Standing Hip Crunch Arm Reach: Core Stability, Form, Sets & Tips
Learn the Standing Hip Crunch Arm Reach for core stability, posture control, and oblique activation with step-by-step form, tips, FAQs, and gear.
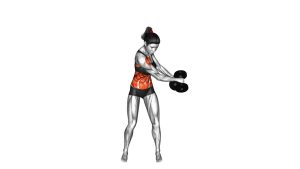
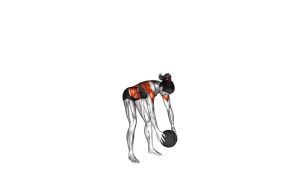
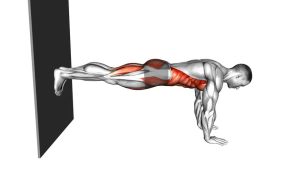
Standing Hip Crunch Arm Reach
This exercise works best when the torso remains quiet and controlled. Because the visible motion is mainly the arm moving while the hips stay mostly fixed, the core should act as a stabilizer. As a result, you should feel gentle tension through the waist and front of the midsection without twisting, leaning, or swinging.
Quick Overview
| Body Part | Core |
|---|---|
| Primary Muscle | Obliques |
| Secondary Muscle | Rectus abdominis, deep core stabilizers, hip stabilizers, shoulder stabilizers |
| Equipment | No equipment required |
| Difficulty | Beginner |
Sets & Reps (By Goal)
- Beginner control: 2–3 sets × 8–12 reps per side with slow, clean movement.
- Core endurance: 3–4 sets × 12–16 reps per side while keeping the hips steady.
- Warm-up activation: 1–2 sets × 8–10 reps per side before core, abs, or full-body training.
- Posture practice: 2 sets × 10 slow reps per side with relaxed breathing and tall alignment.
Progression rule: First improve control, breathing, and posture. Then, add more reps or a slower tempo. Do not progress by swinging the arm or forcing the trunk to bend.
Setup / Starting Position
- Stand tall: Place your feet about hip-width apart and keep your weight balanced.
- Set the hips: Keep one hand resting on the hip, as shown in the video, to help monitor stability.
- Raise the opposite arm: Extend the working-side arm overhead with the elbow long but not locked aggressively.
- Brace lightly: Tighten the midsection enough to stay stable while breathing normally.
- Keep the head neutral: Look forward and avoid dropping the chin or shrugging the shoulder.
Execution (Step-by-Step)
- Begin from the overhead position: Stand upright with one hand on the hip and the opposite arm reaching upward.
- Lower the arm with control: Bend the raised elbow and bring the hand downward toward the shoulder/head area.
- Keep the torso stable: Maintain a tall spine and avoid obvious twisting, collapsing, or side bending.
- Pause briefly: Hold the lower arm position for a moment while keeping the core engaged.
- Return overhead: Extend the arm back upward smoothly until it reaches the starting position.
- Repeat evenly: Continue for the target reps, then switch sides if training both sides.
Pro Tips & Common Mistakes
- Move slowly: A slower tempo makes the core work harder to stabilize the body.
- Do not swing: Avoid using momentum to drop or lift the arm.
- Keep the shoulder relaxed: Do not shrug the raised shoulder toward the ear.
- Control the hips: Keep the pelvis steady instead of shifting side to side on every rep.
- Avoid over-crunching: The video does not show a deep crunch, so keep the movement small and controlled.
- Breathe naturally: Exhale during the lowering phase and inhale as the arm returns overhead.
- Use the hand on the hip as feedback: If the hip moves too much, slow down and reset your stance.
FAQ
Is the Standing Hip Crunch Arm Reach an abs exercise?
Yes, it can train the abs and obliques through stabilization. However, based on the visible video, it is not a traditional floor crunch or knee-to-elbow crunch. Instead, the core works mainly to keep the torso stable while the arm moves.
Where should I feel this exercise?
You should feel light tension around the waist, obliques, and front of the core. Additionally, the shoulder may work gently as the arm moves. You should not feel sharp pain in the lower back, neck, or shoulder.
Should I bend sideways during the movement?
Only a very small natural shift may happen. However, the uploaded video does not show a large side crunch. Therefore, keep the body tall and avoid forcing a deep side bend.
Can beginners do this exercise?
Yes. This is beginner-friendly because it uses bodyweight only and requires a small, controlled movement. Even so, beginners should start slowly and focus on posture before increasing reps.
How can I make it harder?
First, slow down the tempo and add a brief pause at the bottom. After that, you can add light resistance, such as a small dumbbell or resistance band, only if your shoulder and core control stay clean.
Recommended Equipment (Optional)
- Exercise Mat — useful for warm-ups, cooldowns, and other core exercises.
- Light Dumbbells — optional for advanced progressions if shoulder control is strong.
- Resistance Bands Set — helpful for adding gentle core and shoulder resistance.
- Balance Pad — can increase stability demand for advanced users.
- Posture Corrector Brace — can act as a light posture-awareness tool during standing drills.
Tip: Keep all resistance light at first. Because this movement depends on clean control, heavy loading can easily turn the exercise into a shoulder swing instead of a core-stability drill.