Mountain Climber to Low Lunge: Form, Core Benefits, Sets & Tips
Learn the Mountain Climber to Low Lunge for core strength, hip mobility, shoulder stability, proper form, sets, mistakes, FAQs, and gear.
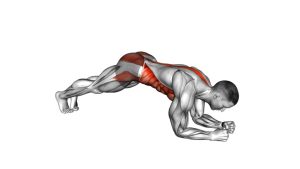
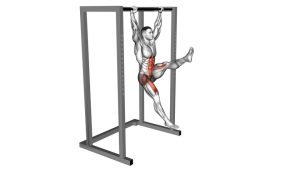
Mountain Climber to Low Lunge
This exercise is best performed with a controlled tempo. The goal is not only to move the knees forward, but to keep the hands planted, shoulders stable, spine long, and hips controlled while the working leg steps forward beside the hand. It trains the core to resist sagging, rotation, and bouncing while improving active hip range of motion.
Quick Overview
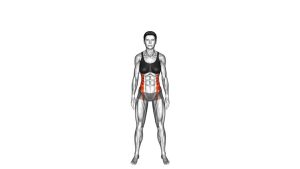
| Body Part | Core |
|---|---|
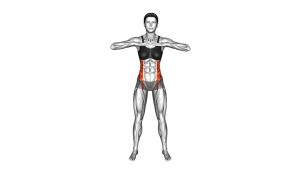
| Primary Muscle | Rectus abdominis, transverse abdominis, and deep core stabilizers |
| Secondary Muscle | Hip flexors, obliques, glutes, shoulders, serratus anterior, and quadriceps |
| Equipment | None required; optional exercise mat |
| Difficulty | Intermediate because it requires plank strength, hip mobility, and controlled transitions |
Sets & Reps (By Goal)
- Core control: 3 sets × 6–8 reps per side with a slow, steady tempo.
- Hip mobility: 2–4 sets × 5–6 reps per side with a 2–3 second pause in the low lunge.
- Conditioning: 3–5 rounds × 20–40 seconds while keeping the hips controlled.
- Warm-up activation: 1–2 sets × 5 reps per side before lower-body or full-body training.
Progression rule: First improve control and range of motion. Then add speed, longer work intervals, or a stronger pause in the low-lunge position.
Setup / Starting Position
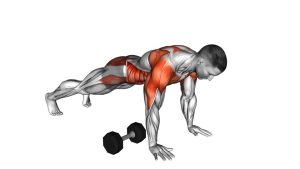
- Start in a high plank: Place your hands under your shoulders with arms straight and fingers spread.
- Set your feet: Keep your legs extended behind you with toes on the floor and feet about hip-width apart.
- Brace your core: Pull the ribs down slightly and keep the body in a straight line from head to heels.
- Keep your neck neutral: Look slightly ahead of your hands without dropping or lifting the head.
- Prepare to step: Keep your shoulders stable before moving one leg forward.
Tip: If your foot cannot reach near the hand, step only as far forward as you can while keeping your spine neutral.
Execution (Step-by-Step)
- Begin in plank: Press the floor away and keep your shoulders stacked above your wrists.
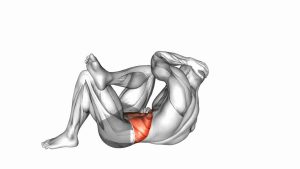
- Drive one knee forward: Bring one knee toward your chest without letting the hips bounce upward.
- Step into low lunge: Place the foot forward near the same-side hand, keeping the back leg extended.
- Stabilize briefly: Hold the low-lunge position for a moment while keeping the chest controlled and core tight.
- Return to plank: Push the front foot back and extend the leg behind you with control.
- Reset your plank: Rebuild a straight body line before switching sides.
- Alternate sides: Repeat the same pattern with the opposite leg.
Pro Tips & Common Mistakes
- Keep the shoulders strong: Push through the floor so your upper back does not collapse.
- Do not rush the step: A controlled foot placement builds better core and hip control than a fast sloppy rep.
- Avoid hip sagging: Keep the abs braced when the leg returns to plank.
- Land the front foot flat: Try to place the whole foot down instead of landing only on the toes.
- Use a smaller range if needed: It is better to step halfway forward with good posture than force a deep lunge with poor alignment.
- Do not over-rotate: Keep the hips mostly square to the floor as the knee comes forward.
- Breathe through the movement: Exhale as the knee drives forward and inhale as you reset in plank.
FAQ
What muscles does the Mountain Climber to Low Lunge work?
It mainly trains the core, especially the rectus abdominis, transverse abdominis, and obliques. It also works the hip flexors, shoulders, serratus anterior, glutes, and quadriceps.
Is this exercise better for abs or mobility?
It can be used for both. A slower tempo with a pause in the lunge emphasizes hip mobility and core control. A faster but still controlled tempo adds more conditioning and cardio demand.
Why can’t I step my foot close to my hand?
Limited hip mobility, tight hip flexors, weak core control, or a short plank stance can make the step difficult. Start with a shorter step and gradually increase your range as your control improves.
Should I jump or step during this exercise?
For clean technique, step first. Once you can maintain stable shoulders, a neutral spine, and smooth hip control, you may increase speed for a more conditioning-focused variation.
Is the Mountain Climber to Low Lunge good for beginners?
It can be beginner-friendly if performed slowly with a reduced range of motion. However, the full version is more intermediate because it requires plank strength, wrist tolerance, and hip mobility.
Recommended Equipment (Optional)
- Exercise Mat — adds comfort for hands, wrists, and feet during plank-based movements.
- Push-Up Handles — may reduce wrist extension stress during high-plank exercises.
- Core Sliders — useful for smoother plank knee drives and advanced mountain climber variations.
- Resistance Bands Set — helpful for hip mobility warm-ups, glute activation, and lower-body prep.
- Yoga Blocks — can elevate the hands slightly and make the low-lunge step easier for mobility work.
Tip: Equipment is optional. The main priority is a stable plank, controlled step, and comfortable hip range.