Plyo Side Lunge Stretch: Form, Benefits, Sets, Tips & FAQ
Learn the Plyo Side Lunge Stretch to improve lateral mobility, adductor flexibility, hip control, and leg power with safe form tips.
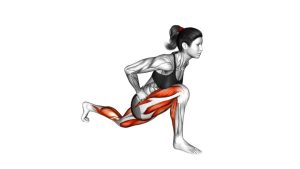
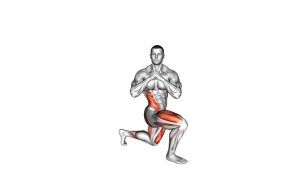
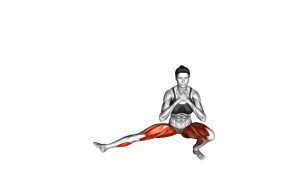
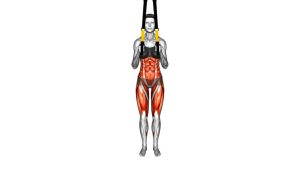
Plyo Side Lunge Stretch
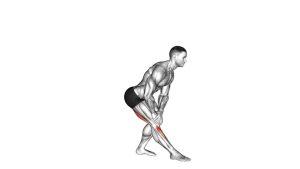
This exercise is best used as a dynamic warm-up, mobility drill, or lateral movement preparation exercise. Unlike a passive stretch, the Plyo Side Lunge Stretch uses active control through the hips, glutes, quads, hamstrings, and adductors. The straight leg receives the stretch, while the bent leg controls the descent and pushes the body back across the center line.
Keep the movement smooth before increasing speed. The “plyo” element should feel like a light, athletic rebound from side to side, not a rushed collapse into the knees or lower back. Quality range of motion is more important than depth.
Quick Overview
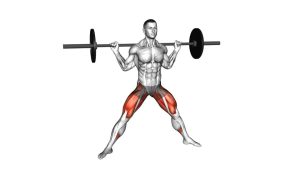
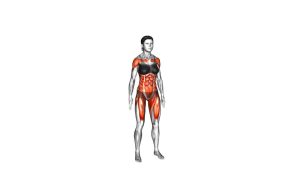
| Body Part | Legs |
|---|---|
| Primary Muscle | Adductors, glutes, quadriceps |
| Secondary Muscle | Hamstrings, calves, hip stabilizers, core |
| Equipment | Bodyweight only |
| Difficulty | Intermediate because it requires hip mobility, balance, lateral control, and smooth transitions |
Sets & Reps (By Goal)
- Dynamic warm-up: 2–3 sets × 6–10 reps per side with smooth, controlled transitions.
- Hip mobility: 2–4 sets × 6–8 reps per side with a 1–2 second pause in the stretched position.
- Adductor flexibility: 2–3 sets × 5–8 reps per side using a slower tempo and controlled depth.
- Athletic lateral prep: 3–4 sets × 8–12 alternating reps with a light rebound between sides.
- Conditioning finisher: 2–3 rounds × 20–30 seconds, only if form stays clean and pain-free.
Progression rule: First improve depth and control. Then increase speed slightly. Do not turn it into a fast bounce until you can keep the knee aligned, heel grounded, and torso stable.
Setup / Starting Position
- Stand wide: Place your feet wider than shoulder width so you have enough space to shift side to side.
- Set your feet: Keep both feet planted. Toes can point slightly outward if that helps your hips open comfortably.
- Brace lightly: Keep your ribs stacked, core engaged, chest open, and spine long.
- Relax your arms: Let the arms move naturally for balance, or reach one hand toward the floor as you descend.
- Prepare to shift: Start with your weight centered before moving into the first side lunge.
Tip: Begin with a moderate stance. If your stance is too narrow, you will not get enough adductor stretch. If it is too wide, you may lose control or force the groin.
Execution (Step-by-Step)
- Shift your weight to one side: Move your hips toward one leg while bending that knee.
- Sit the hips back: Lower into a side lunge by pushing the hips back slightly instead of driving the knee forward aggressively.
- Keep the opposite leg straight: The non-working leg should lengthen to create a strong but controlled stretch through the inner thigh.
- Keep the bent heel grounded: Press through the foot of the bent leg to stay stable and protect the knee.
- Use your hand for balance: Reach toward the floor if needed, but avoid collapsing your chest or rounding heavily through the back.
- Push back to center: Drive through the bent leg to return to the middle with control.
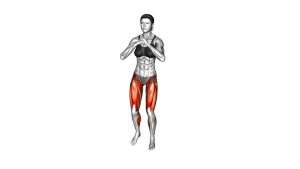
- Transition to the other side: Shift smoothly into the opposite side lunge and repeat the same mechanics.
- Add rhythm carefully: Once controlled, make the transition more dynamic with a light side-to-side rebound.
Pro Tips & Common Mistakes
Pro Tips
- Start slow before going dynamic: Build control first, then add speed.
- Think “hip back, knee aligned”: This protects the knee and loads the glutes more effectively.
- Keep both feet planted: A stable foot position helps create a better adductor stretch.
- Use the floor touch as feedback: The hand can help balance, but it should not replace leg control.
- Move side to side with rhythm: The best reps look smooth, elastic, and controlled.
Common Mistakes
- Rushing the stretch: Fast movement without control can irritate the groin or knee.
- Letting the knee cave inward: Keep the knee tracking over the foot.
- Lifting the bent-leg heel: This can shift stress into the knee and reduce glute control.
- Rounding the back too much: A slight forward lean is fine, but avoid collapsing the torso.
- Forcing depth: Only go as low as your hips and adductors allow without pain.
- Turning it into a side shuffle: The exercise should still include a clear side-lunge stretch on each side.
FAQ
What muscles does the Plyo Side Lunge Stretch work?
It mainly targets the adductors, glutes, and quadriceps. The hamstrings, calves, hips, and core also help stabilize the body during the side-to-side movement.
Is the Plyo Side Lunge Stretch a strength exercise or a stretch?
It is both. The straight leg gets an active inner-thigh stretch, while the bent leg performs a side-lunge pattern that strengthens the glutes, quads, and hip stabilizers.
Should I do this exercise before or after a workout?
It works best before training as part of a dynamic warm-up, especially before leg workouts, running, agility training, sports, or lateral movement drills.
How deep should I go?
Go only as deep as you can while keeping the bent-leg heel grounded, the knee aligned, and the straight leg comfortable. A moderate range with control is better than forcing a deep position.
Why do I feel this in my groin?
Feeling a stretch in the inner thigh or groin area is normal because the adductors are lengthened on the straight-leg side. Sharp pain, pulling, or pinching is not normal and means you should reduce the range.
Can beginners do the Plyo Side Lunge Stretch?
Beginners can perform a slower side lunge stretch first. The plyometric or faster transition should be added only after basic lateral lunge control feels stable and pain-free.
Recommended Equipment (Optional)
- Exercise Mat — provides a stable surface for warm-ups, mobility drills, and floor-based recovery work
- Mini Resistance Bands — useful for glute activation before lateral lunges and lower-body mobility sessions
- Exercise Sliders — helpful for controlled lateral lunge variations and adductor mobility progressions
- Foam Roller — useful for warming up the quads, adductors, glutes, and hips before training
- Agility Cones — great for pairing this drill with lateral movement, footwork, and athletic warm-up routines
Tip: Equipment is optional. The most important tool is controlled movement quality. Add tools only when they improve balance, warm-up quality, or progression.