Handstand Push-Up: Proper Form, Sets, Tips & FAQ
Learn how to perform the Handstand Push-Up with proper form to build stronger shoulders, triceps, and upper-body control. Includes setup, execution, sets by goal, mistakes to avoid, FAQs, and recommended equipment.
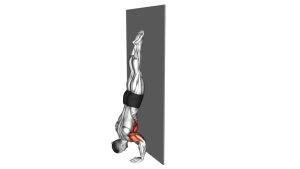
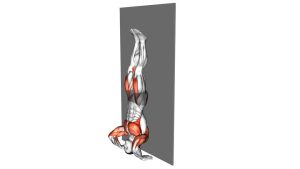
Handstand Push-Up
This exercise is most effective when every rep stays controlled from top to bottom. The shoulders should do the majority of the work while the core, glutes, and upper back keep the body stacked. A good handstand push-up should look vertical, stable, and smooth rather than rushed or heavily arched.
Quick Overview
| Body Part | Shoulders |
|---|---|
| Primary Muscle | Deltoids, especially the front and side shoulders |
| Secondary Muscle | Triceps, upper chest, upper traps, core, and serratus anterior |
| Equipment | Bodyweight only; optional wall, parallettes, or exercise mat |
| Difficulty | Advanced |
Sets & Reps (By Goal)
- Strength: 3-5 sets × 3-6 reps, rest 2-3 minutes
- Skill practice: 4-6 sets × 1-4 clean reps, rest 2-3 minutes
- Hypertrophy: 3-4 sets × 6-10 reps using an easier variation such as wall-supported or pike progression, rest 60-90 seconds
- Progression work: 3-5 sets of negatives or partial reps for 3-5 reps with full control
Progression rule: Build consistency with perfect body alignment before increasing reps. Quality matters more than volume on handstand push-ups.
Setup / Starting Position
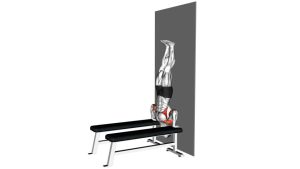
- Choose your space: Use a flat, stable surface with enough room overhead. Beginners should start facing a wall or with wall support behind them.
- Place your hands: Set the hands roughly shoulder-width apart with fingers spread wide to improve balance and pressure control.
- Brace the upper body: Push firmly through the floor, lock the elbows, and elevate the shoulders so the upper back stays active.
- Kick up or press into position: Bring the legs overhead until the body is stacked vertically.
- Create full-body tension: Squeeze the glutes, brace the abs, and keep the ribs from flaring.
Tip: Most athletes learn faster with a wall-assisted setup first. It reduces the balance demand and lets you focus on pressing mechanics.
Execution (Step-by-Step)
- Start in a strong handstand: Keep the body straight from wrists to ankles with the core tight and legs fully engaged.
- Lower with control: Bend the elbows and lower the body in a vertical line. Keep the elbows slightly forward rather than flaring wide.
- Bring the head toward the floor: The head should move down between the hands while the torso stays braced.
- Reach the bottom under control: Pause briefly when the head lightly touches the floor or reaches your chosen depth.
- Press back up: Drive forcefully through the palms, extend the elbows, and return to a stable lockout.
- Finish tall: Re-establish shoulder elevation and body alignment before starting the next rep.
Pro Tips & Common Mistakes
- Keep the body stacked: Aim for wrists, shoulders, hips, and ankles to stay aligned throughout the rep.
- Use the shoulders actively: Press tall through the shoulder girdle instead of hanging into the joints.
- Control the descent: Slow negatives build strength and improve bottom-position confidence.
- Do not over-arch: Excessive lower-back extension usually means you lost core tension.
- Avoid flared elbows: Letting the elbows shoot too wide can reduce pressing efficiency and stress the shoulders.
- Warm up wrists and shoulders first: Mobility and activation work improve comfort and rep quality.
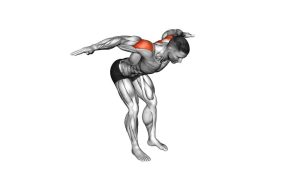
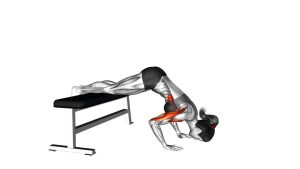
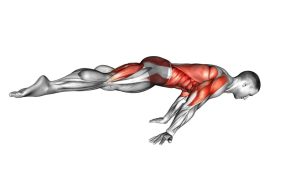
- Use progressions wisely: Pike push-ups, feet-elevated pike push-ups, and wall-assisted handstand push-ups are excellent stepping stones.
FAQ
What muscles does the handstand push-up work most?
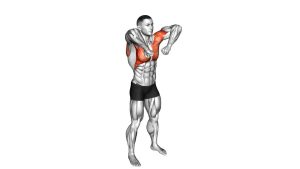
The handstand push-up mainly targets the shoulders, especially the front delts, while the triceps play a major supporting role. The upper chest, traps, serratus, and core also work hard to stabilize the body.
Is the handstand push-up better than the overhead press?
Both are excellent. The overhead press is easier to load progressively with external weight, while the handstand push-up adds bodyweight control, inversion strength, and a much bigger balance challenge.
Can beginners do handstand push-ups?
Most beginners should first master pike push-ups, elevated pike push-ups, and wall-supported handstand holds. The full handstand push-up is an advanced exercise.
Should I use a wall for handstand push-ups?
Yes, a wall is one of the best tools for learning the movement. It helps you practice pressing mechanics and body alignment without needing full freestanding balance.
How do I make handstand push-ups safer on my wrists?
Warm up the wrists thoroughly, spread the fingers, grip the floor, and consider using push-up bars or parallettes if flat palms on the floor bother your wrists.
Recommended Equipment (Optional)
- Handstand Parallettes — helpful for reducing wrist extension and improving pressing comfort during handstand work
- Push-Up Bars / Low Parallettes — useful for beginners building inverted pressing strength and better hand positioning
- Exercise Mat — adds floor comfort and can make wall-supported practice more forgiving
- Resistance Bands Set — great for shoulder warm-ups, activation drills, and assistance progressions
- Liquid Chalk — can improve grip confidence if sweaty hands affect balance or control
Tip: Optional equipment should improve control and comfort, not replace proper progression. Build the movement gradually and prioritize clean technique.