Cable Bent-Over One-Arm Lateral Raise: Form, Sets, Tips & FAQ
Learn the Cable Bent-Over One-Arm Lateral Raise for stronger rear delts, better shoulder balance, and cleaner upper-back development. Includes form tips, sets by goal, mistakes, FAQ, and recommended equipment.
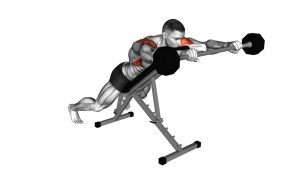
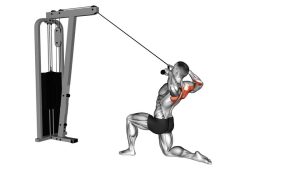
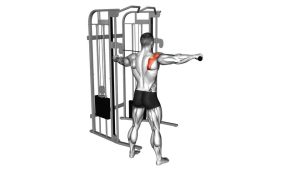
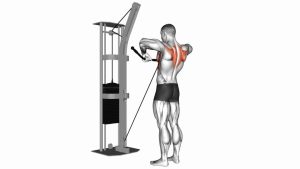
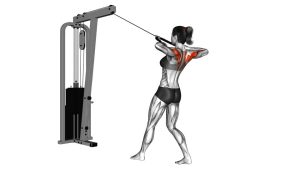
Cable Bent-Over One-Arm Lateral Raise
This exercise works best with moderate loads, clean control, and strict body positioning. The bent-over angle reduces help from other muscle groups and places more of the workload on the rear delt. You should feel the movement in the back of the shoulder and upper rear shoulder line, not mostly in the neck or lower back. A slight elbow bend is ideal, and the arm should travel out and slightly back in a controlled arc.
Quick Overview
| Body Part | Rear Shoulders |
|---|---|
| Primary Muscle | Rear deltoid (posterior deltoid) |
| Secondary Muscle | Middle traps, rhomboids, rotator cuff stabilizers |
| Equipment | Cable machine with single handle attachment |
| Difficulty | Intermediate |
Sets & Reps (By Goal)
- Muscle growth: 3–4 sets × 10–15 reps per arm, 45–75 seconds rest
- Shoulder balance and control: 2–4 sets × 12–18 reps per arm, slow eccentric, 30–60 seconds rest
- Warm-up / activation: 2–3 sets × 12–20 reps per arm, light weight, short rest
- Finisher work: 2–3 sets × 15–20 reps per arm with very strict form
Progression rule: Add reps first, then small weight increases. Rear delt isolation exercises respond best to precision, control, and consistent tension rather than heavy cheating.
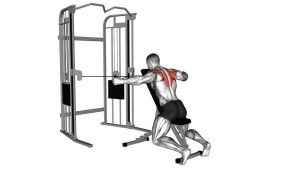
Setup / Starting Position
- Set the pulley low: Position the cable at or near the lowest setting and attach a single D-handle.
- Stand side-on to the machine: Use the arm farther from the stack so the cable crosses slightly in front of your body at the bottom.
- Hinge at the hips: Bend forward with a flat back, soft knees, and braced core.
- Let the working arm hang naturally: Keep a slight elbow bend and allow the cable to create light tension at the start.
- Square the torso: Avoid rotating toward the machine. Keep your chest stable and neck neutral.
Tip: Your torso angle can vary slightly, but the key is keeping the rear delt loaded while staying stable through the spine and hips.
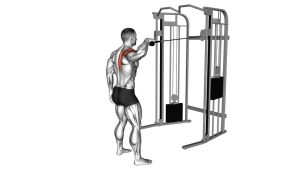
Execution (Step-by-Step)
- Brace and lock in: Set your hinge, keep the spine neutral, and maintain a soft bend in the working elbow.
- Lead with the elbow: Raise the arm out to the side and slightly back in a smooth arc.
- Stop around shoulder level: Lift until the rear delt is fully contracted without shrugging or twisting.
- Pause briefly: Hold the top for a split second to reinforce control and tension.
- Lower slowly: Return along the same path under control and feel the rear delt lengthen on the way down.
- Repeat evenly: Keep every rep smooth and consistent instead of chasing momentum.
Pro Tips & Common Mistakes
- Use the rear delt to move the weight: Think “sweep out,” not “pull back.”
- Keep the elbow slightly bent: This protects the joint and keeps tension on the target muscle.
- Do not shrug: Excessive trap involvement usually means the weight is too heavy.
- Avoid torso rotation: Twisting to finish the rep shifts tension away from the rear delt.
- Control the eccentric: The lowering phase is where a lot of rear-delt growth stimulus comes from.
- Don’t rush the setup: A stable hinge and square torso make the entire exercise more effective.
- Keep the range honest: Stop where you can still control the shoulder without compensating.
FAQ
What muscle should I feel the most during this exercise?
You should mainly feel the rear delt, or the back of the shoulder. You may also notice light support from the upper back, but the rep should not feel dominated by traps or full rowing muscles.
Is this better than dumbbell rear delt raises?
It can be. The cable provides more consistent tension through the range of motion, especially near the bottom where dumbbells often lose tension. Both are useful, but cables are excellent for isolation and control.
How heavy should I go?
Use a weight that allows strict form and a smooth arc. Most lifters get better rear-delt activation from moderate or lighter loads rather than trying to force heavy reps.
Should my arm go straight out to the side?
Usually the best path is slightly out and slightly back, not perfectly sideways and not turned into a row. That line tends to match the rear delt better for most lifters.
Where should I place this exercise in a workout?
It works well after your main pressing or rowing movements, or near the end of a shoulder or upper-body session as a focused hypertrophy exercise.
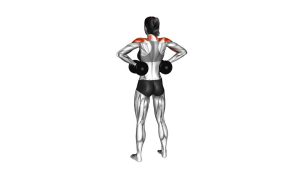
Recommended Equipment
- Single D-Handle Cable Attachment — the most direct attachment for clean one-arm cable rear-delt work
- Adjustable Cable Machine / Functional Trainer — ideal if you want to perform this movement at home with consistent cable resistance
- Resistance Bands Set — useful for rear-delt activation, warm-ups, and extra shoulder volume when a cable is not available
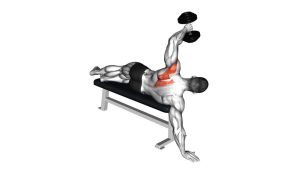
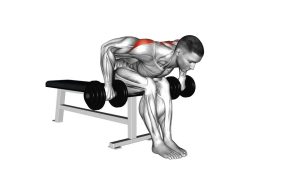
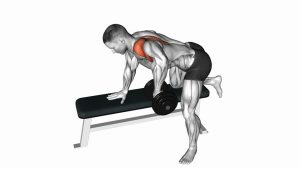
- Adjustable Weight Bench — helpful for chest-supported rear-delt variations and additional shoulder isolation work
- Massage Ball for Shoulder Mobility — useful for soft-tissue work around the rear shoulder, upper back, and surrounding musculature
Choose gear that improves setup quality, comfort, and control. A single cable handle, a stable cable station, and a few simple support tools can make rear-delt training more consistent and more effective. Amazon currently shows relevant options in these categories, including single D-handles, cable machines, resistance bands, adjustable benches, and massage balls.