Cable Single-Leg Tuck Reverse Crunch: Form, Sets, Tips & FAQ
Learn the Cable Single-Leg Tuck Reverse Crunch to train lower abs, hip flexors, and core control with step-by-step form, sets, tips, and equipment.
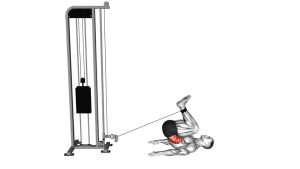
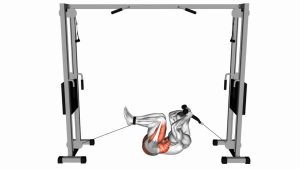
Cable Single-Leg Tuck Reverse Crunch
This exercise is best used when you already understand basic reverse crunch mechanics and can keep your lower back controlled during leg movement. Because the cable pulls on one leg, your trunk must resist twisting while your abs draw the pelvis upward. Keep the movement smooth, keep the working knee traveling toward the torso, and avoid turning the exercise into a fast leg swing.
Quick Overview
| Body Part | Core |
|---|---|
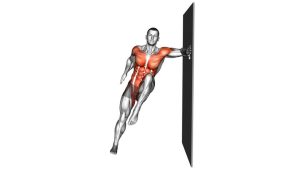
| Primary Muscle | Lower abs, especially rectus abdominis fibers involved in posterior pelvic tilt |
| Secondary Muscle | Hip flexors, deep core stabilizers, obliques, transverse abdominis |
| Equipment | Cable machine, ankle strap, flat bench or exercise mat |
| Difficulty | Intermediate — requires cable control, pelvic tuck awareness, and unilateral stability |
Sets & Reps (By Goal)
- Core control: 2–3 sets × 8–10 reps per side with a slow, strict tempo.
- Lower-ab strength: 3–4 sets × 10–12 reps per side using moderate cable tension.
- Muscle endurance: 2–3 sets × 12–15 reps per side with lighter resistance.
- Advanced core finisher: 2 sets × 15 controlled reps per side after main ab training.
Progression rule: Add reps first, then increase cable load only when you can tuck the pelvis cleanly without swinging the leg, arching the lower back, or rotating the hips.
Setup / Starting Position
- Set the cable low: Attach an ankle strap to a low pulley and secure it around the working ankle.
- Lie on your back: Position yourself on a flat bench or mat with your feet facing the cable machine.
- Anchor your upper body: Hold the bench edges or keep your hands beside your body for support.
- Extend the working leg: Start with the strapped leg extended but not fully relaxed into the cable pull.
- Stabilize the free leg: Keep the non-working leg extended or slightly bent, depending on your control level.
- Brace your core: Keep the ribs down, pelvis controlled, and lower back close to the surface.
Execution (Step-by-Step)
- Brace first: Exhale lightly, tighten your abs, and keep your upper body stable.
- Tuck the working knee in: Bend the strapped leg and guide the knee toward your torso.
- Lift the pelvis slightly: At the top, curl the hips upward with a small posterior pelvic tilt.
- Pause briefly: Hold the top position for one second while keeping the abs tight.
- Lower with control: Slowly extend the working leg back out while resisting the cable pull.
- Stop before losing control: Do not let the lower back arch or the leg drop too low.
- Repeat smoothly: Complete all reps on one side, then switch the ankle strap to the other leg.
Pro Tips & Common Mistakes
- Think “knees in, hips up”: The knee tuck starts the movement, but the pelvic curl finishes the ab contraction.
- Use slow control: A rushed eccentric phase reduces core tension and increases lower-back stress.
- Avoid swinging: If the cable leg swings, the weight is too heavy or the tempo is too fast.
- Do not overextend the leg: Lower only as far as you can keep your ribs down and spine controlled.
- Keep the hips square: Because only one leg is loaded, the body may rotate. Resist that twist with your obliques.
- Do not yank with the hip flexor: Pull smoothly and let the abs create the top-end crunch.
- Keep the ankle strap secure: A loose strap can distract from form and create uneven tension.
- Exhale at the top: Breathing out during the tuck helps reinforce the pelvic curl and lower-ab contraction.
FAQ
What muscles does the Cable Single-Leg Tuck Reverse Crunch work?
It mainly targets the lower abs through posterior pelvic tilt and spinal flexion control. The hip flexors help bring the knee toward the torso, while the obliques and deep core stabilize the pelvis against the one-sided cable pull.
Is this exercise good for lower abs?
Yes. It is especially useful for lower-ab training when you perform the top phase correctly. The lower abs work hardest when you curl the pelvis upward instead of simply pulling the knee toward your chest.
Should I use heavy weight on this exercise?
No. This exercise works best with moderate resistance and strict control. Heavy cable weight often causes swinging, hip flexor dominance, lower-back arching, or loss of pelvic control.
Why do I feel this mostly in my hip flexors?
You may be pulling the knee in without finishing the reverse crunch. Reduce the weight, slow down, exhale at the top, and focus on curling the hips slightly off the surface.
Can beginners do the Cable Single-Leg Tuck Reverse Crunch?
Beginners should first master bodyweight reverse crunches, lying knee tucks, and dead bug variations. Once they can control pelvic position without lower-back arching, they can progress to the cable version with light resistance.
How is this different from a regular reverse crunch?
A regular reverse crunch uses bodyweight and both legs together. This version uses cable resistance on one leg, which creates constant tension and adds an anti-rotation challenge for the core.
Recommended Equipment
- Cable Ankle Strap — essential for attaching the low pulley securely to the working ankle.
- Adjustable Weight Bench — provides stable support for lying cable core exercises.
- Cable Machine / Home Gym Pulley System — allows smooth resistance for cable-based ab and leg exercises.
- Thick Exercise Mat — useful if performing the movement on the floor instead of a bench.
- Core Sliders — helpful for related knee-tuck and lower-ab progression drills.
Tip: Choose equipment that allows smooth cable tension and secure ankle attachment. Comfort and stability matter more than heavy resistance for this exercise.