Captain’s Chair Ab Tuck: Form, Sets, Core Tips & FAQ
Learn the Captain’s Chair Ab Tuck to train abs, hip flexors, and core control with strict form, clear steps, sets, mistakes, FAQs, and gear.
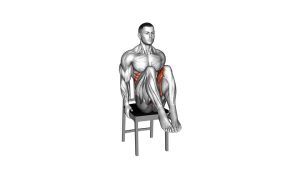
Captain’s Chair Ab Tuck
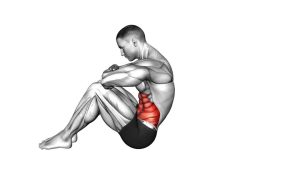
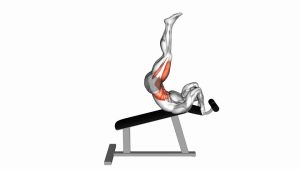
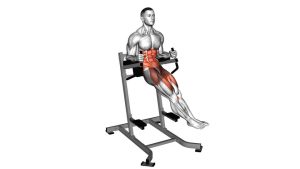
This exercise trains the abs while the upper body stays supported by the forearm pads and back pad. Because the legs travel forward and upward, the hip flexors assist the movement. However, the core still plays an important role by controlling the pelvis, resisting excessive swinging, and helping the lower back stay organized. For that reason, each repetition should feel smooth, strict, and deliberate.
Quick Overview
| Body Part | Core |
|---|---|
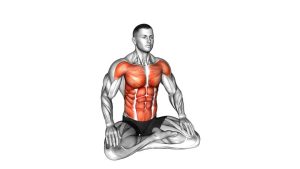
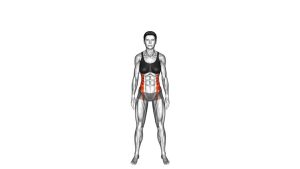
| Primary Muscle | Rectus abdominis |
| Secondary Muscle | Hip flexors, obliques, transverse abdominis, forearm and shoulder stabilizers |
| Equipment | Captain’s chair, vertical knee raise station, or Roman chair-style dip station with back support |
| Difficulty | Intermediate because the legs must be lifted and lowered without swinging |
Sets & Reps (By Goal)
- Core control: 2–3 sets × 6–10 slow reps with a brief pause at the top
- Muscle endurance: 3–4 sets × 10–15 controlled reps with 45–75 seconds rest
- Strength-focused abs: 3–5 sets × 6–8 strict reps with slower lowering
- Beginner progression: 2–3 sets × 5–8 partial-range reps before increasing height
- Finisher option: 1–2 sets near technical fatigue while keeping every rep clean
Progression rule: First improve control and reduce swinging. Then add reps, longer top pauses, or a slower lowering phase. Do not progress by using momentum.
Setup / Starting Position
- Step into the station: Place your forearms firmly on the pads and hold the handles if available.
- Set your back: Keep your upper back and lower back supported against the vertical pad.
- Brace the core: Pull the ribs down slightly and tighten the abs before the legs move.
- Start with legs down: Let the legs hang under the body with feet together or close together.
- Keep the shoulders quiet: Press lightly through the forearms without shrugging toward the ears.
The starting position should feel stable before every repetition. If your body shifts before the lift begins, reset your arms, back, and core before continuing.
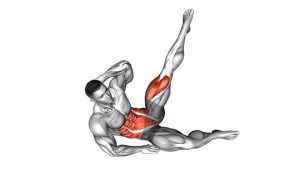
Execution (Step-by-Step)
- Brace first: Tighten the abs gently and keep the torso supported against the back pad.
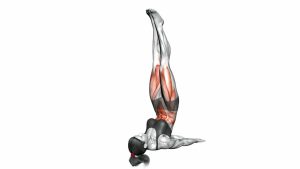
- Lift the legs forward: Raise the legs in front of the body while keeping the movement controlled.
- Avoid swinging: Move slowly enough that the legs do not kick upward with momentum.
- Reach the top position: Lift until the abs strongly engage and the legs are forward in front of the body.
- Pause briefly: Hold the top for a short moment without leaning excessively or collapsing through the shoulders.
- Lower under control: Bring the legs back down slowly until they return beneath the body.
- Reset before the next rep: Let the body become still, then start the next controlled repetition.
Pro Tips & Common Mistakes
- Lift with control, not speed: Momentum makes the exercise easier but reduces abdominal tension.
- Keep the back supported: The back pad helps limit excessive swinging, so stay connected to it.
- Do not shrug: Keep the shoulders down and stable while the forearms press into the pads.
- Use a small pause at the top: This pause improves control and makes the abs work harder.
- Lower slowly: The lowering phase is where many people lose form, so resist gravity instead of dropping.
- Control the pelvis: Avoid arching hard at the bottom or over-rounding aggressively at the top.
- Start with bent knees if needed: If straight legs are too difficult, use a smaller range or bend the knees slightly.
- Stop before form breaks: Once swinging begins, the set has become less useful for strict core training.
FAQ
Is the Captain’s Chair Ab Tuck good for lower abs?
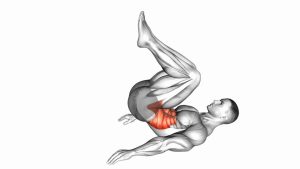
Yes, it can strongly challenge the lower portion of the rectus abdominis because the pelvis and legs must be controlled. However, the entire rectus abdominis works together, so it is better to think of this as a full-ab exercise with strong lower-ab emphasis.
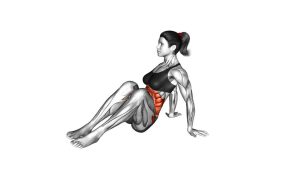
Why do I feel this exercise in my hip flexors?
The hip flexors help lift the legs, so feeling them is normal. However, if they dominate completely, slow the rep down, brace harder, and focus on slightly curling the pelvis as the legs rise.
Should I keep my legs straight or bend my knees?
In the video, the legs stay mostly extended as they lift forward. That version is harder. Therefore, beginners can bend the knees slightly or use a shorter range until they can control the movement without swinging.
How high should I lift my legs?
Lift as high as you can while staying controlled and supported. If going higher causes swinging, lower-back discomfort, or shoulder shrugging, reduce the range and build strength gradually.
Can I do this exercise every day?
You can practice low-volume core work often, but hard sets should usually be separated by recovery time. For most people, 2–4 sessions per week works better than forcing high-volume daily training.
What is the biggest mistake with this exercise?
The biggest mistake is swinging the legs. Once momentum takes over, the abs do less work and the hips may feel irritated. Instead, pause between reps and make every lift controlled.
Recommended Equipment
- Vertical Knee Raise Station — the main equipment for supported captain’s chair ab tucks and leg raises
- Power Tower Dip Station — useful for dips, knee raises, leg raises, and pull-up variations
- Ab Straps for Pull-Up Bar — an alternative for supported hanging ab raises if you do not have a captain’s chair
- Exercise Mat — helpful for warm-up core drills, dead bugs, reverse crunches, and floor progressions
- Resistance Bands Set — useful for core warm-ups, hip flexor control drills, and full-body accessory training
Choose equipment that feels stable and allows your forearms, back, and shoulders to stay supported. Better support usually leads to cleaner reps and less swinging.