Lying Bicycle Crunch: Proper Form, Core Benefits, Sets, Tips & FAQ
Learn the Lying Bicycle Crunch for stronger abs, hip flexors, and core control. Get step-by-step form, sets, mistakes, FAQs, and equipment tips.
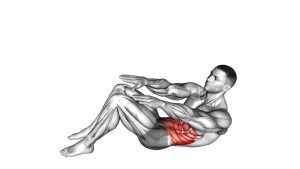
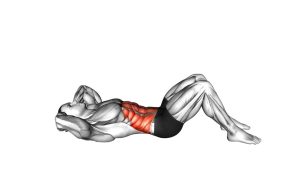
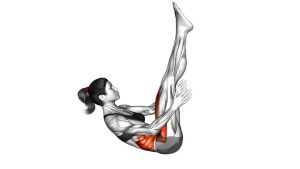
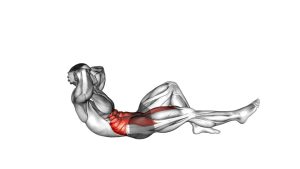
Lying Bicycle Crunch
This exercise works best when the core stays active from the first rep to the last. Because the legs move continuously, the abs must resist excessive lower-back arching while the hips flex and extend. Therefore, each repetition should feel controlled rather than rushed. Keep the neck comfortable, keep the movement smooth, and avoid kicking the legs aggressively.
Quick Overview
| Body Part | Core |
|---|---|
| Primary Muscle | Rectus abdominis |
| Secondary Muscle | Hip flexors, transverse abdominis, obliques, and lower-abdominal stabilizers |
| Equipment | None; optional exercise mat for comfort |
| Difficulty | Beginner to Intermediate |
Sets & Reps (By Goal)
- Core activation: 2 sets × 8–10 reps per side with slow control.
- Muscular endurance: 3 sets × 12–20 reps per side with steady breathing.
- Beginner control: 2–3 sets × 6–8 reps per side with a smaller leg range.
- Conditioning finisher: 2–4 rounds × 20–40 seconds while keeping form clean.
Progression rule: First, increase control and range. Then, add more reps or time. However, do not progress if your lower back arches or your legs start swinging.
Setup / Starting Position
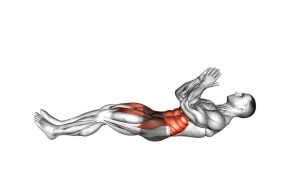
- Lie on your back: Start on the floor with your torso supported and your head slightly lifted only if comfortable.
- Bring both knees in: Bend both knees and lift the feet away from the floor.
- Set the arms: Keep the arms relaxed beside the body, as shown in the video, instead of pulling on the head or neck.
- Brace the core: Gently tighten the abs before the legs begin moving.
- Control the pelvis: Keep the hips steady and avoid rocking side to side.
Tip: If the full leg extension feels too hard, shorten the range and keep the knees more bent. As a result, the core can stay engaged without excessive lower-back strain.
Execution (Step-by-Step)
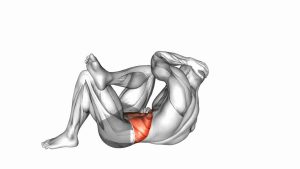
- Start compact: Begin with both knees bent and pulled toward the torso.
- Extend one leg: Slowly send one leg outward while keeping the opposite knee bent toward the chest.
- Keep the abs active: Maintain tension through the front of the core as the leg reaches away.
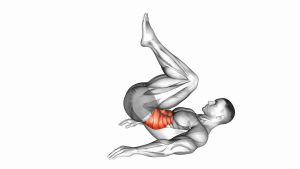
- Switch sides: Bring the extended leg back in while the opposite leg extends outward.
- Repeat smoothly: Continue alternating in a controlled bicycle-like rhythm without jerking or rushing.
- Breathe steadily: Exhale during each extension or switch, then inhale lightly through the transition.
Pro Tips & Common Mistakes
- Keep the lower back controlled: If your back arches, raise the legs slightly higher or reduce the extension range.
- Avoid neck tension: Since the arms are not behind the head, do not strain the neck to lift higher.
- Move with rhythm: Use a steady cycling pattern instead of sharp, uncontrolled kicks.
- Do not hold your breath: Smooth breathing helps keep the core engaged without bracing too aggressively.
- Control both directions: The returning leg matters just as much as the extending leg.
- Avoid hip rocking: Keep the pelvis stable so the abs perform more of the work.
- Use a smaller range when needed: A shorter, cleaner rep is better than a long rep with poor control.
FAQ
What muscles does the lying bicycle crunch work?
The lying bicycle crunch mainly works the rectus abdominis. In addition, the hip flexors, obliques, and deep core stabilizers assist during the alternating leg motion.
Is the lying bicycle crunch beginner-friendly?
Yes, it can be beginner-friendly when the range is controlled. However, beginners should keep the legs slightly higher and avoid extending too low if the lower back arches.
Should my hands be behind my head?
In this video version, the arms stay beside the body. This setup helps reduce neck pulling and keeps the focus on the lower-body cycling pattern and abdominal control.
Why does my lower back hurt during bicycle crunches?
Lower-back discomfort often happens when the legs extend too low or the core loses tension. Therefore, shorten the range, slow down, and keep the pelvis more stable.
How fast should I perform the movement?
Use a controlled pace. Although the movement has a bicycle rhythm, it should not look rushed. Smooth switching and stable hips are more important than speed.
Recommended Equipment (Optional)
- Exercise Mat — adds comfort and support during floor-based ab exercises.
- Thick Yoga Mat — useful if your spine or hips feel uncomfortable on hard floors.
- Light Ankle Weights — optional progression for advanced users after form is consistent.
- Mini Resistance Bands — helpful for adding hip and core activation to related floor exercises.
- Foam Roller — useful for warm-ups, mobility work, and post-workout recovery.
Tip: Equipment is optional. For this exercise, body control matters more than added load.