Climber on a Padded Stool Supported: Form, Core Benefits & Tips
Learn the Climber on a Padded Stool Supported for core stability, shoulder control, and anti-rotation strength with safe form and tips.
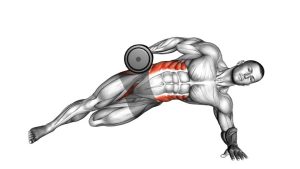
Climber on a Padded Stool Supported
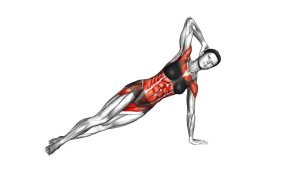
This exercise works best when the body stays firm from shoulders to heels. Because one or both hands may be supported by the padded stool during the movement, the core must resist twisting while the shoulders stabilize the upper body. As a result, the movement trains control, balance, and coordination without requiring heavy equipment.
Quick Overview
| Body Part | Core |
|---|---|
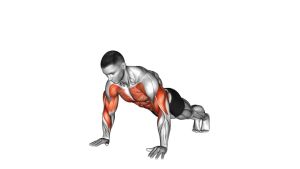
| Primary Muscle | Rectus abdominis and deep core stabilizers |
| Secondary Muscle | Obliques, shoulders, chest, triceps, hip flexors, glutes |
| Equipment | Padded stool or stable low platform |
| Difficulty | Beginner to intermediate, depending on speed, stability, and plank control |
Sets & Reps (By Goal)
- Core control: 2–3 sets × 8–12 slow reps per side, resting 45–60 seconds.
- Shoulder stability: 3 sets × 6–10 controlled reps per side with a strong plank hold.
- Conditioning: 3–4 sets × 20–30 seconds at a smooth pace, resting 60 seconds.
- Beginner practice: 2 sets × 6–8 reps per side with a short pause after each hand or knee movement.
Progression rule: First improve control, then increase reps. After that, add time or slightly increase speed while keeping the hips level.
Setup / Starting Position
- Place the stool securely: Set a padded stool or low platform on a non-slip surface.
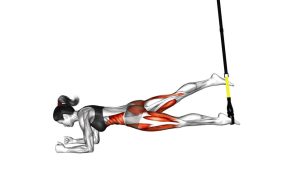
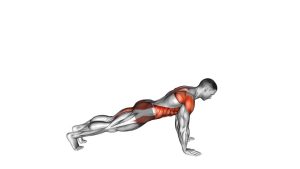
- Start in a plank: Extend both legs back and keep your toes on the floor.
- Set your hands: Place one or both hands on the padded stool, depending on the version shown or your control level.
- Brace the core: Tighten your abs gently as if preparing to resist a push from the side.
- Align the body: Keep your head, shoulders, hips, knees, and heels in one long line.
- Relax the neck: Look down slightly so your neck stays neutral instead of lifting the chin forward.
The setup should feel stable before you move. If the stool shifts, choose a heavier platform or place it on a grip-friendly surface.
Execution (Step-by-Step)
- Begin in a strong supported plank: Press through the hands and keep the shoulders stacked and steady.
- Brace before moving: Tighten the core lightly so the hips do not sway side to side.
- Shift weight with control: Move your bodyweight toward the supported hand without collapsing into the shoulder.
- Perform the climber action: Bring one knee forward under the body or transition the hand position as shown in the supported variation.
- Pause briefly: Hold control for a moment so the body does not twist or bounce.
- Return to plank: Extend the leg back or reset the hand position while keeping your body line firm.
- Repeat on the other side: Alternate sides with the same smooth rhythm and stable torso.
Pro Tips & Common Mistakes
Pro Tips
- Push the floor and stool away: This keeps the shoulders active and prevents sinking.
- Move slowly at first: Slow reps build better core control than fast, messy reps.
- Keep the hips square: Imagine balancing a glass of water on your lower back.
- Breathe steadily: Exhale during the knee drive or transition, then inhale as you reset.
- Use a wider foot stance: A slightly wider base can make the exercise easier and more stable.
Common Mistakes
- Using an unstable stool: This increases slipping risk and reduces safe control.
- Letting the lower back sag: Sagging shifts stress away from the core and into the spine.
- Rotating the hips: Excessive twisting reduces the anti-rotation benefit.
- Shrugging the shoulders: Keep the neck long and shoulders controlled.
- Moving too fast: Speed should only increase after your plank alignment stays clean.
FAQ
What muscles does the Climber on a Padded Stool Supported work?
It mainly works the core, especially the rectus abdominis and deep stabilizers. In addition, the obliques, shoulders, chest, triceps, hip flexors, and glutes help stabilize the body during the movement.
Is this exercise good for beginners?
Yes, it can be beginner-friendly when performed slowly with a stable stool. However, beginners should start with fewer reps and a wider foot stance to improve balance and control.
Should I move fast like a mountain climber?
Not at first. This supported version is best learned with slow, controlled reps. Once your hips stay level and your shoulders remain steady, you can gradually increase speed for conditioning.
Why do my hips twist during the exercise?
Hip twisting usually means the core is losing anti-rotation control. To fix it, widen your feet, slow the movement down, and brace before each rep.
What can I use instead of a padded stool?
You can use a stable low bench, aerobic step, or firm padded platform. However, the surface must not slide, wobble, or collapse under your bodyweight.
Recommended Equipment
- Adjustable Aerobic Step Platform — useful as a stable alternative to a padded stool for elevated plank variations.
- Non-Slip Exercise Mat — helps reduce slipping and provides a more secure base for hands and feet.
- Push-Up Handles — can reduce wrist extension and support plank-based upper-body work.
- Core Sliders — useful for progressing climber-style core movements with smoother leg motion.
- Resistance Bands Set — helpful for pairing this drill with shoulder stability and upper-back activation work.
Choose equipment that feels stable and secure. For this exercise, safety and control matter more than adding difficulty.