Resistance Band Standing Twist: Core Form, Sets, Tips & FAQ
Learn the resistance band standing twist for stronger obliques, better core rotation, controlled form, sets by goal, mistakes, FAQs, and gear.
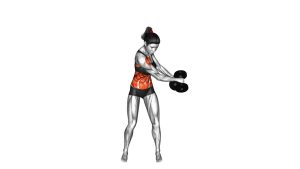
Resistance Band Standing Twist
This exercise is best performed with a slow, deliberate tempo. First, set a stable stance. Then, rotate your chest and shoulders together while keeping the arms long. As a result, the movement challenges the obliques without needing heavy equipment. For best results, avoid rushing the band back to the start position.
Quick Overview
| Body Part | Core |
|---|---|
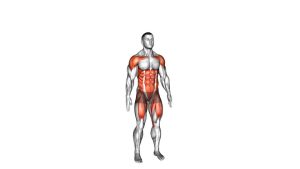
| Primary Muscle | Obliques |
| Secondary Muscle | Rectus abdominis, transverse abdominis, spinal stabilizers, shoulders |
| Equipment | Resistance band anchored to the side |
| Difficulty | Beginner to Intermediate, depending on band tension and rotation range |
Sets & Reps (By Goal)
- Core activation: 2–3 sets × 8–10 reps per side with light band tension
- Oblique strength: 3–4 sets × 10–12 reps per side with moderate tension
- Rotational control: 3 sets × 6–8 slow reps per side with a 2-second pause at the end
- Conditioning finisher: 2–3 rounds × 20–30 seconds per side with smooth rhythm
Progression rule: Add control before adding resistance. Once every rep looks smooth, increase band tension slightly or step farther from the anchor.
Setup / Starting Position
- Anchor the band: Secure the resistance band around chest height to a stable point on one side.
- Stand sideways to the anchor: Position your body so the band pulls from your left or right side.
- Grip the band with both hands: Hold the handle or band ends together in front of your chest.
- Extend the arms forward: Keep the elbows soft but mostly straight, creating a long lever.
- Set your stance: Place feet about shoulder-width apart, with knees slightly bent and hips stable.
- Brace your core: Keep ribs down, spine tall, and shoulders relaxed before you rotate.
If the anchor point is not clearly visible, use chest height as the safest default because it keeps the band path aligned with the torso.
Execution (Step-by-Step)
- Start in control: Hold the band in front of your chest with light tension already present.
- Brace before moving: Tighten your midsection gently as if preparing for a small push.
- Rotate the torso: Turn your chest and shoulders away from the anchor while keeping your arms extended.
- Keep the hips quiet: Allow only minimal hip movement so the core does most of the work.
- Pause briefly: Stop at the end of your comfortable rotation range without leaning or twisting aggressively.
- Return slowly: Let the torso rotate back to the start position under control.
- Repeat evenly: Complete all reps on one side, then turn around and train the opposite side.
Pro Tips & Common Mistakes
- Rotate from the ribs: Think about turning your chest, not pulling the band with your hands.
- Keep the arms long: A longer arm position increases core demand, but the elbows should not lock painfully.
- Control the return: Do not let the band snap you back toward the anchor.
- Avoid leaning: Stay tall through the crown of the head instead of side-bending to create range.
- Do not overload too early: Heavy band tension often causes hip twisting, shoulder pulling, or lower-back compensation.
- Use both sides: Train left and right evenly to support balanced rotational strength.
- Exhale during rotation: Breathing out can help the ribs stay down and the abs stay engaged.
- Shorten the range if needed: A smaller clean rotation is more useful than a large uncontrolled twist.
FAQ
What muscles does the resistance band standing twist work?
It mainly works the obliques. In addition, the transverse abdominis, rectus abdominis, spinal stabilizers, shoulders, and hips help keep the body stable during the rotation.
Is the band twist good for abs?
Yes. It trains the abs through rotation and control rather than only spinal flexion. Therefore, it is useful for people who want a standing core exercise that also challenges coordination.
Should my hips rotate during the movement?
A small amount of natural hip movement may happen. However, the hips should not swing aggressively. For better core focus, keep the lower body stable and rotate mainly through the torso.
How heavy should the resistance band be?
Use a light to moderate band. If the band makes you lean, twist your lower back, or lose arm position, it is too heavy for clean rotational training.
Is this the same as a Pallof press?
Not exactly. A Pallof press mainly resists rotation, while this drill uses a visible torso twist. However, both exercises train core control against side-pulling band tension.
Can beginners do this exercise?
Yes, beginners can perform it with a light band and short rotation range. Moreover, the standing position makes it easy to adjust resistance by stepping closer to or farther from the anchor.
Recommended Equipment (Optional)
- Resistance Bands with Handles — ideal for standing twists because the handles improve grip and control
- Door Anchor for Resistance Bands — useful for setting the band at chest height when training at home
- Loop Resistance Bands Set — works well for lighter core activation and beginner rotational drills
- Non-Slip Exercise Mat — helps keep the feet stable during standing core work
- Wall Anchor / Multi-Anchor Band System — allows more consistent band height for rotational strength exercises
Tip: Choose a band setup that lets you rotate smoothly without yanking, slipping, or losing balance.