Dumbbell Lying Leg Curl: Form, Sets, Hamstring Tips & FAQ
Learn the Dumbbell Lying Leg Curl for stronger hamstrings with proper setup, step-by-step form, sets by goal, common mistakes, FAQs, and gear.
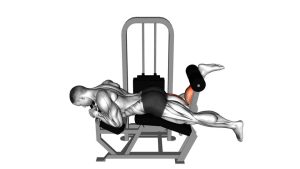
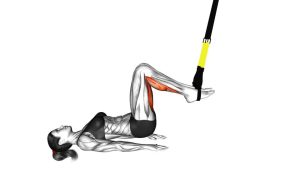
Dumbbell Lying Leg Curl
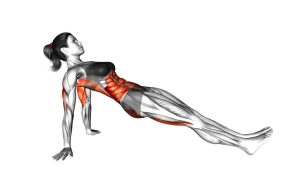
This exercise is useful when you want a practical alternative to a lying leg curl machine. It trains the hamstrings through knee flexion, with strong emphasis on the biceps femoris, semitendinosus, and semimembranosus. Because the dumbbell is held between the feet, the movement requires extra control, foot pressure, and smooth tempo. Use a light-to-moderate dumbbell first so the hamstrings perform the work instead of momentum.
Quick Overview
| Body Part | Hamstrings |
|---|---|
| Primary Muscle | Hamstrings — biceps femoris, semitendinosus, semimembranosus |
| Secondary Muscle | Calves, glutes, and core stabilizers |
| Equipment | Dumbbell and flat bench |
| Difficulty | Intermediate because the dumbbell must stay controlled between the feet |
Sets & Reps (By Goal)
- Muscle growth: 3–4 sets × 8–12 reps with a slow 2–3 second lowering phase.
- Hamstring strength: 4–5 sets × 6–8 reps using strict control and full range.
- Beginner control: 2–3 sets × 10–15 reps with a very light dumbbell.
- Posterior-chain accessory work: 2–4 sets × 12–15 reps after squats, deadlifts, or hip hinges.
- Tempo focus: 3 sets × 8–10 reps with a 1-second squeeze at the top and 3-second descent.
Progression rule: Increase reps first, then increase dumbbell weight only when the lift, top squeeze, and lowering phase remain smooth. Never progress load if the dumbbell slips or your hips lift off the bench.
Setup / Starting Position
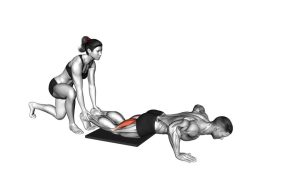
- Choose the right bench position: Lie face down on a flat bench with your knees near the edge so your lower legs can move freely.
- Secure the dumbbell: Place a dumbbell vertically between your feet and squeeze it firmly using the inner edges of your shoes.
- Set your hips: Keep your hips and thighs in contact with the bench to reduce lower-back compensation.
- Brace lightly: Hold the bench with your hands and keep your torso stable without excessive tension.
- Start with control: Begin with the legs extended, knees soft, and hamstrings slightly stretched.
Tip: A hex dumbbell is usually easier to hold than a round dumbbell because it gives the feet a more stable surface.
Execution (Step-by-Step)
- Stabilize first: Squeeze the dumbbell between your feet and keep your body steady on the bench.
- Curl the weight upward: Bend your knees and bring the dumbbell toward your glutes in a smooth arc.
- Control the top position: Pause briefly when your knees are deeply bent and squeeze the hamstrings.
- Avoid hip lifting: Keep your hips close to the bench instead of arching your lower back to move the weight.
- Lower slowly: Extend your knees under control until your legs return near the starting position.
- Maintain tension: Do not fully relax at the bottom; keep the dumbbell stable and begin the next rep smoothly.
Pro Tips & Common Mistakes
- Use a controlled tempo: Curl up smoothly, squeeze briefly, and lower slowly to increase hamstring tension.
- Do not kick the dumbbell: Momentum reduces hamstring work and increases the chance of losing the weight.
- Keep your hips down: Excessive hip lift shifts stress into the lower back instead of the hamstrings.
- Choose a manageable weight: This exercise feels harder than it looks because the feet must stabilize the dumbbell.
- Use full but safe range: Lower until the hamstrings lengthen, but do not force knee extension if it causes discomfort.
- Squeeze the dumbbell evenly: Uneven foot pressure can make the weight rotate or slip.
- Keep the knees aligned: Avoid letting the knees flare out aggressively during the curl.
- Start light: Master the setup before using heavier dumbbells.
FAQ
What muscles does the Dumbbell Lying Leg Curl work?
The main muscles are the hamstrings, especially the biceps femoris, semitendinosus, and semimembranosus. The calves, glutes, and core also help stabilize the movement.
Is the Dumbbell Lying Leg Curl a good replacement for the leg curl machine?
Yes, it can be a strong home or free-weight alternative. It does not feel exactly the same as a machine, but it still trains knee flexion and hamstring contraction effectively when performed with control.
Why does the dumbbell slip during this exercise?
The dumbbell usually slips when the load is too heavy, the feet are not squeezing evenly, or the rep is performed too fast. Use a lighter dumbbell, wear stable shoes, and control the lowering phase.
Should I use heavy weight on this exercise?
Use moderate weight only after you can control every rep. Heavy weight is not useful if it causes swinging, hip lifting, or poor dumbbell control.
Can beginners do the Dumbbell Lying Leg Curl?
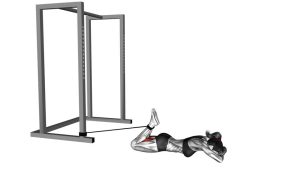
Beginners can do it with a very light dumbbell, but the exercise requires coordination. If holding the dumbbell feels unsafe, start with resistance band leg curls or machine leg curls first.
Where should I feel the exercise?
You should feel it mainly in the back of the thighs. A mild calf contribution is normal, but lower-back strain, knee pain, or cramping means you should reduce load or adjust your setup.
Recommended Equipment
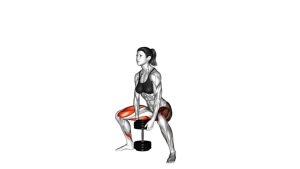
- Hex Dumbbell — easier to secure between the feet than many round dumbbells.
- Adjustable Dumbbell Set — useful for gradual progression without needing many separate dumbbells.
- Flat Workout Bench — provides a stable surface for prone hamstring curl variations.
- Resistance Bands Set — helpful for warm-ups, band leg curls, and hamstring activation drills.
- Thick Exercise Mat — useful for floor-based hamstring work, stretching, and warm-up exercises.
Tip: For this movement, the most important equipment choice is a dumbbell you can hold securely. Control and safety are more important than using a heavy load.