Single-Leg Sliding Floor Bridge Curl: Form, Sets, Tips & FAQ
Learn the Single-Leg Sliding Floor Bridge Curl on Towel to build hamstring strength, glute stability, hip control, and posterior-chain power at home.
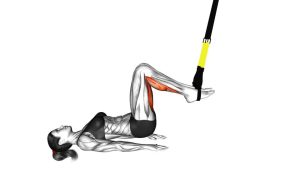
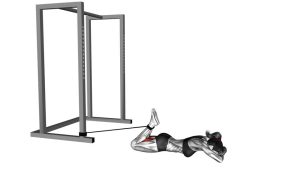
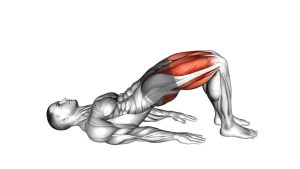
Single-Leg Sliding Floor Bridge Curl on Towel
This exercise is best used when you want to train hamstring strength without a machine. Because only one leg works at a time, the movement challenges knee flexion strength, hip extension control, and pelvic stability. It is especially useful for athletes, home workouts, posterior-chain training, and people who want a more advanced progression after mastering regular glute bridges and two-leg sliding hamstring curls.
Quick Overview
| Body Part | Hamstrings |
|---|---|
| Primary Muscle | Hamstrings — biceps femoris, semitendinosus, semimembranosus |
| Secondary Muscle | Glutes, calves, adductors, core, lower-back stabilizers |
| Equipment | Towel, furniture slider, core slider, or smooth floor surface |
| Difficulty | Advanced — requires strong hamstring control and hip stability |
Sets & Reps (By Goal)
- Strength: 3–5 sets × 4–8 reps per leg with slow control and full hip lift.
- Muscle building: 3–4 sets × 8–12 reps per leg using a controlled 2–3 second slide-out.
- Hamstring injury prevention: 2–4 sets × 5–8 reps per leg with extra focus on the eccentric slide-out phase.
- Glute and posterior-chain activation: 2–3 sets × 6–10 reps per leg before lower-body training.
- Beginner progression: Start with two-leg sliding bridge curls, then progress to single-leg eccentrics before full single-leg reps.
Progression rule: First improve hip height, control, and range of motion. Then add reps, slower tempo, longer holds, or a smoother sliding surface. Do not progress if your hips drop or your lower back takes over.
Setup / Starting Position
- Lie on your back: Position yourself on a smooth floor with one heel placed on a towel or slider.
- Set the working leg: Bend the working knee and keep the heel under or slightly in front of the knee.
- Lift the opposite leg: Extend the non-working leg slightly upward so it does not touch the floor.
- Place the arms down: Keep both arms flat on the floor with palms down for balance and stability.
- Brace the core: Keep the ribs down and pelvis controlled before lifting the hips.
- Raise into a bridge: Drive through the working heel and lift the hips until the body forms a strong bridge line.
- Keep the neck relaxed: Look upward, avoid pushing the head into the floor, and keep the shoulders relaxed.
The best starting position feels stable but active. Your glutes should already be working before the heel begins to slide.
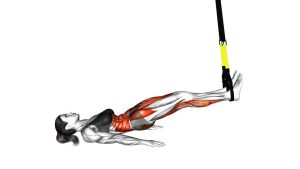
Execution (Step-by-Step)
- Start in a single-leg bridge: Press the working heel into the towel and lift the hips. Keep the opposite leg raised.
- Slide the heel away: Slowly extend the working leg forward by letting the towel slide away from your hips.
- Control the eccentric phase: Resist the slide-out. Do not let the leg shoot forward quickly.
- Keep the hips elevated: Maintain a strong bridge position as the working knee opens and the hamstring lengthens.
- Reach your controlled end range: Stop before the hips drop or the lower back arches.
- Curl the heel back in: Pull the towel toward your body by bending the working knee and contracting the hamstrings.
- Squeeze at the top: Finish with the heel close to the hips, glutes tight, and pelvis level.
- Repeat with control: Perform every rep smoothly, keeping the same hip height from start to finish.
Pro Tips & Common Mistakes
- Keep the hips high: Do not let the pelvis sag as the heel slides away.
- Move slowly: The slide-out phase should feel controlled, not passive.
- Drive through the heel: Press the heel into the towel to keep tension in the hamstrings.
- Avoid overextending: Stop the slide before your hips drop or your back arches.
- Keep the pelvis level: Do not rotate toward the working leg or lifted leg.
- Do not push with the arms: The arms stabilize, but the hamstrings and glutes should do the work.
- Control the non-working leg: Keep it lifted and quiet instead of swinging for momentum.
- Use the right floor surface: A surface that is too slippery can make the movement unsafe; a surface with light friction is better for control.
- Regress when needed: If full reps are too hard, slide out with one leg and return using both legs.
- Warm up first: Hamstrings can cramp if you jump into this movement without glute bridges, light curls, or hip mobility work.
FAQ
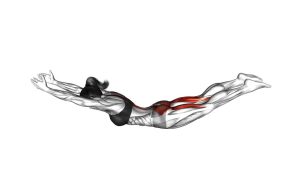
What muscles does the Single-Leg Sliding Floor Bridge Curl work?
It mainly works the hamstrings, especially during the slide-out and curl-in phases. The glutes work hard to keep the hips lifted, while the core and hip stabilizers help keep the pelvis level.
Is this exercise good for hamstring strength?
Yes. It is excellent for hamstring strength because it trains both eccentric control as the leg slides out and concentric strength as the heel curls back in. The single-leg version is much harder than the two-leg version.
Why do my hamstrings cramp during this exercise?
Hamstring cramping often happens when the hamstrings are not ready for the load, the glutes are not helping enough, or the range is too long. Warm up first, shorten the slide, and focus on squeezing the glutes before each rep.
Should my hips stay up the whole time?
Yes. The hips should stay lifted throughout the rep. If they drop during the slide-out, use a shorter range, switch to a two-leg version, or perform only the eccentric phase until you build more control.
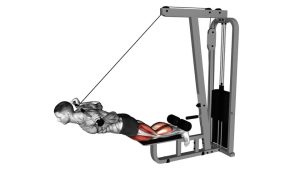
Is this better than a machine leg curl?
It is different. A machine leg curl isolates knee flexion, while the sliding bridge curl combines knee flexion with hip extension. This makes it more demanding for the glutes, hamstrings, and pelvic stability.
Can beginners do this exercise?
Most beginners should start with regular glute bridges, then two-leg sliding hamstring curls. The single-leg version is advanced and should only be used when you can control the hips and hamstrings without pain or cramping.
Recommended Equipment
- Core Sliders — ideal for smooth sliding hamstring curls, core work, and floor-based training.
- Workout Towel — useful for towel hamstring curls on smooth flooring and general training support.
- Non-Slip Exercise Mat — supports the upper body and improves comfort during floor bridge exercises.
- Resistance Bands for Legs — useful for glute activation drills before performing hamstring bridge curls.
- Hamstring Stretch Strap — helpful for post-workout hamstring mobility and recovery work.
Tip: For this exercise, the slider surface matters. Choose a towel or slider that allows smooth movement but still gives enough friction to control the eccentric phase safely.