Full Squat Mobility: Proper Form, Benefits, Sets & Tips
Learn Full Squat Mobility with step-by-step form, deep squat holds, muscles worked, mobility benefits, common mistakes, FAQs, and training tips.
Full Squat Mobility
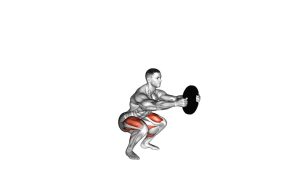
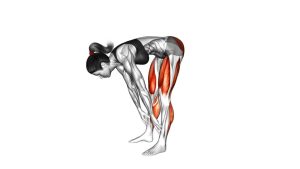
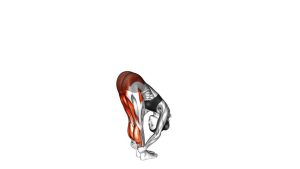
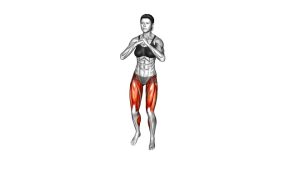
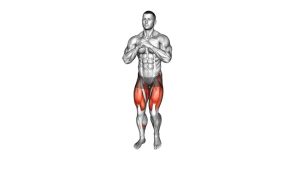
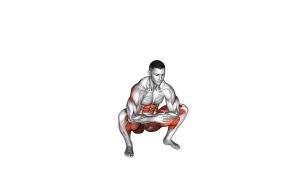
Full Squat Mobility combines active lower-body movement with a brief deep squat hold. First, the hips, knees, and ankles bend together as the body moves toward the floor. Meanwhile, the arms help maintain balance during the descent. At the bottom, the squat position challenges available hip and ankle mobility. Then, the legs gradually extend to return the body to standing.
Additionally, this exercise can help develop confidence in deeper squat positions. It may be useful before lower-body workouts or during a general mobility routine. However, the deepest possible squat is not always the most appropriate starting point. Instead, prioritize comfortable joint movement, stable foot contact, and consistent technique.
Quick Overview
| Body Part | Legs |
|---|---|
| Primary Muscle | Quadriceps and gluteus maximus |
| Secondary Muscle | Hip adductors, hamstrings, soleus, gastrocnemius, gluteus medius, and core stabilizers |
| Equipment | None (bodyweight exercise) |
| Difficulty | Intermediate, depending on available hip and ankle mobility, squat depth, and balance control |
Sets & Reps (By Goal)
- General mobility: Perform 2–3 sets of 6–10 controlled repetitions. Hold the bottom position for 2–5 seconds. Rest approximately 30–45 seconds between sets.
- Squat warm-up: Complete 2–3 sets of 5–8 repetitions before lower-body training. Additionally, use a comfortable depth and focus on smooth movement.
- Hip and ankle mobility: Perform 2–4 sets of 4–6 slow repetitions. Maintain each comfortable bottom position for approximately 5–10 seconds. Rest 30–60 seconds as needed.
- Deep squat control: Complete 2–3 sets of 5–8 repetitions. Use a controlled descent, pause briefly, and return to standing without bouncing.
- Mobility endurance: Perform 2–3 sets of 8–12 repetitions. Alternatively, practice comfortable deep squat holds lasting 15–30 seconds. Maintain relaxed breathing throughout.
Progression rule: First improve balance and consistency before increasing squat depth or hold duration. Subsequently, extend the bottom pause or add a few controlled repetitions. However, avoid forcing additional range when your heels lift excessively, your knees become unstable, or your lower back loses comfortable control.
Setup / Starting Position
- Choose a clear training area: Stand on a firm, non-slip surface with enough space to move freely. Additionally, remove nearby obstacles that could interfere with your balance.
- Position your feet: Place both feet approximately shoulder-width apart, or slightly wider if your hip structure requires it. Turn your toes outward naturally without creating an exaggerated stance.
- Establish an upright posture: Stand tall with your hips and knees extended. Keep your head neutral, shoulders relaxed, and chest comfortably lifted. Meanwhile, maintain a natural spinal position without excessive lower-back arching.
- Extend your arms forward: Raise both arms in front of your body to approximately shoulder height. Keep your elbows mostly straight and your palms facing downward. Consequently, your arms can act as a counterbalance during the squat.
- Prepare your core: Create gentle abdominal tension while maintaining normal breathing. Then, distribute your body weight evenly between both feet. Avoid shifting heavily toward either leg.
- Check knee alignment: Point your knees in approximately the same direction as your toes. Furthermore, keep both feet stable before initiating the downward movement.
- Prepare for the descent: Look forward and begin relaxing unnecessary tension through your shoulders. Finally, choose a squat depth that allows comfortable movement without forcing your joints.
Setup tip: A slightly wider stance may help some people reach a comfortable deep squat. However, stance width varies with individual anatomy. Therefore, choose the position that provides the best combination of balance, knee tracking, and comfortable hip movement.
Execution (Step-by-Step)
- Begin the squat: Bend your hips and knees together while gradually lowering your body. Initially, keep both arms extended forward to help maintain balance.
- Control the downward movement: Allow your hips to move backward and downward between your legs. Meanwhile, your knees travel forward naturally in line with your toes.
- Increase ankle movement: Continue lowering as your ankles bend to accommodate the increasing squat depth. Keep your feet stable and distribute pressure comfortably across each foot.
- Lower into a deep squat: Continue descending until your hips approach or move below knee level, provided your mobility allows it. However, stop at a shallower depth if deeper movement causes discomfort or loss of balance.
- Adjust your arm position: As you approach the bottom, gradually lower your arms toward your knees or lower legs. This matches the demonstrated movement and helps maintain a balanced position.
- Hold the bottom position: Pause briefly in your deepest comfortable squat. Maintain controlled knee alignment, relaxed shoulders, and steady breathing. Additionally, avoid bouncing or forcing your hips farther downward.
- Begin the upward movement: Press evenly through your feet while extending your knees and hips together. As your pelvis rises, gradually bring your torso toward an upright position.
- Return your arms forward: During the ascent, lift both arms toward shoulder height. Meanwhile, maintain balanced pressure across your feet without abruptly shifting your body weight.
- Finish the repetition: Stand upright with your hips and knees comfortably extended. Finally, stabilize your posture before beginning another controlled repetition.
Pro Tips & Common Mistakes
- Use a comfortable stance: Position your feet to accommodate your natural hip movement. However, avoid excessively narrow or wide positions that compromise balance.
- Keep your knees aligned: Allow your knees to follow the direction of your toes. Additionally, avoid uncontrolled inward knee collapse during the descent or ascent.
- Do not rush the descent: Lower your hips gradually rather than dropping into the deepest position. Consequently, your muscles can better control the movement.
- Maintain stable foot contact: Keep your feet grounded and avoid excessive pressure on your toes. If your heels rise unintentionally, reduce the depth and reassess ankle mobility.
- Use your arms for balance: Extend your arms forward during the initial descent. Then, allow them to lower naturally as your body reaches the bottom position.
- Avoid forcing maximum depth: Deep squatting should remain comfortable and controlled. Therefore, gradually develop your range instead of pushing through painful restrictions.
- Keep your spine controlled: Maintain comfortable trunk alignment without excessive rounding or arching. Some pelvic movement at maximum depth can occur naturally. However, avoid forcing the lower back into an uncomfortable position.
- Do not bounce aggressively: Hold the bottom position steadily rather than repeatedly dropping into your joints. Instead, use a brief pause and maintain gentle muscular control.
- Breathe throughout the movement: Avoid unnecessarily holding your breath during a mobility-focused squat. For example, inhale during the descent and exhale naturally as you stand.
- Progress gradually: Improve squat depth, balance, and bottom-position comfort before increasing repetitions or hold duration. As a result, progression remains focused on movement quality.
FAQ
Full Squat Mobility: Muscles and Benefits
What muscles does Full Squat Mobility work?
Full Squat Mobility primarily involves the quadriceps and gluteus maximus. Additionally, the hip adductors, calves, hamstrings, and core stabilizers contribute to movement control. During the descent, these muscles help regulate hip, knee, and ankle movement. Meanwhile, the deep squat position challenges available lower-body mobility. Therefore, the exercise combines muscular control with mobility-focused practice.
What are the benefits of Full Squat Mobility?
This exercise helps practice comfortable movement through a relatively large range at the hips, knees, and ankles. Additionally, it develops awareness of squat depth, posture, and balance. Regular practice may improve confidence in deep squat positions. However, improvements depend on individual mobility, training consistency, and technique. As a result, it works well as part of a broader lower-body mobility routine.
Is Full Squat Mobility good for beginners?
Beginners can practice a modified version using a shallower squat depth. However, the full-depth variation may require more ankle and hip mobility than some beginners currently possess. Therefore, start with a comfortable range and maintain stable foot contact. Additionally, a sturdy support may help while developing balance. Gradually increase depth only when the movement remains controlled.
Squat Depth, Mobility, and Technique
How deep should I squat during this exercise?
Ideally, descend into the deepest position you can reach comfortably and control. For some people, the hips can move below knee level while the feet remain stable. However, individual anatomy and mobility influence achievable squat depth. Consequently, a shallower squat may be more appropriate initially. Never force the knees, hips, or ankles into painful positions simply to reach the floor.
Why do my heels lift during a deep squat?
Heel lifting can occur because of limited ankle dorsiflexion, stance choices, balance demands, or individual body proportions. Additionally, descending too quickly may make foot control more difficult. Therefore, experiment with a comfortable stance and reduce squat depth when necessary. Over time, consistent ankle mobility practice may help improve the movement. However, avoid forcing the heels downward when doing so causes discomfort.
Should my knees travel beyond my toes?
Yes, some forward knee travel is normal during deep squatting. In fact, greater ankle dorsiflexion often allows the knees to move farther forward. However, the knees should generally track in the same direction as the toes. Additionally, keep your feet stable and avoid painful or uncontrolled movement. Therefore, focus on overall joint comfort rather than enforcing an arbitrary knee position.
Training Frequency, Progression, and Safety
How often should I perform Full Squat Mobility?
Many people can include this movement several times per week. For example, 2–4 short mobility sessions may provide regular practice without excessive training volume. Additionally, a few controlled repetitions can be useful before leg workouts. However, frequency should reflect your mobility level and recovery. If soreness or joint irritation develops, reduce the volume or intensity.
How long should I hold the deep squat?
Beginners may start with a brief 2–5-second pause at a comfortable depth. Subsequently, the hold can increase toward 10–20 seconds as balance and mobility improve. Some experienced individuals may use longer comfortable holds. However, holding for extra time is unnecessary when posture deteriorates. Instead, prioritize relaxed breathing, stable feet, and controlled positioning.
Can Full Squat Mobility cause knee pain?
Deep squatting places substantial movement demands on the knees, hips, and ankles. Although this is not automatically harmful, some people may experience discomfort because of existing conditions, limited tolerance, or poor movement control. Therefore, avoid pushing through painful repetitions. Additionally, use a shallower depth when necessary. Persistent or worsening pain should be assessed by a qualified healthcare professional.
Recommended Equipment (Optional)
- Non-Slip Exercise Yoga Mat — provides a comfortable, stable surface for bodyweight mobility practice. Additionally, it can be used for stretching and floor-based exercises.
- Cork Yoga Blocks — offer optional hand support when learning deeper squat positions. Therefore, they may help beginners practice balance without forcing additional depth.
- Adjustable Slant Board — useful for supported calf stretching and ankle mobility exercises. Additionally, a suitable incline may assist modified squat practice when used carefully.
- Loop Resistance Bands Set — useful for complementary glute activation, lateral walking drills, and lower-body warm-ups. However, bands are not required for the demonstrated squat.
- High-Density Foam Roller — provides an optional tool for general lower-body mobility routines. For example, it can be used for brief quadriceps and calf rolling before training.
Equipment tip: Full Squat Mobility requires no equipment. Therefore, these products are optional accessories rather than essential parts of the movement. Start with your own bodyweight and gradually develop comfortable squat depth. Additionally, choose any support tools according to your individual mobility needs.