Lying Tuck Crunch: Proper Form, Core Benefits, Sets, Tips & FAQ
Learn the lying tuck crunch for stronger abs, better core compression, and controlled hollow-to-tuck movement with form tips, sets, FAQs, and gear.
Lying Tuck Crunch
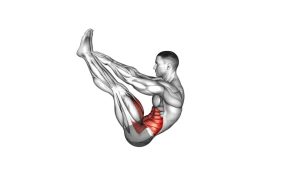
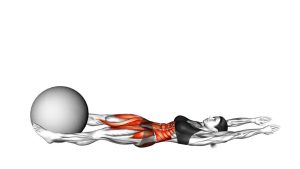
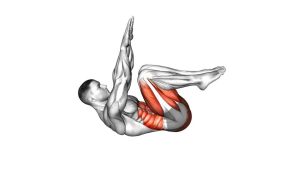
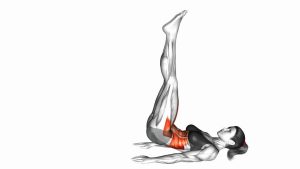
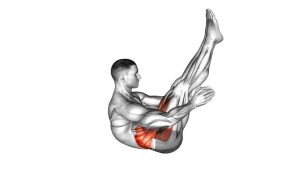
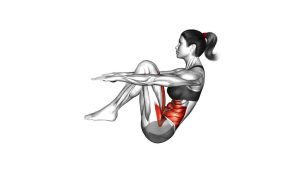
This exercise is best performed with slow control. Begin lying on your back with your arms extended overhead and your legs straight. Then, crunch upward while drawing your knees toward your chest. At the top, your body forms a tight tuck position. After that, return with control until your arms and legs extend again without fully relaxing your core.
Quick Overview
| Body Part | Core |
|---|---|
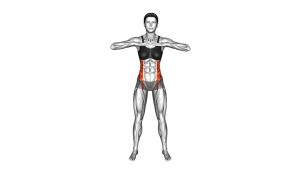
| Primary Muscle | Rectus abdominis |
| Secondary Muscle | Hip flexors, transverse abdominis, obliques |
| Equipment | None; optional exercise mat |
| Difficulty | Intermediate because both the upper body and legs move together |
Sets & Reps (By Goal)
- Core strength: 3–4 sets × 8–12 controlled reps, resting 60–90 seconds between sets.
- Muscular endurance: 2–4 sets × 12–20 reps, using a smooth tempo and steady breathing.
- Beginner progression: 2–3 sets × 6–10 reps, bending the knees earlier if needed.
- Core finisher: 2–3 rounds × 20–30 seconds, stopping before form breaks down.
Progression rule: First improve control. Then increase reps, extend the legs lower, or slow the lowering phase.
Setup / Starting Position
- Lie on your back: Use a flat floor or exercise mat for comfort.
- Extend your arms overhead: Keep your arms long without forcing your shoulders into an uncomfortable position.
- Straighten your legs: Keep both legs extended and slightly lifted if you can control your lower back.
- Brace your core: Pull your ribs down gently and avoid letting your lower back overarch.
- Keep your neck relaxed: Look slightly upward or forward as you begin the crunch.
Start with a smaller range if your lower back lifts too much during the extended position.
Execution (Step-by-Step)
- Begin extended: Start with your arms overhead and legs straight in a controlled hollow-style position.
- Crunch upward: Lift your head, shoulders, and upper back off the floor without yanking your neck.
- Tuck the knees in: At the same time, bend your knees and pull them toward your chest.
- Reach forward: Bring your arms toward your legs as your body compresses into the tuck.
- Pause briefly: Squeeze your abs at the top while keeping your feet off the floor.
- Return slowly: Extend your arms and legs back out with control, resisting the urge to drop down.
- Repeat cleanly: Move into the next rep only when your core stays tight and your lower back remains controlled.
Pro Tips & Common Mistakes
- Use your abs, not momentum: Avoid swinging your legs into the tuck.
- Control the lowering phase: The return to extension should be just as active as the crunch.
- Keep the feet elevated: If possible, avoid touching the floor between reps to maintain core tension.
- Do not pull the neck: Let the torso lift from abdominal contraction, not head movement.
- Avoid excessive low-back arching: Raise the legs higher or bend the knees sooner if your back loses position.
- Exhale during the tuck: Breathing out as you crunch helps the ribs stay down and improves contraction.
- Do not rush the rep: A slower tempo makes the exercise safer and more effective.
FAQ
What muscles does the lying tuck crunch work?
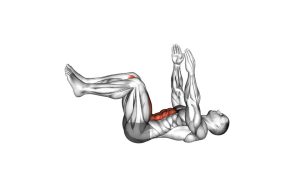
The lying tuck crunch mainly targets the rectus abdominis. In addition, the hip flexors, transverse abdominis, and obliques help control the knee tuck and stabilize the trunk.
Is the lying tuck crunch good for lower abs?
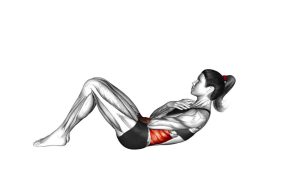
Yes. Although the lower abs are not a separate muscle, the knee-tuck portion strongly challenges the lower abdominal region because the pelvis and legs must move under control.
Should my feet touch the floor between reps?
Ideally, your feet stay slightly elevated to keep tension on the core. However, beginners may lightly reset between reps if needed to protect form.
Why does my lower back arch during this exercise?
Your lower back may arch if the extended position is too difficult. Therefore, bend your knees slightly, keep your legs higher, or reduce the range until your core strength improves.
Is the lying tuck crunch beginner-friendly?
It can be used by beginners if the range is shortened. However, the full version is usually more intermediate because it combines a hollow hold, crunch, and reverse-crunch-style knee tuck.
How is this different from a regular crunch?
A regular crunch mainly lifts the upper body. By contrast, the lying tuck crunch brings the upper body and knees together, which creates a stronger full-core compression challenge.
Recommended Equipment
- Exercise Mat — adds comfort for your spine, hips, and shoulders during floor-based ab training.
- Thick Yoga Mat — useful if you need extra cushioning during repeated crunch variations.
- Core Sliders — helpful for related tuck and pike progressions once basic control improves.
- Ab Wheel Roller — a stronger progression tool for anti-extension core strength.
- Pilates Mini Ball — can support modified core drills and improve control during beginner progressions.
Equipment is optional. The lying tuck crunch can be trained effectively with only bodyweight and a stable floor surface.