Weighted Seated Tuck Crunch on Floor: Form, Sets, Tips & FAQ
Learn the weighted seated tuck crunch on floor to train abs with control. Includes setup, execution, sets, mistakes, FAQs, and equipment.
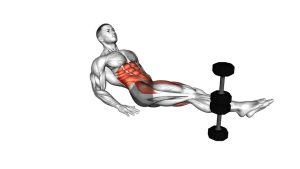
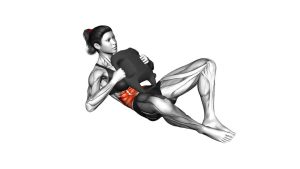
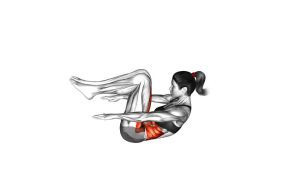
Weighted Seated Tuck Crunch on Floor
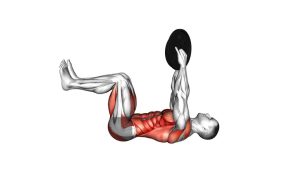
This exercise is best performed with a smooth rhythm and a small, controlled range of motion. First, the body starts in a semi-reclined seated position. Then, the knees travel inward as the torso crunches forward. After that, the legs move away again while the torso leans back under control. As a result, the abs must work continuously to manage balance, trunk flexion, and leg movement.
Quick Overview
| Body Part | Core |
|---|---|
| Primary Muscle | Rectus abdominis |
| Secondary Muscle | Hip flexors, obliques, transverse abdominis, deep core stabilizers |
| Equipment | Dumbbell, weight plate, kettlebell, or no weight for an easier version |
| Difficulty | Intermediate because it requires balance, trunk control, and coordinated knee-tuck timing |
Sets & Reps (By Goal)
- Core endurance: 2–3 sets × 12–18 reps with light weight or bodyweight
- Ab strength: 3–4 sets × 8–12 reps with a controlled moderate load
- Muscle control: 2–3 sets × 6–10 slow reps with a 1-second squeeze at the top
- Home workout finisher: 2 rounds × 30–45 seconds with steady form
Progression rule: Add reps first, then add a slightly heavier weight. Moreover, only progress when you can keep the weight close, the knees controlled, and the torso stable from start to finish.
Setup / Starting Position
- Sit on the floor: Begin seated with your knees bent and your torso leaning slightly backward.
- Hold the weight close: Grip a dumbbell, plate, or kettlebell with both hands near your chest or upper stomach.
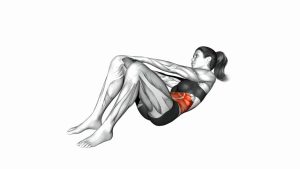
- Brace your core: Keep your ribs down and maintain a controlled semi-reclined position.
- Lift or lighten the feet: Keep the feet slightly elevated if you can control the balance. Otherwise, use a lighter bodyweight version first.
- Set your posture: Keep the chest controlled, the neck neutral, and the shoulders relaxed.
Tip: If your lower back takes over, reduce the lean-back angle and perform the exercise without weight until the tuck pattern feels stable.
Execution (Step-by-Step)
- Start semi-reclined: Sit tall enough to stay balanced, but lean back enough to create abdominal tension.
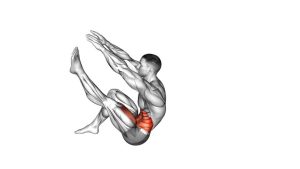
- Draw the knees inward: Bring both knees toward your chest in a smooth tuck motion.
- Crunch forward slightly: At the same time, move your torso toward the knees without yanking the neck.
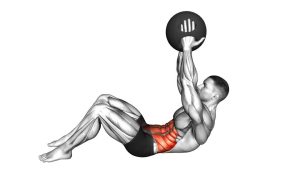
- Keep the weight quiet: Hold the weight close and stable instead of swinging it forward.
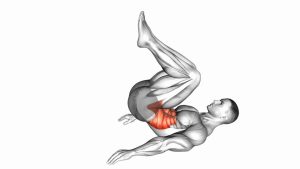
- Squeeze the abs: Pause briefly when the knees are closest to the torso.
- Return with control: Lean back and extend the legs away again without dropping or relaxing fully.
- Repeat smoothly: Continue for the target reps while keeping the same rhythm on every repetition.
Pro Tips & Common Mistakes
- Keep the weight close: This improves control and reduces unnecessary shoulder involvement.
- Avoid using momentum: Swinging the weight or kicking the legs makes the abs work less effectively.
- Control the return phase: The lowering portion should be slow enough that your lower back stays stable.
- Do not overextend the legs: Reach only as far as you can without losing abdominal tension.
- Keep the neck neutral: Look forward naturally and avoid pulling the chin aggressively toward the chest.
- Exhale during the tuck: Breathing out as the knees come in can help the abs contract more cleanly.
- Use bodyweight first if needed: A clean unweighted tuck is better than a sloppy weighted version.
- Stay balanced: If you keep falling backward, reduce the range and slow down the rep speed.
FAQ
What muscles does the weighted seated tuck crunch work?
It mainly works the rectus abdominis, especially during the crunching action. Additionally, the hip flexors help move the knees, while the obliques and deep core muscles help stabilize the torso.
Is this exercise beginner-friendly?
The bodyweight version can be beginner-friendly. However, the weighted version is better for intermediate users because it requires more balance, coordination, and abdominal control.
Should my feet touch the floor between reps?
They can touch lightly if needed for control. Nevertheless, keeping the feet slightly elevated increases core tension and makes the movement harder. Choose the option that lets you maintain clean form.
How heavy should the weight be?
Use a light to moderate weight that you can keep close to your body without swinging. If the weight changes your rhythm or pulls your shoulders forward, it is too heavy.
Why do I feel this in my hip flexors?
Some hip flexor work is normal because the knees tuck toward the torso. However, if you feel mostly hip flexors and very little abs, shorten the range, slow down, and focus on curling the torso slightly toward the knees.
Can I do this exercise without weight?
Yes. In fact, the unweighted version is a smart starting point. Once your balance and control improve, you can add a dumbbell, plate, or kettlebell.
Recommended Equipment (Optional)
- Hex Dumbbell — simple option for adding controlled resistance to seated tuck crunches
- Weight Plate — easy to hold close to the torso during weighted ab exercises
- Kettlebell — useful for compact weighted core drills and home workouts
- Thick Exercise Mat — adds floor comfort for seated core training
- Adjustable Dumbbell — allows gradual resistance changes as your ab strength improves
Tip: Choose equipment that helps you keep the movement controlled. Additionally, avoid oversized or awkward weights that force shoulder tension or momentum.