Ring Back Lever: Full Body Tension, Form, Sets, Tips & FAQ
Learn the Ring Back Lever with proper setup, body alignment, shoulder control, sets by goal, common mistakes, FAQs, and ring training gear.
Ring Back Lever
This exercise works best when performed with patience, progressive loading, and strict control. The Ring Back Lever places high demand on the shoulders, biceps tendons, lats, chest, core, glutes, and posterior-chain stabilizers. Every rep should look smooth, quiet, and deliberate. Avoid dropping quickly into the bottom position or forcing a full hold before you can maintain a clean tuck or straddle variation.
Quick Overview
| Body Part | Back |
|---|---|
| Primary Muscle | Latissimus dorsi, rear deltoids, teres major, straight-arm shoulder extensors |
| Secondary Muscle | Core, glutes, hamstrings, biceps, chest, forearms, scapular stabilizers |
| Equipment | Gymnastic rings with secure straps and overhead anchor |
| Difficulty | Advanced; requires strong ring control and progressive back lever preparation |
Sets & Reps (By Goal)
- Skill practice: 4–6 sets × 5–10 second holds using the cleanest progression available.
- Strength development: 3–5 sets × 8–15 second holds with 90–150 seconds rest.
- Full back lever control: 3–4 sets × 5–12 second full holds, only if body line stays strict.
- Transition practice: 3–5 sets × 2–4 slow lower-and-lift reps from inverted hang to back lever.
- Beginner progression: 4–6 sets × 8–15 second tuck back lever holds before moving to advanced tuck or straddle.
Progression rule: Master tuck, advanced tuck, one-leg, and straddle variations before attempting a full Ring Back Lever. Add hold time first, then improve body length, then progress to harder leverage.
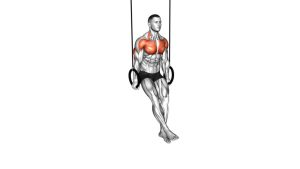
Setup / Starting Position
- Set the rings securely: Hang the rings from a stable overhead anchor with enough space for a full body rotation.
- Grip the rings firmly: Use a strong overhand grip and keep your wrists neutral as you prepare to invert.
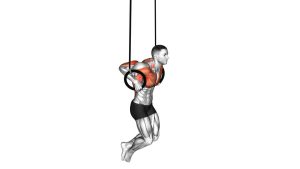
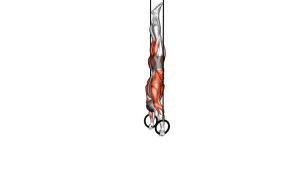
- Move into an inverted hang: Pull or roll your body upside down until your legs point upward and your arms stay straight.
- Brace your body: Squeeze your glutes, tighten your abs, point your toes, and keep your legs together.
- Set the shoulders: Keep the shoulders depressed and controlled. Avoid shrugging toward the ears.
- Prepare for a slow descent: Before lowering, create full-body tension so the movement does not become a swing.
Tip: If you cannot control the descent from inverted hang, use a tuck back lever or band-assisted variation first.
Execution (Step-by-Step)
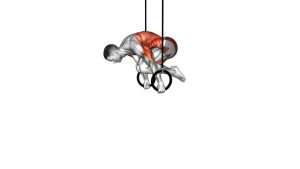
- Start from an inverted hang: Keep your body tight, legs straight, arms locked, and rings close to the sides of the body.
- Begin lowering slowly: Let your body rotate backward with control while maintaining straight elbows and a firm grip.
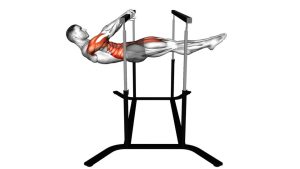
- Open the shoulder angle: As you descend, allow the shoulders to move into extension while keeping the scapulae stable.
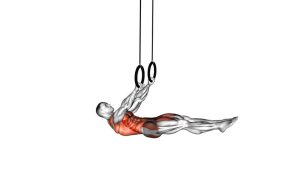
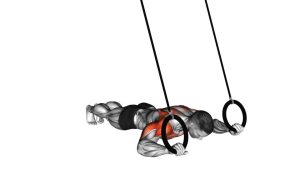
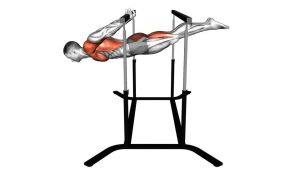
- Maintain a rigid body line: Keep the abs, glutes, thighs, and calves tight so the hips do not sag below the shoulders.
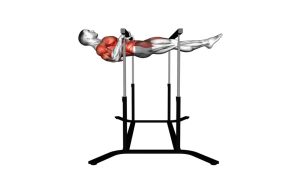
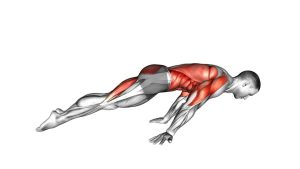
- Reach the horizontal position: Stop when your body is parallel to the floor and forms a straight line from head to heels.
- Hold with control: Keep the rings stable, elbows locked, chest open, legs together, and toes pointed.
- Return smoothly: Pull the hips back upward and rotate into the inverted hang without swinging or bending the elbows.
Pro Tips & Common Mistakes
- Lock the elbows: Bent elbows reduce the straight-arm strength benefit and usually signal the progression is too hard.
- Do not rush the descent: Dropping into the bottom position can overload the shoulders and biceps tendons.
- Keep the hips level: Sagging hips turn the hold into a loose hang instead of a true back lever.
- Use progressive leverage: Tuck, advanced tuck, one-leg, straddle, then full lever.
- Control the rings: Ring shaking usually means you need more scapular stability or an easier progression.
- Keep your neck neutral: Do not crank the head upward or tuck the chin aggressively.
- Squeeze the glutes: Glute tension helps connect the upper body and lower body into one rigid line.
- Train mobility separately: Shoulder extension mobility and German hang preparation can support safer progress.
FAQ
What muscles does the Ring Back Lever work?
The Ring Back Lever mainly trains the lats, rear delts, teres major, straight-arm shoulder extensors, core, glutes, and scapular stabilizers. It also places strong isometric demand on the biceps, forearms, chest, and posterior chain.
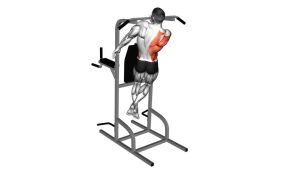
Is the Ring Back Lever beginner-friendly?
No. The full Ring Back Lever is an advanced calisthenics skill. Beginners should start with ring support holds, tuck back lever holds, skin-the-cat practice, and controlled inverted hang work before attempting the full position.
Why do my elbows bend during the back lever?
Elbow bending usually means the leverage is too difficult or the athlete is trying to pull instead of hold with straight-arm tension. Use a tuck or advanced tuck variation until the elbows can stay locked.
Should I feel the Ring Back Lever in my biceps?
Some biceps and elbow-tendon tension is normal because the exercise is a straight-arm skill. However, sharp pain or intense tendon discomfort is not normal. Reduce difficulty and build gradually.
How long should I hold a Ring Back Lever?
Quality matters more than duration. A clean 5–10 second hold is better than a long hold with sagging hips, bent elbows, or unstable rings. Build toward 10–20 seconds only after your form is consistent.
What is the best progression before the full Ring Back Lever?
A good progression path is tuck back lever, advanced tuck back lever, one-leg back lever, straddle back lever, then full Ring Back Lever. Move forward only when each step feels controlled.
Recommended Equipment
- Wooden Gymnastic Rings — essential for ring back lever training, grip control, and calisthenics strength work
- Gymnastic Rings with Numbered Straps — makes ring height adjustment easier and helps keep both straps even
- Resistance Bands for Calisthenics — useful for assisted back lever progressions and controlled skill practice
- Liquid Chalk — improves grip security during ring holds and inverted transitions
- Pull-Up Bar / Ring Anchor — provides an overhead setup option for ring training when properly secured
Tip: Always inspect straps, buckles, rings, and anchor points before practicing advanced ring skills. A stable setup is essential for safe Ring Back Lever training.