Single-Leg Floor Dip: Proper Form, Sets, Tips & FAQ
Learn how to do the Single-Leg Floor Dip with proper form to target the triceps, chest, and shoulders. Includes setup, execution, sets by goal, common mistakes, FAQs, and recommended equipment.
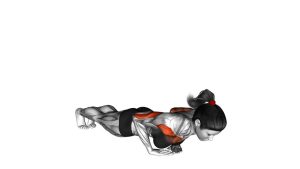
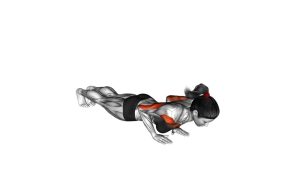
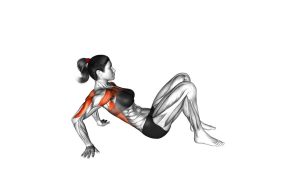
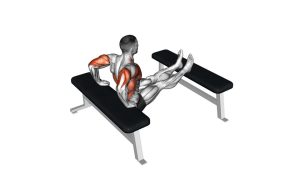
Single-Leg Floor Dip
This variation works best when each rep is smooth and deliberate. Keep your hands close enough to support a strong press, your chest open, and your shoulders pulled down away from the ears. One leg stays extended in front of you while the other stays bent with the foot planted, which increases unilateral loading and makes the triceps work harder than in a standard two-leg floor dip.
Quick Overview
| Body Part | Triceps |
|---|---|
| Primary Muscle | Triceps brachii |
| Secondary Muscle | Anterior deltoids, lower chest, core stabilizers |
| Equipment | Bodyweight only (floor space required) |
| Difficulty | Beginner to Intermediate |
Sets & Reps (By Goal)
- Technique practice: 2–3 sets × 6–8 reps per side, controlled tempo, 45–60 sec rest
- Muscle building: 3–4 sets × 8–12 reps per side, 60–90 sec rest
- Bodyweight strength: 4–5 sets × 5–8 reps per side, 75–120 sec rest
- Burnout finisher: 2–3 sets × 10–15 total reps, alternating sides or completing one side at a time
Progression rule: First improve depth control, tempo, and lockout quality. Then add reps. After that, reduce assistance from the planted leg or pause longer in the bottom position.
Setup / Starting Position
- Sit on the floor: Place your hands behind your hips with fingers pointing forward or slightly outward if that feels better on the wrists.
- Set the legs: Extend one leg straight in front of you and keep the other leg bent with the foot flat on the floor.
- Lift the chest: Pull the shoulders back and down so the chest stays open instead of rounded.
- Brace lightly: Tighten the core and glutes enough to keep the hips from sagging or twisting.
- Start tall: Arms should be straight or nearly straight before you begin the descent.
Tip: Keep the planted foot close enough to help stabilize you, but do not turn the movement into a leg-driven push.
Execution (Step-by-Step)
- Press into the hands: Begin in the top position with the chest up and one leg extended.
- Bend the elbows: Lower your hips by bending the elbows backward while keeping the shoulders controlled.
- Lower under control: Descend until your elbows reach about 90 degrees or a little deeper if your shoulders tolerate it well.
- Pause briefly: Stay tight in the bottom without collapsing into the shoulder joints.
- Drive back up: Push through the palms and extend the elbows until you return to the top.
- Repeat smoothly: Keep the extended leg straight, the planted foot stable, and avoid bouncing out of the bottom.
Pro Tips & Common Mistakes
- Keep the chest open: Rounded shoulders make the movement less stable and can increase front-shoulder stress.
- Do not drop too deep: More range is not always better if your shoulder mobility is limited.
- Use the triceps to press: Avoid turning the rep into a big hip shove from the planted leg.
- Move with control: Fast, bouncing reps reduce tension on the target muscles and increase joint stress.
- Stay even through the torso: Do not twist toward the bent leg or let one shoulder sit higher than the other.
- Protect the wrists: If your wrists feel irritated, warm them up first or use push-up handles to keep a more neutral hand position.
FAQ
What muscles does the Single-Leg Floor Dip work most?
The triceps do most of the work, while the front shoulders and lower chest assist. Your core also helps stabilize the torso and hips.
Why extend one leg instead of keeping both feet planted?
Extending one leg reduces lower-body assistance, increases loading on the upper body, and adds a small stability challenge that makes the movement more demanding.
Is this better than a regular bench dip?
It is not automatically better, but it is a useful variation if you want a floor-based dip pattern with slightly more unilateral demand and less setup.
How deep should I go?
Lower until your triceps are loaded and your shoulders still feel controlled. For many people, around 90 degrees at the elbows is a smart target.
What if I feel this mostly in my shoulders?
Reduce depth, slow the lowering phase, keep the chest more open, and make sure your hands are not too far behind you. If shoulder discomfort continues, switch to a more joint-friendly triceps variation.
Recommended Equipment
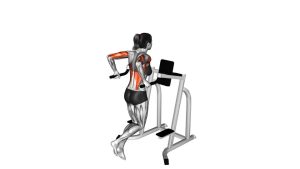
- Adjustable Dip Bars — useful if you want to progress from floor dips to deeper dip variations and more advanced bodyweight pressing
- Wooden Push-Up Bars / Parallettes — can reduce wrist strain and provide a more neutral grip for floor-based pressing work
- Fitgriff Wrist Wraps — helpful for lifters who want extra wrist support during dips, push-ups, and pressing exercises
- Thick Exercise Mat — adds comfort for floor-based setup and helps protect the hips, hands, and planted foot
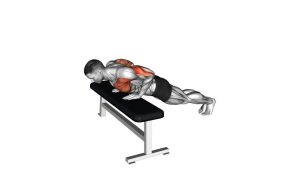
- Flat Weight Bench — useful if you want to rotate this movement with bench dips or other triceps-focused bodyweight variations
Choose equipment that improves comfort and control, not just difficulty. Better wrist position, stable support, and joint-friendly setup usually lead to better reps.