Single-Leg Squat with Support: Form, Benefits, Sets, Tips & FAQ
Learn the Single-Leg Squat with Support for stronger quads, glutes, balance, and leg control. Includes setup, steps, sets, tips, FAQs, and gear.
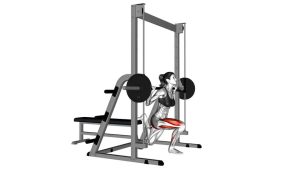
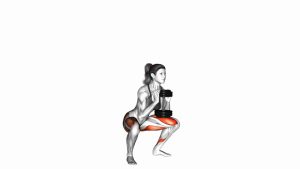
Single-Leg Squat with Support
This exercise is especially useful for learning single-leg squat mechanics before progressing to harder variations like the pistol squat. It teaches the body how to control the hip, knee, and ankle together while keeping the torso stable. Because the hand provides assistance, you can focus on clean movement quality, proper depth, and smooth control instead of fighting for balance on every repetition.
Quick Overview
| Body Part | Legs |
|---|---|
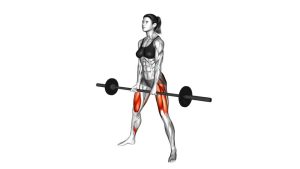
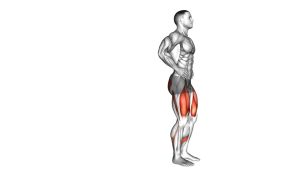
| Primary Muscle | Quadriceps |
| Secondary Muscle | Glutes, hamstrings, calves, hip stabilizers, core |
| Equipment | Stable support such as a wall, pole, rack, chair, or suspension strap |
| Difficulty | Beginner to Intermediate |
Sets & Reps (By Goal)
- Technique practice: 2–3 sets × 5–8 reps per leg with slow control.
- Strength building: 3–4 sets × 6–10 reps per leg with moderate assistance.
- Balance and control: 2–4 sets × 8–12 reps per leg using light support only.
- Pistol squat progression: 3–5 sets × 3–6 reps per leg with a deeper range of motion.
- Warm-up activation: 1–2 sets × 6–8 reps per leg before lower-body training.
Progression rule: First improve control, then increase depth, then reduce support. Do not remove the support until your knee stays aligned and your heel stays grounded through the full repetition.
Setup / Starting Position
- Stand beside a stable support: Use a wall, rack, pole, chair, or suspension strap that will not move.
- Plant one foot firmly: Keep the working foot flat with pressure through the heel, big toe, and little toe.
- Lift the opposite leg: Keep the non-working leg slightly forward or lightly off the floor.
- Brace the core: Keep the ribs stacked over the pelvis and avoid leaning excessively to one side.
- Set the knee line: Point the knee in the same direction as the toes before lowering.
- Use light support: Hold the support for balance, not to pull your body up aggressively.
Tip: Start with a small range of motion if your balance, ankle mobility, or knee control is limited.
Execution (Step-by-Step)
- Start tall: Stand on one leg with the support hand lightly touching the wall, rack, or strap.
- Shift control into the working leg: Keep your weight centered over the midfoot and heel.
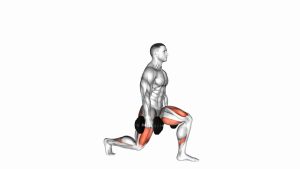
- Begin the descent: Bend the working knee and hip together while keeping the chest controlled.
- Lower slowly: Descend with a smooth tempo, allowing the knee to travel forward in line with the toes.
- Keep the heel down: Maintain full foot contact and avoid rolling onto the inside edge of the foot.
- Control the bottom: Lower only as far as you can without knee collapse, heel lift, or hip twisting.
- Drive upward: Push through the working foot and extend the knee and hip together.
- Use minimal assistance: Let the support guide balance, but make the working leg perform most of the effort.
- Finish tall: Return to the start position with control before beginning the next rep.
Pro Tips & Common Mistakes
- Keep the knee tracking clean: The working knee should follow the toes instead of collapsing inward.
- Do not rush the lowering phase: A slow descent improves strength, control, and joint positioning.
- Use the support lightly: Pulling too much with the arm reduces the leg-strength benefit.
- Keep the heel grounded: If the heel lifts, reduce depth or improve ankle mobility before going lower.
- Avoid hip dropping: Keep the pelvis level so the glutes and hip stabilizers stay active.
- Control the non-working leg: Do not swing it aggressively for momentum.
- Use a box if needed: Squatting to a bench or box can help control depth and build confidence.
- Progress gradually: Depth and reduced assistance should come after clean alignment is consistent.
FAQ
What muscles does the Single-Leg Squat with Support work?
It mainly targets the quadriceps, while also training the glutes, hamstrings, calves, hip stabilizers, and core. Because it is performed on one leg, it also challenges balance and lower-body coordination.
Is this exercise good for beginners?
Yes. The support makes it more beginner-friendly than a full pistol squat. Beginners should use a small range of motion, move slowly, and focus on keeping the working knee aligned with the toes.
How is this different from a pistol squat?
A pistol squat is usually performed without support and often requires more strength, balance, and mobility. The supported version reduces balance demands and helps you build the strength and control needed for harder single-leg squat progressions.
Should my knee go past my toes?
It can, depending on your ankle mobility and body proportions. The more important point is that the heel stays grounded and the knee tracks in the same direction as the toes without collapsing inward.
Why do I lose balance during the movement?
Balance issues often happen when the foot is unstable, the core is relaxed, or the hip shifts sideways. Use more support, reduce the range of motion, and focus on pressing the whole foot into the floor.
Can this help improve knee stability?
Yes, when performed with good alignment. It strengthens the muscles around the knee and improves control of the hip and ankle, which can support better knee tracking during squats, lunges, and athletic movement.
Recommended Equipment
- Suspension Trainer — provides adjustable assistance for supported single-leg squats and pistol squat progressions.
- Plyometric Box — useful for box-assisted single-leg squats and controlled depth practice.
- Resistance Bands Set — helpful for assisted squat progressions, glute activation, and lower-body warm-ups.
- Exercise Mat — adds comfort and traction for home lower-body training sessions.
- Ankle Mobility Slant Board — supports ankle mobility work, which can improve squat depth and heel contact.
Tip: Choose equipment that helps you move with better control. The goal is not to make the exercise easier forever, but to use assistance while building strength, balance, and clean single-leg mechanics.