Standing Biceps Curl Door Frame: Form, Muscles Worked, Sets, Tips & FAQ
Learn how to perform the Standing Biceps Curl Door Frame with proper form. Discover muscles worked, setup, step-by-step execution, sets and reps by goal, mistakes to avoid, FAQs, and recommended equipment.
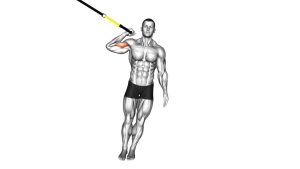
Standing Biceps Curl Door Frame
This exercise is especially useful for home workouts, minimalist training, and lifters who want a bodyweight-style biceps movement without traditional gym equipment. It challenges the biceps brachii through elbow flexion while also involving the brachialis, forearms, and grip. Because resistance depends on body position, the movement rewards smooth tempo, stable shoulders, and a controlled return to the starting position.
Quick Overview
| Body Part | Biceps |
|---|---|
| Primary Muscle | Biceps brachii |
| Secondary Muscle | Brachialis, brachioradialis, forearms, grip muscles |
| Equipment | Door frame or sturdy vertical support |
| Difficulty | Beginner to Intermediate |
Sets & Reps (By Goal)
- Muscle growth: 3–4 sets × 8–15 reps per arm with slow lowering and 45–75 sec rest
- Strength endurance: 2–4 sets × 12–20 reps per arm with smooth tempo and short rest
- Beginner skill practice: 2–3 sets × 6–10 controlled reps using an easier body angle
- Home arm finisher: 2–3 sets to near technical fatigue while keeping strict form
Progression rule: First increase control, range, and reps. Then make the exercise harder by leaning farther back or slowing the eccentric phase.
Setup / Starting Position
- Face the support: Stand facing a sturdy door frame or vertical support and grip it firmly with one hand.
- Set your feet: Place your feet so your body can lean back safely while staying balanced.
- Extend the working arm: Start with the elbow nearly straight but not aggressively locked out.
- Brace the torso: Keep the ribs down, core lightly engaged, and shoulders level.
- Create tension: Lean back enough to load the arm, but not so much that you lose control.
Tip: A more upright position makes the exercise easier. A deeper lean increases the amount of bodyweight resistance.
Execution (Step-by-Step)
- Start under tension: Grip the frame and lean back into the working arm with your body aligned and stable.
- Initiate the curl: Bend the elbow and pull your body toward the frame by contracting the biceps.
- Keep the shoulder quiet: Avoid shrugging, twisting, or yanking with the torso as you move upward.
- Reach peak contraction: Continue until your body is closer to the frame and the elbow is strongly flexed.
- Squeeze briefly: Pause for a moment at the top without collapsing posture.
- Lower with control: Slowly extend the arm and return to the start while resisting the descent.
- Repeat smoothly: Perform each rep with the same body angle, tempo, and range of motion.
Pro Tips & Common Mistakes
- Use body angle as resistance: Don’t rush to lean too far back before you can control the motion.
- Keep the wrist neutral: Avoid over-bending the wrist as you pull.
- Control the eccentric: The lowering phase is where a lot of growth stimulus comes from.
- Don’t swing the torso: Pulling with body momentum takes tension off the biceps.
- Avoid shoulder shrugging: Keep the neck relaxed and shoulders down.
- Don’t rush the top: A brief squeeze at peak contraction improves mind-muscle connection.
- Match both arms: If training one side at a time, give each arm the same reps and tempo.
FAQ
What muscles does the Standing Biceps Curl Door Frame work?
It mainly targets the biceps brachii, while the brachialis, brachioradialis, and forearm grip muscles assist throughout the motion.
Is this a good substitute for dumbbell curls?
It can be a very useful home alternative when you do not have weights. While it is not identical to a dumbbell curl, it still trains elbow flexion and biceps control effectively.
How do I make this exercise harder?
Lean farther back, slow the lowering phase, pause longer at the top, or perform more reps with strict form. The harder version should still feel controlled and stable.
Can beginners do this exercise?
Yes. Beginners can simply use a more upright body angle and shorter range until strength and coordination improve.
Should I train one arm at a time or both sides separately?
One arm at a time works well because it lets you focus on grip, elbow path, and equal effort on each side. Just keep the volume balanced between arms.
Recommended Equipment
- Resistance Bands Set — useful for adding more direct biceps work and other home arm exercises
- Door Anchor for Resistance Bands — expands your home setup for curls, rows, and banded upper-body training
- Resistance Bands for Biceps Curls — a practical option if you want adjustable tension beyond body angle alone
- Gym Grip Pads — can improve comfort and grip if your hands slip during high-rep arm work
- Heavy-Duty Door Anchor — helpful for a more secure band-based setup in a home training space
Tip: Choose sturdy, simple accessories that improve safety, grip, and training variety without making the setup complicated.