Resistance Band Isometric Biceps Hold: Form, Sets, Tips & FAQ
Learn the Resistance Band Isometric Biceps Hold to build biceps tension, control, and arm strength with step-by-step form, sets, tips, FAQs, and gear.
Resistance Band Isometric Biceps Hold
This exercise is especially useful when you want to train the biceps with low joint stress while still creating a strong contraction. Because the resistance band pulls against your hand continuously, the biceps must stay active throughout the hold. The goal is not to rush reps. The goal is to create a clean, steady contraction and maintain the same elbow angle without letting the band pull your arm backward.
Quick Overview
| Body Part | Biceps |
|---|---|
| Primary Muscle | Biceps brachii |
| Secondary Muscle | Brachialis, brachioradialis, forearm flexors, grip stabilizers |
| Equipment | Resistance band and stable anchor point |
| Difficulty | Beginner to Intermediate |
Sets & Reps (By Goal)
- Biceps activation: 2–3 sets × 10–20 second holds per arm, light-to-moderate band tension.
- Muscle growth / hypertrophy: 3–4 sets × 20–40 second holds per arm, controlled tension with a strong squeeze.
- Strength endurance: 3–5 sets × 30–45 second holds per arm, steady breathing and no body swing.
- Finisher after curls: 1–3 sets × 20–30 second holds per arm at the end of an arm workout.
- Beginner practice: 2 sets × 8–15 second holds per arm, focusing only on clean position and comfort.
Progression rule: Increase hold time first, then increase band tension. Do not progress if your shoulder rolls forward, your wrist bends back, or your elbow drifts away from the target position.
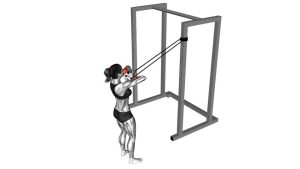
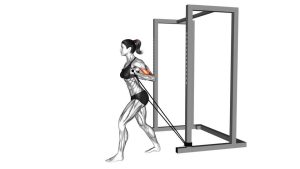
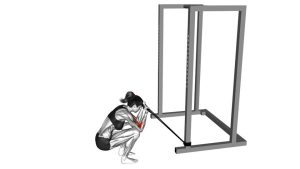
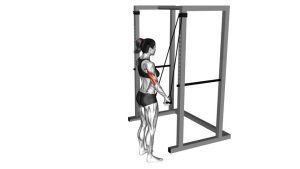
Setup / Starting Position
- Anchor the band: Secure the resistance band behind you at about hip to waist height using a stable anchor point.
- Hold the band: Grip the handle or band with one hand using a palm-up position to emphasize the biceps.
- Step forward slightly: Move away from the anchor until the band has light tension before the curl begins.
- Set your posture: Stand tall with your chest open, ribs controlled, and shoulders relaxed.
- Position the elbow: Keep the elbow close to your side or slightly behind the torso without letting it flare outward.
- Brace gently: Keep your core lightly engaged so your body does not lean or rotate during the hold.
- Prepare the wrist: Keep the wrist straight and aligned with the forearm before beginning the curl.
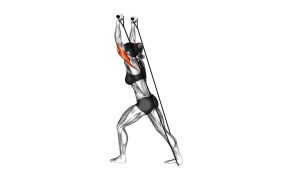
A behind-the-body band angle can place the biceps under a stretched starting position. Use a small range at first if you feel too much pull in the front of the shoulder.
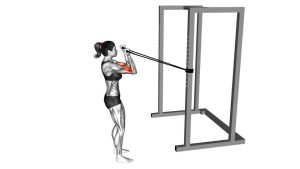
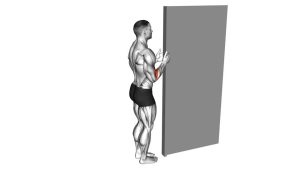
Execution (Step-by-Step)
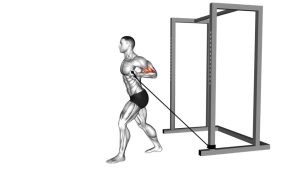
- Start with tension: Stand far enough from the anchor so the band is lightly stretched before you curl.
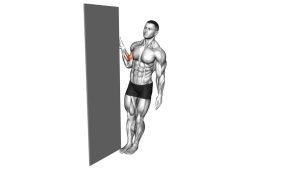
- Curl into position: Bend your elbow and bring your hand forward until your elbow reaches roughly a 70–90 degree angle.
- Stop and hold: Pause at the strongest position and hold the contraction without moving the elbow.
- Squeeze the biceps: Keep steady pressure through the palm-up grip and focus on the front of the upper arm.
- Control your shoulder: Keep the shoulder down and back. Do not let it roll forward as the band pulls behind you.
- Breathe during the hold: Avoid holding your breath. Use slow breathing to maintain control.
- Return slowly: Let the arm extend with control until you return to the starting position.
- Repeat or switch sides: Complete the full hold time on one arm before changing sides, or alternate arms between sets.
Pro Tips & Common Mistakes
Pro Tips
- Use a true isometric hold: Once you reach the hold position, freeze the elbow angle and maintain constant tension.
- Keep the palm up: A supinated grip helps place more direct emphasis on the biceps brachii.
- Control the band path: The band should pull from behind you, but your arm should stay stable and organized.
- Use moderate tension: Isometric work is most effective when you can hold the position without compensating.
- Think “elbow stays quiet”: The elbow should not swing forward, flare outward, or drift backward during the hold.
- Pair it with full curls: Use this after regular curls to extend time under tension and create a strong biceps finisher.
Common Mistakes
- Using too much band tension: Heavy tension often causes shoulder rolling, torso leaning, and poor elbow control.
- Turning it into a full curl: This variation is mainly a hold, not a fast repetition exercise.
- Letting the wrist bend back: A bent wrist reduces force transfer and may create wrist discomfort.
- Shrugging the shoulder: Keep the traps relaxed so the biceps remain the main working muscle.
- Leaning away from the band: Your body should stay still while the arm controls the resistance.
- Holding your breath: Breath-holding makes the exercise feel harder and can reduce control.
FAQ
What muscles does the Resistance Band Isometric Biceps Hold work?
It primarily works the biceps brachii. It also involves the brachialis, brachioradialis, forearms, and grip stabilizers because the hand must resist the band without losing position.
Is this exercise good for building biceps?
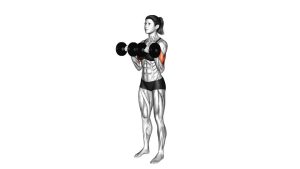
Yes. It can support biceps growth by increasing time under tension and improving contraction quality. For best results, combine it with full-range curl variations such as dumbbell curls, band curls, or cable curls.
How long should I hold the band curl position?
Most people should start with 10–20 seconds per arm. More advanced users can hold for 30–45 seconds if they can keep the elbow, shoulder, and wrist stable.
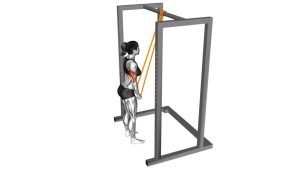
Should the band be anchored behind me?
Yes, for this version the band is anchored behind the body. This creates a strong tension line and can increase the stretch on the biceps at the starting position. Keep the shoulder comfortable and avoid excessive backward pull.
Can beginners do this exercise?
Yes. Beginners can use a light band and shorter holds. The key is to maintain good posture, avoid swinging, and stop before the form breaks down.
Why does my shoulder move during the hold?
Your band may be too heavy, or you may be standing too far from the anchor. Step closer, reduce tension, and focus on keeping the shoulder relaxed while the elbow stays near your side.
Recommended Equipment
- Resistance Bands with Handles — ideal for comfortable gripping during biceps holds and curl variations.
- Door Anchor for Resistance Bands — helps create a stable behind-the-body band angle at home.
- Loop Resistance Bands Set — useful for lighter arm activation, warm-ups, and controlled tension work.
- Adjustable Resistance Band Set — allows you to change resistance levels as your biceps control improves.
- Exercise Mat — helpful for home workouts, warm-ups, and floor-based accessory exercises.
Choose equipment that lets you keep smooth control. For this exercise, a stable anchor and manageable band tension are more important than using the heaviest resistance possible.