Band 45-Degrees One-Arm Biceps Curl: Form, Benefits, Sets & Mistakes
Learn how to do the Band 45-Degrees One-Arm Biceps Curl with proper form. Discover benefits, muscles worked, setup tips, sets and reps by goal, common mistakes, FAQs, and recommended equipment.
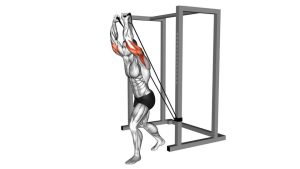
Band 45-Degrees One-Arm Biceps Curl
This curl variation is excellent for lifters who want to build the upper arms without relying on heavy free weights. The single-arm setup helps you train each side evenly, improve mind-muscle connection, and limit momentum. Since the resistance increases as the band stretches, the exercise rewards control, clean elbow flexion, and a strong squeeze at the top instead of swinging the arm.
Quick Overview
| Body Part | Biceps |
|---|---|
| Primary Muscle | Biceps brachii |
| Secondary Muscle | Brachialis, brachioradialis, forearm flexors, shoulder stabilizers |
| Equipment | Resistance band |
| Difficulty | Beginner to Intermediate |
Sets & Reps (By Goal)
- Muscle growth: 3–4 sets × 8–15 reps per arm with 45–75 seconds rest
- Strength-focused band training: 3–5 sets × 6–10 reps per arm with 60–90 seconds rest
- Endurance / high-rep burn: 2–3 sets × 15–20 reps per arm with 30–45 seconds rest
- Warm-up or activation: 1–2 sets × 12–15 controlled reps per arm using lighter tension
Progression rule: First improve control, squeeze, and full range of motion. Then increase reps, slow the lowering phase, or use a thicker band for more resistance.
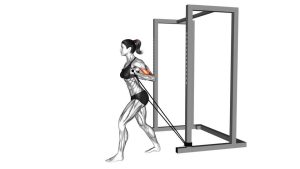
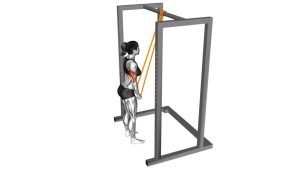
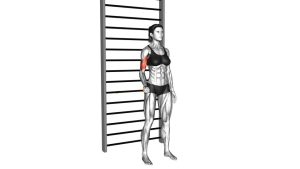
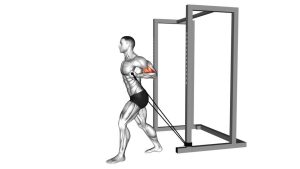
Setup / Starting Position
- Anchor the band low: Step on the band securely or attach it to a low anchor point.
- Grip with one hand: Use a supinated grip so your palm faces forward or slightly upward.
- Set the arm angle: Position the working arm slightly behind your torso at roughly 45 degrees.
- Stand tall: Keep your chest up, ribs stacked, and core lightly braced.
- Start with elbow extended: The arm should be nearly straight at the bottom without locking out hard.
- Relax the shoulder: Avoid shrugging or rolling the shoulder forward before the rep begins.
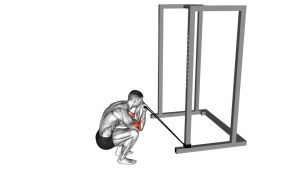
Tip: A staggered stance can improve balance and make it easier to keep the torso still during single-arm reps.
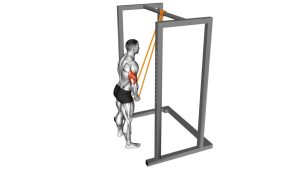
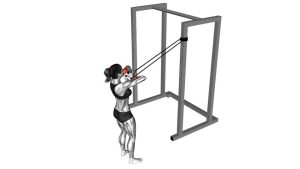
Execution (Step-by-Step)
- Begin from the stretched position: Let the band create tension while keeping the arm slightly behind the body.
- Curl the handle upward: Bend the elbow and bring your hand toward your shoulder in a smooth arc.
- Keep the elbow mostly fixed: Do not let it drift far forward as you lift.
- Squeeze at the top: Pause briefly when the biceps are fully contracted.
- Lower under control: Resist the band on the way down instead of letting it pull your arm back quickly.
- Return to full tension: Finish the rep in the stretched bottom position and repeat evenly.
Pro Tips & Common Mistakes
- Keep your upper arm quiet: A stable elbow improves isolation and keeps tension on the biceps.
- Use a full but controlled range: Don’t cut the bottom short or rush through the top.
- Emphasize the eccentric: A 2–4 second lowering phase can increase muscle stimulus.
- Don’t swing your torso: Momentum reduces the training effect and shifts stress away from the biceps.
- Don’t over-bend the wrist: Excessive wrist flexion can make the curl feel awkward and reduce clean biceps loading.
- Match both sides: Perform the same reps and tempo on each arm to avoid imbalances.
- Adjust band tension wisely: Use enough resistance to challenge the top without ruining form at the bottom.
FAQ
What makes the 45-degree arm angle different from a regular band curl?
The slight backward arm angle puts the biceps, especially the long head, in a more stretched starting position. That can change how the curl feels and may improve the training stimulus for upper-arm development.
Is this exercise good for building bigger biceps?
Yes. It combines unilateral training, continuous band tension, and a strong peak contraction. When performed with controlled reps and progressive overload, it can be very effective for biceps hypertrophy.
Should I train one arm at a time or alternate sides?
Either works. Many people prefer finishing one side first so they can focus fully on technique and avoid losing rhythm. Alternating arms is also fine if you want a faster workout flow.
Where should I feel this exercise most?
You should mainly feel it in the front of the upper arm. A little forearm involvement is normal, but the biceps should do the bulk of the work throughout the curl.
Can beginners use this exercise?
Yes. Beginners can start with a lighter band and focus on smooth reps, a stable elbow, and full control on the lowering phase before increasing resistance.
Recommended Equipment
- Resistance Bands Set — useful for scaling band tension as you get stronger
- Resistance Band Door Anchor — helpful for low and secure setup options at home
- Resistance Band Handles — can improve grip comfort during single-arm curls
- Workout Gloves or Grip Pads — useful if grip fatigue limits your biceps work
- Exercise Mat — provides a stable, comfortable training surface for home workouts
Tip: Choose band resistance that lets you control both the lift and the lowering phase without twisting or pulling your shoulder out of position.