Bridge Mountain Climber Cross-Body: Core, Glutes & Obliques Guide
Learn the Bridge Mountain Climber Cross-Body for stronger glutes, abs, and obliques with step-by-step form, sets, tips, FAQs, and gear.
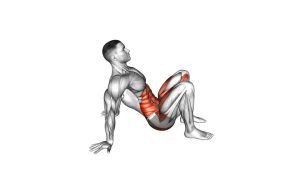
Bridge Mountain Climber (Cross-Body)
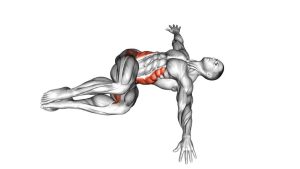
This exercise works best when the bridge position stays strong from the first rep to the last rep. Your planted foot should press firmly into the floor, your ribs should stay controlled, and your hips should not collapse when one leg leaves the ground. Because the knee moves across the body, the exercise adds a rotational core challenge that targets the obliques while the glutes fight to keep the pelvis level.
Quick Overview
| Body Part | Obliques, Glutes |
|---|---|
| Primary Muscle | Glutes, obliques, and rectus abdominis |
| Secondary Muscle | Hamstrings, hip flexors, transverse abdominis, lower back stabilizers |
| Equipment | No equipment required; optional exercise mat |
| Difficulty | Intermediate because it requires single-leg bridge control and cross-body coordination |
Sets & Reps (By Goal)
- Core activation: 2–3 sets × 8–10 reps per side with a slow controlled tempo.
- Glute endurance: 3–4 sets × 10–14 reps per side while keeping the hips lifted the entire time.
- Oblique control: 3 sets × 8–12 reps per side with a 1-second pause at the cross-body position.
- Conditioning finisher: 2–4 rounds × 30–45 seconds, alternating sides smoothly without rushing.
- Beginner progression: 2 sets × 6–8 reps per side after mastering a basic glute bridge.
Progression rule: Add reps before adding speed. Once your hips stay level, you can increase time under tension, pause longer at the top, or move at a slightly quicker pace while keeping clean control.
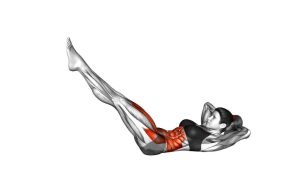
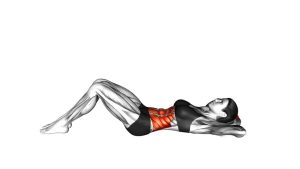
Setup / Starting Position
- Lie on your back: Place your upper back, shoulders, and head comfortably on the floor.
- Set your feet: Bend both knees and place your feet flat on the ground about hip-width apart.
- Position your arms: Keep your arms on the floor beside your body with palms down for balance.
- Brace your core: Gently tighten your abs and keep the ribs from flaring upward.
- Lift into a bridge: Press through your heels and raise your hips until your shoulders, hips, and knees form a strong diagonal line.
- Keep the pelvis level: Before moving the legs, make sure both hips are even and your lower back feels supported.
Tip: Keep your feet close enough that you can push through the heels without your hamstrings cramping. If your lower back takes over, slightly tuck the pelvis and squeeze the glutes harder before starting the knee drive.
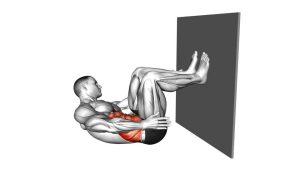
Execution (Step-by-Step)
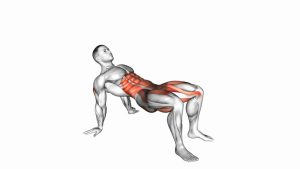
- Hold the bridge: Start with both feet grounded and hips lifted. Keep the glutes active.
- Lift one foot: Slowly bring one foot off the floor without letting the opposite hip drop.
- Drive across the body: Move the knee diagonally toward the opposite side of your torso or chest.
- Control the rotation: Let the obliques work, but avoid twisting so far that the hips roll open.
- Pause briefly: Hold the cross-body position for a moment while keeping the bridge high.
- Return the foot: Bring the leg back down slowly and replant the foot with control.
- Switch sides: Repeat the same diagonal knee drive with the opposite leg.
- Continue alternating: Move side to side while maintaining steady breathing and stable hip height.
Pro Tips & Common Mistakes
Pro Tips
- Push through the planted heel: This keeps the glute working and prevents the bridge from collapsing.
- Keep your ribs down: A controlled rib position helps the abs stay engaged and protects the lower back.
- Use a diagonal knee path: Aim the knee across the body, not just straight toward the chest.
- Pause at the top: A short pause increases oblique engagement and improves control.
- Move quietly: Smooth reps are better than fast reps because stability is the main goal.
Common Mistakes
- Letting the hips drop: This reduces glute tension and turns the movement into a weak knee lift.
- Overarching the lower back: Keep the pelvis slightly tucked so the glutes and abs share the work.
- Driving the knee too aggressively: Excessive momentum can twist the hips and irritate the lower back.
- Holding the breath: Breathe steadily so your core stays controlled without unnecessary bracing.
- Placing the feet too far away: This can overwork the hamstrings and make the bridge harder to stabilize.
FAQ
What muscles does the Bridge Mountain Climber Cross-Body work?
It mainly works the glutes, obliques, and abs. The hamstrings, hip flexors, and deep core muscles also assist because one leg moves while the body holds a bridge position.
Is the Bridge Mountain Climber Cross-Body good for abs?
Yes. It trains the abs to stabilize the trunk while the knee moves diagonally across the body. The cross-body action also increases oblique involvement compared with a regular bridge march.
Why do my hips drop during this exercise?
Hips usually drop because the glutes are not maintaining enough tension or the rep speed is too fast. Start with a normal glute bridge, then progress to bridge marches before using the full cross-body version.
Should I feel this in my lower back?
You may feel your lower back stabilizing lightly, but it should not be the main working area. If your lower back feels strained, lower the hips slightly, tuck the pelvis, brace the abs, and focus on squeezing the glutes.
Is this exercise beginner-friendly?
It can be challenging for beginners because it combines a bridge hold with single-leg movement. Beginners should first master the basic glute bridge and bridge march before adding the cross-body knee drive.
Can I use this exercise in a home workout?
Yes. It requires no equipment and works well in home core workouts, glute activation routines, lower-body warm-ups, and bodyweight conditioning sessions.
Recommended Equipment
- Exercise Mat — provides comfort for your back, shoulders, and hips during floor-based bridge work.
- Non-Slip Yoga Mat — helps keep your feet planted so your bridge stays stable during alternating knee drives.
- Mini Resistance Bands — useful for glute activation drills before progressing into the full exercise.
- Core Sliders — helpful for advanced bridge and core variations that require smooth leg movement.
- Foam Roller — useful for warming up the glutes, hamstrings, and hips before training.
Tip: You do not need equipment to perform this exercise well. A good mat simply improves comfort and helps you maintain better control through the full range of motion.