Front Plank with Arm and Leg Lift: Form, Core Benefits, Sets & Tips
Learn the Front Plank with Arm and Leg Lift to build core stability, glute control, balance, and anti-rotation strength with proper form.
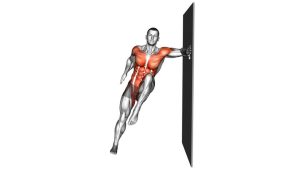
Front Plank with Arm and Leg Lift
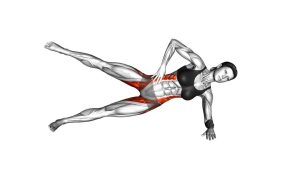
This movement is best understood as a core stability drill, not a speed exercise. During the video, the body remains almost still while the opposite arm and leg extend away from the center line. That small change creates a strong anti-rotation demand. Your core must prevent the hips from twisting, your glutes must control the lifted leg, and your supporting shoulder must stay strong without collapsing.
Use this exercise when you already have a solid basic plank. If your hips sag, your lower back arches, or your body rotates every time you lift a limb, return to easier plank variations first. Clean control matters more than range, speed, or long hold times.
Quick Overview
| Body Part | Core |
|---|---|
| Primary Muscle | Rectus abdominis, transverse abdominis, and obliques |
| Secondary Muscle | Glutes, shoulders, erector spinae, serratus anterior, hip stabilizers |
| Equipment | No equipment required; exercise mat recommended |
| Difficulty | Intermediate to Advanced |
Sets & Reps (By Goal)
- Core stability: 3 sets × 6–10 reps per side with a slow 2–3 second lift.
- Anti-rotation control: 3–4 sets × 5–8 reps per side with a 2–5 second hold at the top.
- Strength endurance: 2–3 sets × 8–12 reps per side with steady breathing and clean alignment.
- Workout finisher: 2 sets × 30–45 seconds alternating sides without rushing.
- Beginner progression: 2–3 sets × 4–6 reps per side, lifting only one limb at a time before combining arm and leg.
Progression rule: First improve control, then increase hold time, then add reps. Do not progress if your hips twist, your lower back drops, or your shoulders lose position.
Setup / Starting Position
- Start in a front plank: Place your forearms on the floor with elbows under your shoulders. Keep your forearms parallel and press gently into the ground.
- Extend your legs: Step both feet back until your body forms a straight line from head to heels.
- Set your feet: Keep your feet about hip-width apart. A slightly wider stance gives more stability, especially when learning.
- Brace your core: Pull your ribs down, tighten your abs gently, and avoid letting your belly drop toward the floor.
- Engage your glutes: Squeeze your glutes lightly to keep your pelvis stable and protect your lower back.
- Set your neck: Keep your head neutral and look down at the floor. Do not lift your chin or tuck too hard.
- Prepare to move slowly: Before lifting, create full-body tension from shoulders to heels.
Tip: If you are new to this exercise, start with a regular forearm plank. Then try lifting only one arm or only one leg before combining opposite arm and opposite leg.
Execution (Step-by-Step)
- Hold a strong plank: Begin with your elbows under your shoulders, legs straight, hips level, and abs braced.
- Shift weight slightly: Transfer a small amount of pressure into the supporting forearm and opposite foot. Keep this shift subtle.
- Lift one arm forward: Reach one arm straight in front of your body. Keep the shoulder controlled and avoid shrugging.
- Lift the opposite leg: Raise the opposite leg behind you until it reaches about hip height. Do not arch your lower back to lift higher.
- Create a long line: Reach the lifted arm forward and the lifted leg backward as if someone is pulling you in two directions.
- Hold briefly: Pause for 1–5 seconds while keeping your hips square to the floor.
- Lower with control: Return the hand and foot to the floor slowly. Avoid dropping, twisting, or bouncing.
- Switch sides: Repeat with the opposite arm and opposite leg. Keep each rep smooth and controlled.
Pro Tips & Common Mistakes
- Keep the hips level: The most common mistake is rotating the pelvis when the arm and leg lift. Imagine balancing a glass of water on your lower back.
- Do not lift the leg too high: A high leg lift often causes lower-back arching. Lift only to hip height or slightly below.
- Reach long, not high: Think about length through the arm and leg instead of chasing maximum height.
- Brace before you move: Set your abs and glutes first. Then lift the limbs. This keeps the movement controlled.
- Avoid shoulder collapse: Push the supporting forearm into the floor and keep space between the shoulder and ear.
- Do not rush reps: Fast reps usually hide poor control. Use a slow lift, brief pause, and slow return.
- Control your breathing: Exhale gently during the lift and keep breathing during the hold. Do not hold your breath for every rep.
- Use a wider foot stance if needed: This gives more balance and helps you learn the anti-rotation pattern.
- Stop before form breaks: End the set when your hips begin to twist or your lower back starts to sag.
FAQ
What muscles does the Front Plank with Arm and Leg Lift work?
It mainly works the core muscles, including the rectus abdominis, transverse abdominis, and obliques. It also trains the glutes, shoulders, serratus anterior, lower-back stabilizers, and hip stabilizers.
Is this exercise good for abs?
Yes. It is especially useful for building strong, stable abs because the core must resist rotation and prevent the lower back from sagging while the arm and opposite leg move.
Is the Front Plank with Arm and Leg Lift beginner-friendly?
It is usually better for intermediate trainees. Beginners can start with a regular plank, then progress to a single-arm plank reach, single-leg plank lift, and finally the full opposite arm and leg lift.
Why do my hips twist during this exercise?
Hip twisting usually means your core and hip stabilizers are not controlling the anti-rotation demand yet. Widen your feet, reduce the lift height, slow down, and focus on keeping your pelvis square to the floor.
Should I do this on my hands or forearms?
The forearm version is often more stable and easier on the wrists. The high-plank version on the hands can be used as a progression, but it requires more shoulder and wrist control.
How high should I lift my arm and leg?
Lift the arm to about shoulder height and the leg to about hip height. If your lower back arches or your hips rotate, lower the range and prioritize control.
Recommended Equipment
- Non-Slip Exercise Mat — provides forearm comfort and better grip during plank variations.
- Foam Forearm Plank Pad — helps reduce elbow pressure during longer plank holds.
- Resistance Bands Set — useful for glute activation drills and core warm-ups before planks.
- Core Sliders — excellent for progressing plank stability, body saws, and controlled core work.
- Stability Ball — helpful for advanced core stability progressions and anti-rotation training.
Tip: Start with a supportive mat before adding tools. This exercise is already challenging because of the stability demand, so equipment should support better control rather than make the movement harder too soon.