Band Decline Sit-Up: Core Form, Benefits, Sets, Tips & FAQ
Learn the Band Decline Sit-Up for stronger abs using band resistance. Includes setup, form cues, sets, common mistakes, FAQs, and equipment.
Band Decline Sit-Up
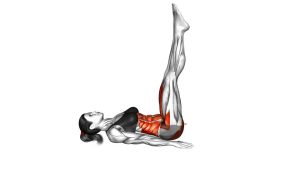
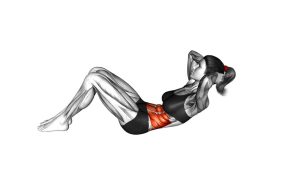
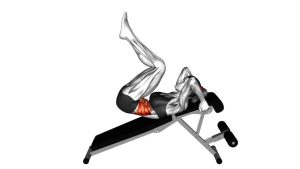
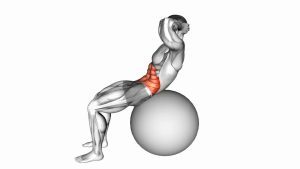
This exercise is best for lifters who already control regular decline sit-ups well. The visible movement begins from a reclined position on the bench, then the head, shoulders, and torso lift together into a controlled sit-up. As the band stretches, the resistance increases. Therefore, every repetition should stay smooth, deliberate, and stable from the bottom to the top.
Quick Overview
| Body Part | Core |
|---|---|
| Primary Muscle | Rectus abdominis |
| Secondary Muscle | Hip flexors, obliques, deep core stabilizers |
| Equipment | Decline bench and resistance band |
| Difficulty | Intermediate to advanced |
Sets & Reps (By Goal)
- Core strength: 3–4 sets × 6–10 reps with a controlled 2–3 second lowering phase.
- Muscle endurance: 2–4 sets × 10–15 reps using a lighter band and steady tempo.
- Hypertrophy-focused abs training: 3–5 sets × 8–12 reps with moderate band tension.
- Technique practice: 2–3 sets × 6–8 reps using low tension and a slower range of motion.
Progression rule: First improve control and range. Then increase band tension, decline angle, or total reps only when every rep stays smooth.
Setup / Starting Position
- Set the bench: Use a decline bench that allows your feet or lower legs to stay secured under the pads.
- Anchor the band: Attach the resistance band behind the bench so it creates tension as you sit up.
- Lie back carefully: Position your body on the bench with your head lower than your hips.
- Secure your legs: Keep the knees bent and the lower legs locked under the padded rollers.
- Hold the band: Grip the band with both hands near the head, shoulders, or upper chest, depending on what is comfortable and controlled.
- Brace the core: Before moving, tighten your abs lightly and keep the torso stable against the bench.
Use a lighter band when learning this exercise. Since tension increases as the torso rises, a band that feels easy at the bottom can feel much harder near the top.
Execution (Step-by-Step)
- Start from the declined position: Lie back on the bench with the band held securely and your feet fixed under the pads.
- Begin the sit-up: Lift the head and shoulders first, then continue curling the torso upward in a controlled motion.
- Keep the band steady: Hold the band close to your upper body without yanking it forward with your arms.
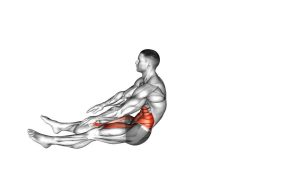
- Sit up with control: Continue rising until your torso reaches the top position shown in the movement.
- Pause briefly: Maintain abdominal tension at the top instead of relaxing or leaning back suddenly.
- Lower slowly: Reverse the movement and return the upper back, shoulders, and head toward the bench under control.
- Reset before the next rep: Keep your legs locked in place, breathe, and repeat without bouncing.
Pro Tips & Common Mistakes
Pro Tips
- Use a smooth tempo: Rise with control, pause briefly, then lower slowly to keep the abs working.
- Keep tension consistent: Do not let the band snap or pull you out of position.
- Brace before each rep: A light abdominal brace helps protect the lower back during the decline position.
- Control the bottom range: Touch down softly instead of dropping onto the bench.
- Match band strength to your level: Choose a band that allows clean reps without neck pulling or hip swinging.
Common Mistakes
- Using too much band tension: Excess resistance can cause jerky reps and poor control.
- Pulling with the arms: The hands should hold the band, but the abs should perform the sit-up.
- Bouncing from the bottom: Momentum reduces core tension and may stress the spine.
- Arching or collapsing during lowering: Lower slowly and keep the torso organized.
- Letting the feet shift: Keep the legs secured so the movement stays stable.
FAQ
What muscles does the Band Decline Sit-Up work?
The main target is the rectus abdominis. However, the hip flexors, obliques, and deeper core stabilizers also assist because the body must control the torso on a decline bench.
Is the Band Decline Sit-Up harder than a regular decline sit-up?
Yes. The resistance band adds extra load, especially as you sit up and the band stretches. As a result, this version is usually more challenging than a bodyweight decline sit-up.
Should beginners do this exercise?
Most beginners should first master regular sit-ups, crunches, and bodyweight decline sit-ups. Then, once control improves, they can use a light band and a smaller range of motion.
Where should I hold the band?
In the video, the band is held near the head or upper chest area. Keep it close enough to stay controlled, but avoid pulling the head or neck forward.
Can this exercise replace weighted decline sit-ups?
It can be used as an alternative. However, band resistance feels different because it becomes harder as the band stretches. Weighted sit-ups usually provide a more constant load.
Why does the top position feel harder?
The band stretches more as you rise. Therefore, the resistance increases near the top of the sit-up, which makes the final part of the movement more demanding.
Recommended Equipment
- Decline Sit-Up Bench — essential for setting the body at a decline angle and securing the legs.
- Resistance Bands Set — allows different tension levels for progressive resisted sit-ups.
- Heavy-Duty Band Anchor — helps secure the band safely to a stable point behind the bench.
- Exercise Mat — useful around the bench area for comfort, setup, and floor protection.
- Ab Workout Bench with Leg Rollers — provides stable lower-leg support for controlled decline core training.
Choose stable equipment first. Since this movement uses both a decline angle and band tension, the bench and anchor point must stay secure during every repetition.