Standing Abdominal Vacuum: Form, Core Benefits, Sets, Tips & FAQ
Learn the Standing Abdominal Vacuum to train deep core control, improve waist tension, and build better posture with step-by-step form tips.
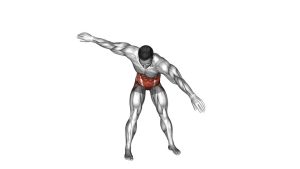
Standing Abdominal Vacuum
This exercise works best when the movement stays small, calm, and precise. Instead of using momentum, focus on creating a clean inward abdominal hollow while keeping the chest lifted, shoulders relaxed, and feet planted. In addition, avoid forcing the stomach inward so aggressively that your posture collapses. The best reps look quiet, steady, and controlled.
Quick Overview
| Body Part | Core |
|---|---|
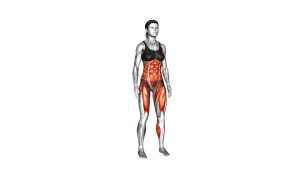
| Primary Muscle | Transverse abdominis |
| Secondary Muscle | Deep abdominal stabilizers, internal obliques, posture-supporting core muscles |
| Equipment | None |
| Difficulty | Beginner to intermediate, depending on hold length and breath control |
Sets & Reps (By Goal)
- Beginner core awareness: 2–3 sets × 5–8 controlled holds, 3–5 seconds each
- Deep core endurance: 3–4 sets × 6–10 holds, 5–10 seconds each
- Posture and waist control: 2–4 sets × 8–12 smooth reps, using a short hold each rep
- Daily activation drill: 1–2 light sets × 5–8 reps, keeping effort easy and clean
Progression rule: First improve control, then increase hold time. However, do not progress if your shoulders rise, your torso bends, or your breathing feels strained.
Setup / Starting Position
- Stand upright: Place your feet about hip-width apart and keep your weight balanced.
- Relax your arms: Let the arms hang naturally by your sides, as shown in the video.
- Set your posture: Keep the chest gently lifted, shoulders relaxed, and neck neutral.
- Start with a relaxed abdomen: Before the vacuum, allow the stomach to sit naturally.
- Prepare slowly: Do not rush the setup, because the exercise depends on smooth control.
Tip: A mirror can help you see whether the abdomen is drawing inward while the rest of the body remains still.
Execution (Step-by-Step)
- Begin tall: Stand in the starting position with your torso vertical and your shoulders quiet.
- Prepare your breath: Gently exhale before pulling the abdomen inward.
- Draw the abdomen in: Pull the stomach inward toward the spine while keeping the ribcage lifted.
- Create the hollow: Continue drawing inward until the waist visibly narrows and the front of the abdomen looks hollow.
- Hold the position: Maintain the inward pull briefly without bending forward or shrugging.
- Release slowly: Let the abdomen return to neutral with control instead of suddenly relaxing.
- Reset posture: Stand normally again before starting the next repetition.
Pro Tips & Common Mistakes
- Keep the body still: The video shows a stable standing position, so avoid swaying or leaning.
- Do not crunch: This is not a standing crunch. Instead, keep the spine tall and the abdomen hollowed.
- Use a gradual pull: The best contraction builds smoothly rather than snapping inward.
- Avoid shoulder tension: Keep the shoulders down and relaxed throughout the hold.
- Do not overhold: Long holds can reduce quality. Therefore, stop each rep before your posture breaks.
- Release with control: The return phase matters because it teaches you to manage abdominal tension.
- Practice consistency: Short, frequent practice often works better than one hard session.
FAQ
What does the Standing Abdominal Vacuum work?
It mainly targets the transverse abdominis, which is a deep abdominal muscle involved in core control and abdominal bracing. In addition, it trains body awareness because you must keep the torso steady while pulling the abdomen inward.
Should I bend forward during the exercise?
No. In the uploaded video, the subject stays upright. Therefore, keep your posture tall and let the abdominal hollowing create the movement rather than bending the spine.
How long should I hold each abdominal vacuum?
Start with 3–5 seconds per hold. After that, gradually increase to 8–10 seconds only if you can stay relaxed, controlled, and stable.
Is the Standing Abdominal Vacuum good for beginners?
Yes, it can be beginner-friendly when the holds are short and gentle. However, beginners should avoid forcing long breath holds or aggressive abdominal pressure.
Why do I feel my shoulders tense up?
Shoulder tension usually means you are trying too hard or holding your breath too forcefully. Reduce the intensity, relax your arms, and focus on drawing the abdomen inward without lifting the shoulders.
Can I do this exercise every day?
Many people can practice light abdominal vacuum reps daily. However, keep the effort moderate and stop if you feel dizziness, discomfort, or excessive pressure.
Recommended Equipment (Optional)
- Full-Length Workout Mirror — helps you monitor posture, abdominal hollowing, and shoulder position
- Yoga Mat — useful for warm-ups, breathing drills, and floor-based core practice
- Light Posture Corrector — can provide posture awareness, although it should not replace active training
- Resistance Bands Set — helpful for pairing the vacuum with posture-supporting rows and pull-aparts
- Breathing Trainer — optional tool for improving breathing awareness and respiratory control
Tip: Equipment is optional for this exercise. Most importantly, use tools only if they improve awareness without causing strain, pressure, or discomfort.