Power Sled Push: Proper Form, Muscles Worked, Sets, Tips & FAQ
Learn the Power Sled Push for explosive leg drive, conditioning, and lower-body strength. Includes setup, steps, sets, mistakes, FAQs, and equipment.
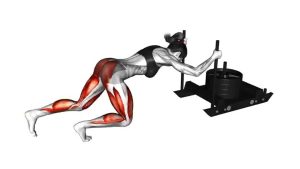
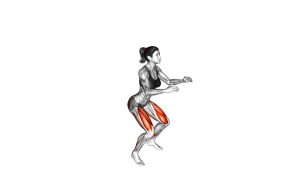
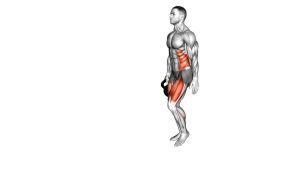
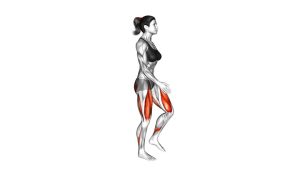
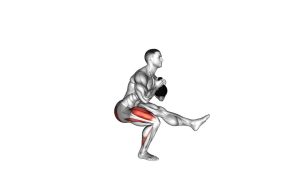
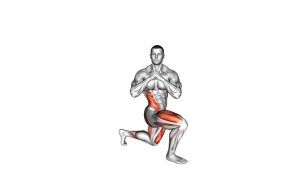
Power Sled Push
This exercise works best when the body stays connected from the hands to the feet. The arms hold the sled firmly, the torso remains braced, and the legs create the main driving force. Each step should feel short, strong, and deliberate rather than long, loose, or bouncy.
Quick Overview
| Body Part | Legs |
|---|---|
| Primary Muscle | Quadriceps |
| Secondary Muscle | Glutes, hamstrings, calves, core, shoulders, upper back |
| Equipment | Power sled, weight plates, turf or sled track |
| Difficulty | Intermediate; scalable for beginners with lighter loads |
Sets & Reps (By Goal)
- Power development: 4–6 sets × 10–20 meters with heavy but fast pushes, 90–150 sec rest
- Conditioning: 6–10 rounds × 15–30 meters, 45–90 sec rest
- Strength focus: 4–5 sets × 10–15 meters with heavier load, 2–3 min rest
- Beginner technique: 3–5 sets × 10–15 meters with light load, 60–90 sec rest
- Finisher: 5–8 rounds × 15–25 meters at moderate load, controlled rest periods
Progression rule: Improve posture, stride rhythm, and control before adding weight. Increase distance or load gradually while keeping the same powerful forward lean.
Setup / Starting Position
- Load the sled: Add a weight that allows strong movement without breaking posture.
- Grip the handles: Hold the sled poles or handles firmly with both hands.
- Lean forward: Angle your body forward so your chest points toward the sled path.
- Brace your core: Keep ribs controlled, spine neutral, and hips aligned with the torso.
- Set your feet: Start in a staggered stance with one foot ready to drive.
- Create pressure: Push lightly into the sled before moving so your whole body is connected.
Tip: A lower body angle usually creates a stronger horizontal force. Avoid standing too tall before the sled begins moving.
Execution (Step-by-Step)
- Drive through the ground: Push the floor backward with your front leg to start moving the sled.
- Keep constant hand pressure: Do not let your arms relax or disconnect from the sled.
- Use short powerful steps: Step quickly under your hips instead of reaching far forward.
- Extend the hips and knees: Push each leg back with strong quad and glute action.
- Stay low: Maintain a forward torso angle throughout the push.
- Keep the spine neutral: Avoid rounding the back or lifting the head too high.
- Continue with rhythm: Alternate legs in a smooth, piston-like drive.
- Finish under control: Slow down gradually and keep posture until the sled stops.
Pro Tips & Common Mistakes
- Push the ground back: Think about driving your feet into the floor, not simply shoving the sled with your arms.
- Keep arms stable: The arms transfer force; they should not bend and press like a chest exercise.
- Avoid standing upright: A tall posture reduces forward force and makes the push less efficient.
- Do not overstride: Long steps can reduce power and place extra stress on the hips and low back.
- Brace your core: A loose midsection leaks power and may cause the lower back to arch or round.
- Match load to goal: Use heavier loads for strength and lighter/moderate loads for speed or conditioning.
- Control breathing: Breathe forcefully but do not hold your breath for long pushes.
- Use a clear path: Sled work needs open space and a surface that allows smooth movement.
FAQ
What muscles does the Power Sled Push work?
The Power Sled Push mainly works the quadriceps, while also training the glutes, hamstrings, calves, core, shoulders, and upper back. It is a full-body conditioning drill, but the legs produce most of the force.
Is the sled push good for building leg strength?
Yes. Heavier sled pushes can build strong leg drive, especially through the quads and glutes. For strength, use a heavier load, shorter distance, and longer rest periods.
Is the Power Sled Push good for fat loss and conditioning?
Yes. Sled pushes are excellent for high-effort conditioning because they train large muscle groups and can be performed in intervals. Use moderate loads, repeated rounds, and controlled rest periods.
Should I use heavy or light weight?
It depends on the goal. Use heavy loads for strength, moderate loads for conditioning, and lighter loads for speed, acceleration, and technique work.
Why does my lower back hurt during sled pushes?
Low-back discomfort often comes from poor bracing, too much load, overstriding, or letting the hips rise too high. Reduce the weight, keep the spine neutral, and focus on short powerful steps.
Can beginners do the Power Sled Push?
Yes, beginners can perform it with a light sled load and shorter distances. The key is learning proper posture, bracing, and step rhythm before increasing intensity.
Recommended Equipment
- Power Push Sled — the main tool for sled push training, strength work, and conditioning drills
- Olympic Weight Plates — used to adjust sled resistance for strength, power, or conditioning goals
- Turf Training Mat — useful for smoother sled movement and safer indoor training surfaces
- Stable Training Shoes — improves grip, foot stability, and force transfer during heavy pushes
- Sled Harness — adds variety for forward drags, resisted walks, and athletic conditioning work
Tip: Choose equipment based on your training surface. A sled that works well on turf may not move the same way on rubber flooring, concrete, or grass.