Barbell One-Leg Squat: Form, Muscles, Sets, Tips & FAQ
Learn the Barbell One-Leg Squat for stronger quads, glutes, balance, and single-leg strength with setup, form cues, sets, mistakes, FAQs, and equipment.
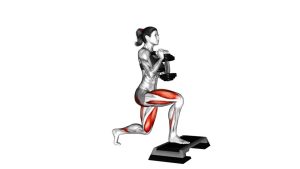
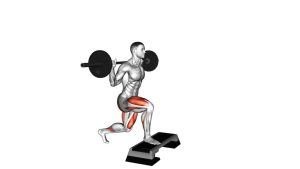
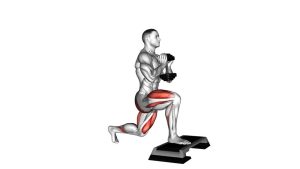
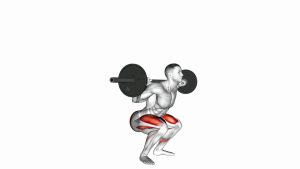
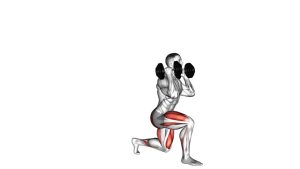
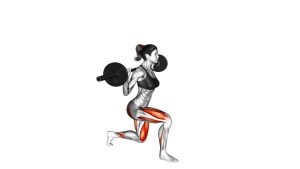
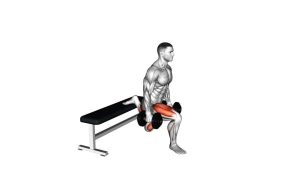
Barbell One-Leg Squat
This exercise works best when the lifter keeps the barbell stable, the front foot flat, and the descent controlled. Because the movement places most of the load on one leg, it is more demanding than a regular split squat and requires strong balance, core bracing, and clean knee tracking. The front leg should do the majority of the work, while the elevated rear leg acts mainly as a support point for balance.
Quick Overview
| Body Part | Legs |
|---|---|
| Primary Muscle | Quadriceps |
| Secondary Muscle | Glutes, hamstrings, adductors, calves, core stabilizers |
| Equipment | Barbell, weight plates, bench or stable platform, squat rack recommended |
| Difficulty | Advanced because it requires balance, mobility, unilateral strength, and barbell control |
Sets & Reps (By Goal)
- Strength: 3–5 sets × 4–6 reps per leg using controlled heavy loading and 90–150 sec rest
- Muscle growth: 3–4 sets × 8–12 reps per leg with a steady tempo and 60–90 sec rest
- Balance and control: 2–4 sets × 8–10 reps per leg using light-to-moderate weight and slow reps
- Lower-body conditioning: 2–3 sets × 12–15 reps per leg with moderate load and short rest
Progression rule: Add reps first, then add small weight increases. Never increase load if balance, depth, or knee alignment becomes inconsistent.
Setup / Starting Position
- Set the barbell: Place the barbell on a squat rack at upper-chest height so you can unrack it safely.
- Position the bar: Rest the bar across your upper traps, similar to a high-bar back squat position.
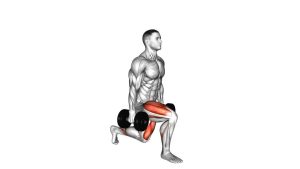
- Choose your stance: Step one foot forward and place the opposite foot behind you on a bench or stable platform.
- Root the front foot: Keep the heel, big toe, and little toe connected to the floor for a strong tripod base.
- Brace your core: Keep your ribs down, chest controlled, and spine neutral before starting the descent.
- Check distance: Your front foot should be far enough forward that the knee can bend naturally without the heel lifting.
Tip: Before adding weight, practice the bodyweight version to find the correct distance between your front foot and the bench.
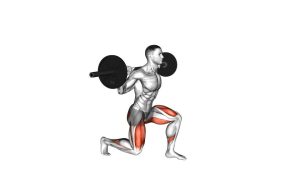
Execution (Step-by-Step)
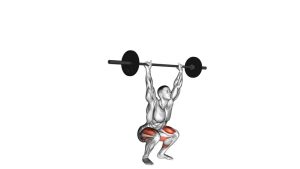
- Start tall: Stand with the barbell secure, front foot planted, rear foot elevated, and hips facing forward.
- Begin the descent: Bend the front knee and lower your hips straight down under control.
- Keep the front foot grounded: Maintain pressure through the mid-foot and heel without letting the heel rise.
- Lower to depth: Descend until the front thigh approaches parallel or the rear knee comes close to the floor.
- Control the bottom: Pause briefly without bouncing, collapsing, or shifting your weight backward.
- Drive upward: Push through the front leg and extend the knee and hip together to return to the top.
- Reset before the next rep: Regain balance, keep the bar steady, and repeat with the same controlled path.
Pro Tips & Common Mistakes
- Keep the bar over the working leg: A stable vertical bar path helps you stay balanced and strong.
- Do not rush the descent: Lower slowly to protect the knee and improve muscle tension.
- Avoid knee collapse: Keep the front knee tracking in line with the toes.
- Do not bounce from the bottom: Use strength, not momentum, to drive upward.
- Do not overuse the back leg: The rear foot should assist balance, not turn the movement into a two-leg push.
- Keep your torso controlled: A slight forward lean is normal, but avoid rounding the back or tipping excessively.
- Use a squat rack: Because the barbell is loaded on the back, safe unracking and reracking are important.
- Match both sides: Use the same stance length, depth, tempo, and reps on each leg.
FAQ
Is the Barbell One-Leg Squat the same as a Bulgarian split squat?
It is very similar when the rear foot is elevated on a bench. In this version, the barbell is placed across the upper back, and the front leg performs most of the work through a deep single-leg squat pattern.
What muscles does the Barbell One-Leg Squat work?
The main target is the quadriceps. The glutes, hamstrings, adductors, calves, and core also assist with hip extension, balance, and lower-body stability.
Should my torso stay completely upright?
Not necessarily. A slight forward lean is normal and often helps balance. The key is to keep the spine neutral, the chest controlled, and the barbell stable over the working leg.
Why do I lose balance during this exercise?
Balance issues usually come from poor foot placement, too much weight, weak hip stability, or rushing the reps. Start lighter, widen your stance slightly, and move slowly until your control improves.
Is this exercise beginner-friendly?
The barbell version is usually better for intermediate to advanced lifters. Beginners should first master bodyweight split squats, dumbbell split squats, and rear-foot-elevated split squats before using a barbell.
How deep should I go?
Lower as far as you can while keeping the front foot flat, the knee aligned, and the pelvis controlled. A good target is when the front thigh reaches around parallel or the rear knee approaches the floor.
Recommended Equipment
- Olympic Barbell — the main loading tool for building strength with this exercise
- Adjustable Weight Bench — provides a stable surface for elevating the rear foot
- Squat Rack — helps you unrack and rerack the barbell safely
- Barbell Pad — adds comfort if the bar pressure on the upper back feels uncomfortable
- Weightlifting Shoes — improves foot stability and helps maintain strong lower-body positioning
Tip: Choose equipment that improves stability and safety. This exercise becomes much more effective when your setup is secure and repeatable.