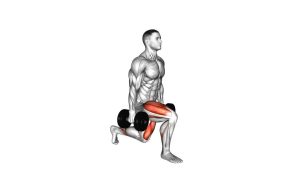
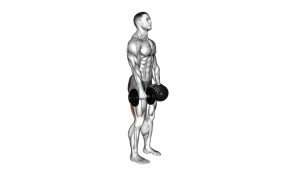
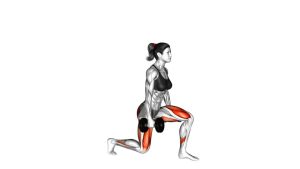
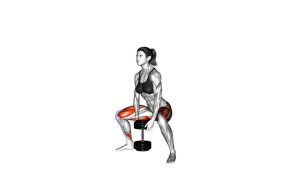
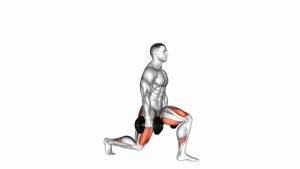
Dumbbell Side Lunge: Proper Form, Muscles, Sets & Tips
Learn the Dumbbell Side Lunge with proper form, muscles worked, sets and reps, common mistakes, and expert tips to build stronger legs and better balance.
Dumbbell Side Lunge
Understanding the Dumbbell Side Lunge
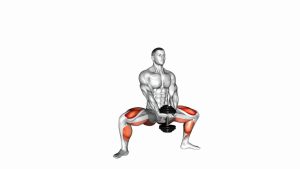
The Dumbbell Side Lunge is an effective exercise for building lower-body strength in the frontal plane. Unlike conventional squats, it introduces lateral movement that challenges the hips, knees, and ankles differently.
Additionally, the exercise requires the working leg to control body weight during the descent. The glutes and quadriceps then generate force to return the body to standing. Consequently, both strength and movement coordination are important throughout each repetition.
Why Include Lateral Lunges in Your Workout?
Most traditional lower-body exercises emphasize forward-and-backward movement. However, everyday activities and many sports also require side-to-side control. Therefore, lateral lunges can complement squats, deadlifts, and conventional lunges.
Furthermore, alternating between legs may help identify differences in strength and mobility. Over time, controlled practice can improve confidence during lateral stepping and direction changes.
Quick Overview
| Body Part | Legs |
|---|---|
| Primary Muscle | Quadriceps, Gluteus Maximus, Adductor Magnus |
| Secondary Muscle | Hamstrings, Gluteus Medius, Hip Adductors, Calves, Core Stabilizers |
| Equipment | One Dumbbell (Chest-Held Position) |
| Difficulty | Intermediate |
Sets & Reps (By Goal)
Strength Development
For strength training, perform 3–4 sets of 6–8 repetitions per leg. Choose a challenging but manageable dumbbell. Additionally, rest for approximately 90–120 seconds between sets to maintain movement quality.
Muscle Growth (Hypertrophy)
To emphasize muscle development, complete 3–4 sets of 8–12 repetitions per leg. Use a controlled lowering phase and a comfortable movement depth. Furthermore, rest for 60–90 seconds between sets while maintaining consistent technique.
Muscular Endurance
For muscular endurance, perform 2–3 sets of 12–15 repetitions per leg. Select a lighter dumbbell to maintain smooth repetitions. Meanwhile, use 45–75 seconds of rest as needed.
Mobility and Movement Control
To improve lateral movement control, complete 2–3 sets of 6–10 repetitions per leg. Initially, use bodyweight or minimal resistance. Then, gradually increase your comfortable range of motion as balance and coordination improve.
Rehab-Style Training
For rehabilitation-oriented practice, a qualified professional may recommend 1–3 sets of 5–8 controlled repetitions. However, the appropriate exercise depth, resistance, and frequency depend on the individual condition. Therefore, avoid using loaded lateral lunges during injury recovery without suitable guidance.
Repetition counting: One repetition consists of stepping sideways, lowering into the lunge, and returning to standing. Count repetitions separately for each leg.
Setup / Starting Position
1. Choose the Appropriate Dumbbell
First, select a dumbbell that allows comfortable movement without compromising balance. Beginners should start with bodyweight before adding resistance. Additionally, ensure the weight can be held securely with both hands.
2. Establish Your Standing Position
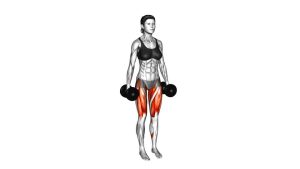
Stand upright with your feet approximately hip-width apart or slightly closer. Meanwhile, distribute your weight evenly between both feet. Keep your knees relaxed rather than rigidly locked.
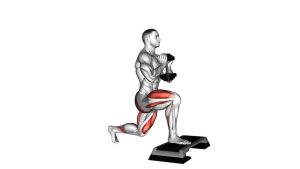
3. Position the Dumbbell at Chest Height
Hold one dumbbell horizontally in front of your upper chest using both hands. Next, bend your elbows and keep the weight close to your torso. Avoid allowing the dumbbell to drift forward.
4. Align Your Upper Body
Maintain a neutral spine and a naturally upright chest. Furthermore, keep your shoulders relaxed and your head aligned with your torso. Avoid excessive arching through the lower back.
5. Engage Your Core
Before stepping sideways, gently brace your abdominal muscles. As a result, your torso can remain more stable during the lateral weight shift. Continue breathing naturally rather than holding your breath unnecessarily.
6. Prepare for Lateral Movement
Finally, check that the floor provides adequate traction. Leave enough room on both sides for comfortable stepping. Once your posture feels stable, begin the first repetition.
Execution (Step-by-Step)
Step 1: Initiate the Sideways Step
Begin by moving your right foot sideways into a wider stance. As you step, maintain the dumbbell at chest height and keep your torso stable. Avoid rushing the movement or taking an excessively wide step.
Step 2: Transfer Your Body Weight
Next, gradually shift your weight toward the right leg. Keep the working foot firmly planted on the floor. Meanwhile, allow the opposite leg to remain relatively extended.
Step 3: Bend the Working Knee
As your weight moves sideways, bend your right knee and push your hips backward. Additionally, allow a small forward torso inclination while maintaining a neutral spine.
Step 4: Extend the Opposite Leg
While lowering toward the right, keep your left leg comparatively straight. Consequently, the muscles of the inner thigh lengthen as the hips shift laterally. However, avoid forcing the knee into a locked position.
Step 5: Lower Into the Lunge
Continue descending until you reach a comfortable depth. Throughout the movement, maintain full-foot contact on the working side. Furthermore, keep the working knee tracking in line with the toes.
Step 6: Stabilize the Bottom Position
At the lowest comfortable point, maintain control without bouncing. The dumbbell should remain close to your chest. Meanwhile, keep your core engaged and avoid twisting your shoulders.
Step 7: Push Back Toward Standing
Next, drive through your right foot to extend the working hip and knee. As a result, your body begins moving back toward the center. Avoid using sudden momentum to complete the return.
Step 8: Return to the Starting Position
Bring your right foot back beside the left foot. Then, stand upright with your hips extended and your body balanced. Keep the dumbbell securely positioned throughout the transition.
Step 9: Alternate to the Opposite Side
After returning to center, step sideways with your left foot. Repeat the same controlled lowering and returning sequence. Additionally, aim for similar movement depth on both sides.
Step 10: Complete the Prescribed Repetitions
Continue alternating legs until you finish the planned set. Finally, return to a stable standing position before lowering the dumbbell safely.
Breathing Technique
Inhale as you step sideways and lower into the lunge. Then, exhale while pushing back toward standing. For heavier repetitions, maintain appropriate trunk bracing without unnecessary prolonged breath-holding.
Recommended Exercise Tempo
Lower for approximately 2–3 seconds and briefly stabilize at the bottom. Next, return to standing in about 1–2 seconds. However, use a slower tempo whenever additional balance or coordination is needed.
Pro Tips & Common Mistakes
Pro Tip 1: Master the Movement First
Initially, practice lateral lunges without added weight. Once your balance improves, introduce a light dumbbell. This approach helps develop consistent technique before increasing the training challenge.
Pro Tip 2: Maintain a Stable Dumbbell Position
Keep the weight close to your chest throughout every repetition. Furthermore, avoid extending your arms or swinging the dumbbell during transitions. A stable weight position supports better trunk control.
Pro Tip 3: Control Your Hip Movement
As you lower into the lunge, shift your hips backward and toward the working leg. Consequently, the quadriceps and glutes can contribute effectively to the movement.
Pro Tip 4: Maintain Foot Stability
Keep the working foot firmly planted throughout the descent. Additionally, avoid lifting the heel or allowing the foot to roll excessively inward. Stable contact supports controlled force production.
Pro Tip 5: Train Both Legs Equally
Alternate sides with similar step lengths and comfortable movement depths. However, do not force perfect symmetry when one side has less mobility. Instead, improve the weaker side gradually.
Common Mistake 1: Knee Collapsing Inward
Allowing the working knee to move excessively inward can reduce movement control. Therefore, guide the knee in the same general direction as the toes. Reduce resistance if alignment becomes difficult.
Common Mistake 2: Excessively Wide Steps
Taking an overly wide step may compromise balance and make the return difficult. Instead, choose a distance that allows a comfortable hip shift. Then, increase the range gradually.
Common Mistake 3: Rounding the Back
Excessive spinal rounding can reduce trunk stability. To prevent this, maintain a controlled hip hinge and keep your core engaged. Additionally, reduce the dumbbell weight if necessary.
Common Mistake 4: Using Too Much Resistance
Heavy dumbbells may encourage rushed repetitions or poor balance. Consequently, exercise quality can decline. Choose a manageable load before progressing to heavier weights.
Common Mistake 5: Bouncing at the Bottom
Avoid using momentum to reverse the movement. Instead, lower under control and push through the working leg. This approach encourages more consistent muscular effort.
Common Mistake 6: Rushing Between Sides
Returning to standing provides an opportunity to restore balance. Therefore, pause briefly if needed before stepping in the opposite direction. Smooth transitions are more important than speed.
Frequently Asked Questions (FAQ)
Muscles and Exercise Benefits
What muscles do dumbbell side lunges work?
Dumbbell side lunges primarily target the quadriceps, gluteus maximus, and adductor magnus. Additionally, the hamstrings, gluteus medius, calves, and core muscles contribute to movement control. The exact muscular emphasis depends on technique and movement depth.
Are dumbbell side lunges good for glute growth?
Yes. The gluteus maximus contributes to hip extension when returning to standing. Furthermore, progressive resistance can support muscle development. However, combining lateral lunges with other lower-body exercises generally provides more comprehensive glute training.
Do dumbbell side lunges improve balance?
Yes. Alternating lateral lunges challenge dynamic balance and coordination. Additionally, the exercise requires controlled weight shifts between the legs. Consequently, regular practice may improve confidence during sideways movements.
Technique and Exercise Variations
What is the difference between a side lunge and a lateral lunge?
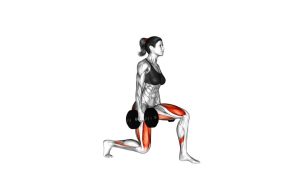
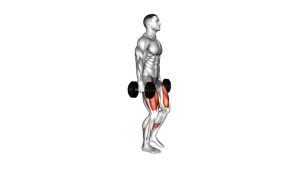
The terms generally describe the same sideways stepping movement. However, different variations use different weight positions. For example, some exercises use two dumbbells at the sides, while others hold one dumbbell at chest height.
Should I use one dumbbell or two dumbbells?
Both variations can be effective. A single dumbbell held at chest height provides a convenient front-loaded option. Meanwhile, two dumbbells held at the sides change the loading position. Choose whichever version allows comfortable, controlled technique.
How deep should I go during a side lunge?
Lower only as far as your mobility and balance allow. Additionally, keep the working foot stable and the knee aligned with the toes. Avoid forcing a deeper position when technique begins to deteriorate.
Should the opposite leg remain completely straight?
The opposite leg should remain relatively extended. However, it does not need to be rigidly locked. A slight knee bend is acceptable when needed for comfortable movement.
Training Frequency and Progression
Are dumbbell side lunges suitable for beginners?
Yes, provided the movement is appropriately modified. Initially, practice bodyweight lateral lunges. Then, introduce a light dumbbell once balance and coordination improve. Progress gradually.
How many dumbbell side lunges should I perform?
For general muscle development, begin with 2–3 sets of 8–12 repetitions per leg. However, training volume should reflect your experience and recovery. Additionally, maintain consistent technique across every set.
How often should I train lateral lunges?
Most recreational lifters can include lateral lunges in 1–3 weekly lower-body sessions. Nevertheless, frequency depends on overall training volume. Therefore, allow adequate recovery between demanding workouts.
Home Training and Safety
Can I perform dumbbell side lunges at home?
Yes. You only need one dumbbell and sufficient space for lateral stepping. Additionally, choose a stable, non-slip surface. Adjustable dumbbells can also provide convenient resistance progression.
Who should be cautious with this exercise?
People recovering from knee, hip, ankle, or groin injuries should seek individualized advice. Furthermore, sharp pain or significant instability should not be ignored. Therefore, consult a qualified professional when appropriate.
Recommended Equipment
The Dumbbell Side Lunge requires minimal equipment. Nevertheless, a few accessories can support home training and gradual resistance progression.
1. Rubber Hex Dumbbell
A rubber hex dumbbell is a practical option for this chest-held variation. Additionally, a secure handle helps maintain control during lateral movement. Choose a manageable weight before progressing.
View Rubber Hex Dumbbells on Amazon
2. Adjustable Dumbbell
Adjustable dumbbells offer multiple resistance levels without requiring a large equipment collection. Furthermore, they make progressive overload convenient for home workouts.
View Adjustable Dumbbells on Amazon
3. Non-Slip Exercise Mat
A non-slip exercise mat can support warm-ups and stretching. However, loaded lateral lunges require a firm, stable surface. Therefore, avoid thick mats that compromise balance.
4. Mini Resistance Bands Set
Mini resistance bands are useful for complementary hip exercises. For example, lateral band walks can challenge the hip abductors. Additionally, these bands are convenient for home warm-ups.
View Resistance Bands on Amazon
5. Foam Roller for Legs
A foam roller is an optional accessory for general warm-up and post-workout comfort. For instance, it can be used around the quadriceps and glutes. However, avoid excessive pressure on painful areas.
Shopping note: These links open Amazon product search results rather than verified individual product listings. Compare specifications, prices, and customer reviews before purchasing.