Pike Push-Up Between Chairs: Form, Muscles Worked, Sets, Tips & FAQ
Learn how to do the Pike Push-Up Between Chairs with proper form to build stronger shoulders using a deeper range of motion. Includes muscles worked, setup, execution, sets and reps, common mistakes, FAQs, and recommended equipment.
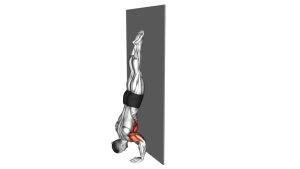
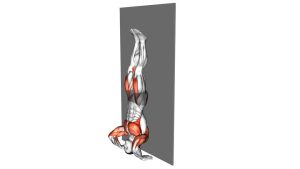
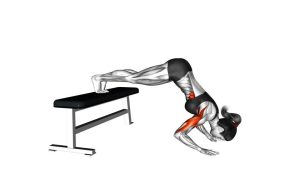
Pike Push-Up Between Chairs
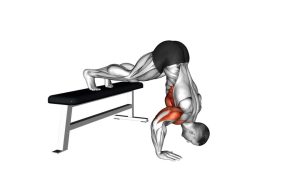
This exercise works best when the setup is stable and the movement is controlled. The goal is to keep the hips elevated so the shoulders do most of the work, while the hands stay firmly planted on the chairs. Lower yourself smoothly until your head drops between the chairs, then press back up without losing body position. You should feel strong shoulder effort, not joint discomfort or unstable wobbling.
Quick Overview
| Body Part | Shoulders |
|---|---|
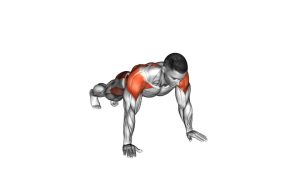
| Primary Muscle | Anterior deltoids |
| Secondary Muscle | Triceps, lateral deltoids, upper chest, serratus anterior, upper traps, core |
| Equipment | Bodyweight, 2 sturdy chairs or parallel elevated supports |
| Difficulty | Intermediate to Advanced |
Sets & Reps (By Goal)
- Strength focus: 3–5 sets × 4–8 reps, 90–150 sec rest
- Muscle building: 3–4 sets × 6–12 reps, 60–90 sec rest
- Handstand push-up progression: 3–5 sets × 3–6 controlled reps, 90–150 sec rest
- Bodyweight shoulder endurance: 2–4 sets × 10–15 reps, 45–75 sec rest
Progression rule: First improve control, range of motion, and rep quality. Then progress by slowing the eccentric, elevating the feet, or adding load with a weighted vest.
Setup / Starting Position
- Place two sturdy chairs shoulder-width apart on a flat, non-slip surface.
- Grip the front edges or stable top surfaces of the chairs with your hands planted evenly.
- Walk your feet back and lift your hips high to form a pike position.
- Stack the shoulders over or slightly in front of the hands to create a pressing angle toward the floor.
- Brace the core and keep the neck neutral with eyes angled toward the floor between the chairs.
Tip: If your hamstrings are tight, you can bend the knees slightly as long as you keep the hips high and the shoulders loaded.
Execution (Step-by-Step)
- Start locked in: Arms straight, hips high, core tight, and weight shifted into the hands.
- Lower under control: Bend the elbows and bring your head down between the chairs.
- Keep the elbows working naturally: Let them angle back and slightly out, not straight sideways.
- Reach the bottom carefully: Lower until you achieve a deep but controlled range of motion without losing shoulder position.
- Press back up: Drive through the palms, extend the elbows, and return to the starting pike position.
- Reset every rep: Re-establish hip height and shoulder alignment before beginning the next repetition.
Pro Tips & Common Mistakes
- Keep your hips high: This keeps the pressing angle shoulder-dominant.
- Use sturdy supports only: Unstable chairs can turn a good exercise into a risky one.
- Control the bottom position: Don’t crash into the deepest part of the range.
- Don’t let the head drift too far forward: Aim down between the hands, not out in front.
- Brace the midline: A loose core makes the movement harder to control.
- Watch elbow flare: Excessive flare can stress the shoulders and reduce pressing efficiency.
- Progress gradually: Master floor pike push-ups before using a deficit setup between chairs.
FAQ
What muscles does the Pike Push-Up Between Chairs work most?
It mainly targets the anterior deltoids, with strong assistance from the triceps, lateral delts, upper chest, and shoulder stabilizers.
Why perform this variation between chairs?
The chairs create a deficit, allowing your head and shoulders to travel deeper than in a regular pike push-up. That extra range of motion increases difficulty and can improve shoulder strength and pressing development.
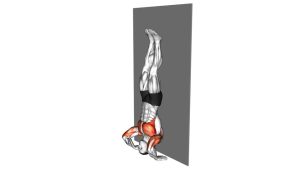
Is this a good progression toward handstand push-ups?
Yes. It teaches a more demanding vertical pressing pattern and builds the shoulder strength and control needed for handstand push-up progressions.
Can beginners do this exercise?
Usually not as a starting point. Most people should first learn standard pike push-ups on the floor and develop enough shoulder strength, balance, and control before adding a deficit setup.
What should I do if my wrists feel uncomfortable?
Warm up the wrists first, reduce range of motion, or use stable push-up bars or parallettes to keep the wrists in a more neutral position. If pain is sharp or persistent, stop and reassess.
Recommended Equipment
- Parallettes Bars — a more stable and training-friendly alternative to chairs for deficit pressing and calisthenics work
- Push-Up Handles — useful for reducing wrist extension stress and improving hand positioning
- Weighted Vest — a simple progression tool once your bodyweight reps become too easy
- Non-Slip Exercise Mat — helps improve floor traction and comfort under the feet during setup
- Resistance Bands Set — useful for shoulder warm-ups, activation drills, and accessory work around your pressing sessions
Tip: The safest upgrade from chairs is usually a pair of sturdy parallettes or push-up bars that stay planted and give you more consistent hand placement.