Band Upper Crunch: Proper Form, Abs Benefits, Sets & Tips
Learn the Band Upper Crunch to strengthen your abs with controlled resistance. Includes setup, form cues, sets, mistakes, FAQs, and equipment.
Band Upper Crunch
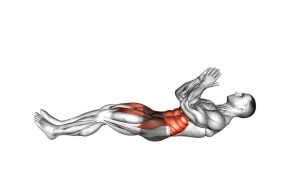
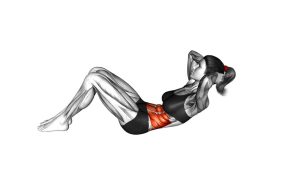
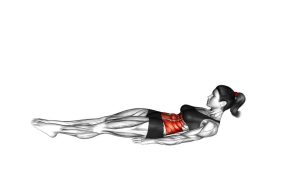
This exercise is best performed with slow control instead of speed. First, secure the band behind your body, then lie on your back with your knees bent and feet flat. As you crunch upward, keep the arms steady and let the abdominal muscles create the movement. Additionally, avoid turning it into a full sit-up because the visible exercise uses a compact upper-crunch range.
Quick Overview
| Body Part | Abs |
|---|---|
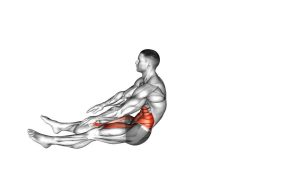
| Primary Muscle | Rectus abdominis, especially the upper abdominal region |
| Secondary Muscle | Deep core stabilizers, obliques, and hip stabilizers |
| Equipment | Resistance band with handles and a secure anchor point |
| Difficulty | Beginner to intermediate, depending on band tension |
Sets & Reps (By Goal)
- Core activation: 2 sets × 10–12 reps with light band tension and slow control.
- Muscle endurance: 3 sets × 12–20 reps with a steady tempo and short rest periods.
- Strength focus: 3–4 sets × 8–12 reps using stronger band tension while maintaining clean form.
- Beginner practice: 2 sets × 8–10 reps, stopping each set before neck or hip compensation appears.
Progression rule: Add reps first, then slightly increase band tension. However, never increase resistance if your shoulders jerk forward or your neck begins to pull.
Setup / Starting Position
- Anchor the band: Attach the resistance band behind your body to a stable point that will not move.
- Lie on your back: Position yourself on the floor with knees bent and feet flat.
- Hold the handles: Keep one handle in each hand with the arms angled forward above the chest.
- Create light tension: Move far enough from the anchor so the band is slightly stretched before you begin.
- Set your torso: Keep your lower back controlled, ribs down, and eyes angled upward before the first rep.
The setup should feel stable before you start. If the anchor shifts, the band snaps, or the tension feels uneven, reset before continuing.
Execution (Step-by-Step)
- Brace your abs: Exhale gently and tighten the abdominal wall before lifting.
- Curl upward: Lift your head, shoulders, and upper back from the floor in a short crunch motion.
- Keep the arms steady: Hold the handles in position instead of pulling with the arms.
- Squeeze at the top: Pause briefly when the upper abs are fully contracted.
- Lower with control: Return slowly until the shoulders and upper back come back to the floor.
- Repeat smoothly: Maintain band tension and avoid bouncing between reps.
Pro Tips & Common Mistakes
- Use the band as resistance, not assistance: The band should challenge the crunch rather than pull you through the rep.
- Avoid yanking the handles: If the arms move too much, your shoulders may take over instead of your abs.
- Keep the range compact: A small upper-body curl is enough when the band tension is controlled.
- Do not rush the lowering phase: Lower slowly so your abs control the return.
- Keep the feet planted: If the feet lift or slide, reduce band tension and reset your base.
- Relax the neck: Keep the chin slightly tucked without pulling the head forward aggressively.
- Control the ribs: Avoid flaring the ribs upward at the start or dropping suddenly at the bottom.
FAQ
What muscles does the Band Upper Crunch work?
The Band Upper Crunch mainly works the rectus abdominis, especially through the upper-crunch motion. In addition, the deep core and obliques assist with trunk control while the band creates extra resistance.
Is the Band Upper Crunch good for beginners?
Yes, beginners can use it when the band tension is light. However, the exercise becomes harder quickly as the band stretches, so start with a manageable resistance and focus on clean reps.
Should I pull the resistance band with my arms?
No. Your arms should stay mostly steady while your abs curl the upper torso upward. If you pull hard with your arms, the exercise becomes less effective for the core.
How high should I lift during the crunch?
Lift only the head, shoulders, and upper back from the floor. Since this is an upper crunch, you do not need to sit all the way up.
Why do I feel this in my neck?
Neck tension usually means the head is being pulled forward too hard or the band tension is too heavy. Reduce resistance, slow down, and let the abs initiate the curl.
Recommended Equipment
- Resistance Bands with Handles — ideal for band crunches because the handles make the grip more secure.
- Door Anchor for Resistance Bands — useful for creating a stable anchor point behind the body.
- Thick Exercise Mat — adds comfort for the spine, shoulders, and head during floor crunches.
- Stackable Resistance Band Set — allows easier progression by changing tension levels over time.
- Floor Exercise Foot Anchor — helps keep the lower body more stable during core training.
Choose equipment that lets you keep smooth form. Most importantly, the band and anchor should feel secure before each set.