Handstand Against the Wall: Form, Muscles Worked, Sets, Tips & FAQ
Learn how to do the Handstand Against the Wall with proper form to build shoulder strength, stability, and overhead control. Includes setup, execution, sets by goal, common mistakes, FAQs, and recommended equipment.
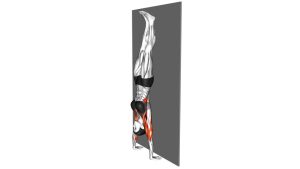
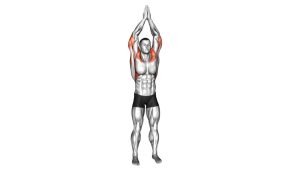
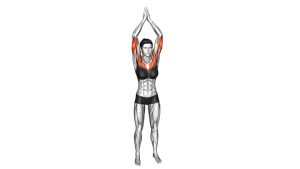
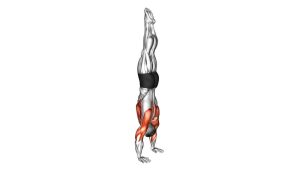
Handstand Against the Wall
This exercise is best performed with deliberate positioning and steady tension. The main training effect should come from the shoulders, triceps, and stabilizing muscles that help you stay strong in an inverted overhead position. The goal is not just to get upside down, but to maintain an active, stacked hold with controlled breathing and strong alignment.
Quick Overview
| Body Part | Shoulders |
|---|---|
| Primary Muscle | Deltoids (especially front delts) |
| Secondary Muscle | Triceps, upper traps, serratus anterior, core, and upper chest stabilizers |
| Equipment | Bodyweight, wall, and open floor space |
| Difficulty | Intermediate; easier with wall support, but still demanding on the shoulders and wrists |
Sets & Reps (By Goal)
- Skill practice: 3–5 sets × 15–30 second holds with 45–90 seconds rest
- Shoulder endurance: 3–4 sets × 20–45 second holds with 60–90 seconds rest
- Strength and control: 4–6 sets × 10–20 second high-tension holds with 75–120 seconds rest
- Beginner wall exposure: 3–4 sets × 8–15 second holds with full control and easy wall contact
Progression rule: First improve body alignment and comfort under inversion, then increase hold time. Progress to more difficult variations only when you can keep the shoulders active, ribs controlled, and elbows straight throughout the hold.
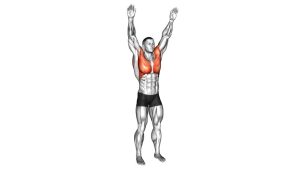
Setup / Starting Position
- Choose your wall space: Use a clear wall with enough room for your hands and a safe kick-up path.
- Place the hands: Set your palms shoulder-width apart on the floor with fingers spread for balance and grip.
- Prepare the shoulders: Press firmly into the ground and think about pushing the floor away before kicking up.
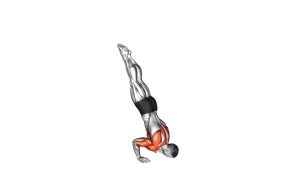
- Kick up with control: Bring one leg up first, then the other, until the heels lightly meet the wall.
- Stack the body: Keep arms straight, shoulders elevated, core braced, legs together, and toes pointed up the wall.
Tip: Light wall contact is usually better than leaning heavily into the wall. The more active your shoulders and core are, the cleaner the hold will feel.
Execution (Step-by-Step)
- Press the floor away: Once upside down, actively elevate the shoulders instead of collapsing into them.
- Lock in your arms: Keep the elbows straight and stable while spreading the fingers for better hand pressure control.
- Brace the midline: Tighten the abs and glutes to avoid excessive arching through the lower back.
- Keep the body long: Stack wrists, elbows, shoulders, hips, and feet as cleanly as possible.
- Breathe and hold: Use slow, controlled breathing while maintaining tension and balance.
- Exit carefully: Come down one leg at a time with control instead of dropping out fast.
Pro Tips & Common Mistakes
- Push tall through the shoulders: Think of shrugging upward instead of sinking into the joints.
- Use your hands actively: Fingers help you control balance and pressure, even with wall support.
- Keep ribs from flaring: Avoid the common “banana back” position by bracing the core and glutes.
- Do not slam into the wall: Kick up with control so the wall supports you without becoming the main load-bearing surface.
- Warm up the wrists first: Inversions can feel limited if your wrists are stiff or underprepared.
- Keep the hold clean: A shorter hold with good stacking is more valuable than a long hold with poor form.
FAQ
What muscles does the handstand against the wall work most?
It mainly trains the shoulders, especially the deltoids, while also involving the triceps, upper traps, serratus anterior, and core stabilizers.
Is this exercise good for beginners?
It can be beginner-friendly compared with a freestanding handstand, but it still requires shoulder mobility, wrist tolerance, and body awareness. Many beginners benefit from shorter holds and controlled wall entries first.
How long should I hold a wall handstand?
Most people should start with 8 to 20 seconds of solid positioning. As your control improves, you can gradually work toward longer holds without sacrificing form.
Should my feet press hard into the wall?
No. In most cases, the wall should provide light support only. Excessive pressure into the wall often encourages poor alignment and reduces active balance control.
Why do my wrists or lower back feel uncomfortable?
Wrist discomfort often comes from limited mobility or poor hand pressure distribution. Lower-back discomfort usually comes from over-arching and losing core tension. Adjust your setup, reduce hold time, and improve stacking before pushing volume.
Recommended Equipment (Optional)
- Parallette Bars — useful for handstand practice, wrist-angle relief, and better pushing mechanics
- Wrist Wraps — extra wrist support for longer holds or high-volume inversion work
- Gymnastics Chalk — helps improve hand grip and reduce slipping during wall-supported handstand work
- Thick Exercise Mat — adds comfort for floor setup, kick-up practice, and safer training space
- Handstand Blocks — useful for athletes who want a more handstand-specific training tool and different hand positioning
Tip: Optional equipment should improve comfort and consistency, not replace good shoulder positioning, wrist preparation, and patient skill practice.