Floor Triceps Dip: Proper Form, Sets, Tips & FAQ
Learn how to do the Floor Triceps Dip with proper form. Discover muscles worked, setup, execution steps, sets by goal, common mistakes, FAQs, and recommended equipment.
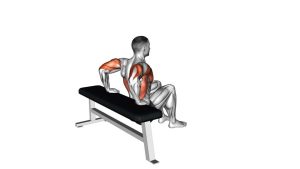
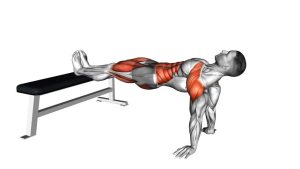
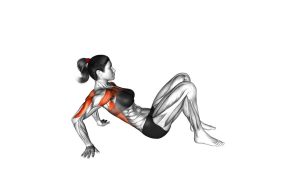
Floor Triceps Dip
This exercise works best when you focus on controlled elbow motion instead of trying to force extra depth. You should feel the triceps doing most of the work as you lower and press. Keep the chest open, shoulders stable, and hips moving in a short, clean range that matches your mobility and comfort.
Quick Overview
| Body Part | Triceps |
|---|---|
| Primary Muscle | Triceps brachii |
| Secondary Muscle | Anterior deltoids, lower chest, forearms, core stabilizers |
| Equipment | Bodyweight only; exercise mat optional |
| Difficulty | Beginner |
Sets & Reps (By Goal)
- General strength: 3–4 sets × 8–12 reps
- Muscle endurance: 2–4 sets × 12–20 reps
- Beginner practice: 2–3 sets × 6–10 controlled reps
- Bodyweight hypertrophy: 3–5 sets × 10–15 reps with slow tempo
Progression rule: First improve control and range of motion, then add reps. Once standard reps feel easy, slow the lowering phase or increase total volume before moving to harder dip variations.
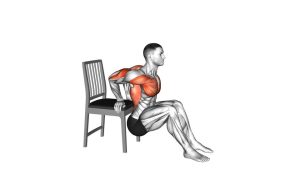
Setup / Starting Position
- Sit on the floor: Bend your knees and place your feet flat about hip-width apart.
- Place your hands behind you: Position your palms on the floor slightly behind the hips, fingers pointing forward or slightly outward.
- Set your shoulders: Open the chest and gently pull the shoulders down and back.
- Brace lightly: Tighten your core and press through the hands to support your upper body.
- Lift the hips slightly: Start with the arms straight or nearly straight and the hips hovering just above the floor.
Tip: Adjust hand placement until your wrists and shoulders feel stable. A small change in angle can make the movement much more comfortable.
Execution (Step-by-Step)
- Start tall at the top: Keep your chest open, elbows extended, and hips slightly elevated.
- Bend the elbows: Lower your hips toward the floor in a controlled motion while keeping the elbows pointing mostly backward.
- Stay in a safe depth: Stop when you feel a strong triceps load without shoulder discomfort. Do not force excessive range.
- Pause briefly: Hold the bottom for a moment without collapsing into the shoulders.
- Press back up: Extend the elbows and push through the palms until you return to the top position.
- Repeat smoothly: Maintain a steady tempo and avoid bouncing or rushing the reps.
Pro Tips & Common Mistakes
- Keep the elbows tracking backward: Excessive flare can shift tension away from the triceps and stress the shoulders.
- Do not drop too low: Going deeper than your mobility allows may irritate the front of the shoulder.
- Use controlled tempo: Lower for 2–3 seconds, then press up smoothly for better triceps tension.
- Keep the chest open: Avoid slouching or letting the shoulders collapse forward.
- Use the legs only for support: The feet help with balance, but the arms should drive the press.
- Protect the wrists: If the wrist angle feels uncomfortable, use a mat, adjust hand width, or reduce volume.
FAQ
What muscles does the Floor Triceps Dip work?
The main muscle worked is the triceps brachii. Secondary assistance comes from the anterior deltoids, lower chest, forearms, and stabilizing muscles through the core and shoulders.
Is the Floor Triceps Dip good for beginners?
Yes. It is generally more beginner-friendly than bench dips or parallel-bar dips because the range of motion is usually shorter and the feet stay on the floor for support.
How low should I go?
Lower only as far as you can while keeping the shoulders stable and pain-free. A controlled partial range is better than forcing a deep, uncomfortable rep.
Can I use this exercise for triceps growth?
Yes. When done with enough volume, controlled tempo, and proper effort, Floor Triceps Dips can help build triceps strength and muscle, especially for home workouts and bodyweight training.
What if I feel it more in my shoulders than my triceps?
Reduce your depth, keep the chest open, and focus on bending and extending at the elbows. You may also need to move your hands slightly closer or farther from the hips.
Recommended Equipment
- Exercise Mat — adds comfort for floor-based bodyweight training and protects wrists and hips
- Push-Up Bars — can reduce wrist extension demands and provide a more comfortable pressing setup
- Resistance Bands Set — useful for warm-ups, arm activation, and adding upper-body accessory work
- Adjustable Dip Bars — a strong next step if you want to progress from floor dips to more advanced dip variations
- Wrist Wraps — may help provide extra support during high-volume arm training
Tip: Start with the floor version first. Once you can perform smooth, pain-free reps with control, you can consider progressing to elevated dip variations.