Dumbbell Glute Bridge Skull Crusher: Form, Sets, Tips & FAQ
Learn how to do the Dumbbell Glute Bridge Skull Crusher with proper form. Build triceps, glutes, core stability, and full-body control with step-by-step cues.
Dumbbell Glute Bridge Skull Crusher
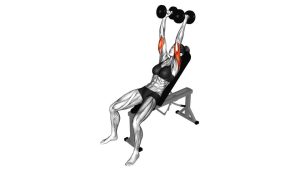
This exercise is a smart hybrid movement for lifters who want to build arm strength while also challenging hip stability and core control. Unlike a normal lying skull crusher, the hips stay elevated in a bridge, which forces the body to resist movement while the dumbbell travels near the head. Because of this, every rep should feel controlled, balanced, and steady.
The movement is not about rushing or using the heaviest dumbbell possible. Instead, focus on a strong glute squeeze, a stable rib cage, fixed upper arms, and smooth elbow extension. When performed correctly, it creates tension through the triceps while keeping the posterior chain active.
Quick Overview
| Body Part | Triceps, Glutes |
|---|---|
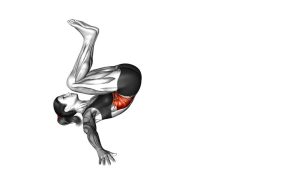
| Primary Muscle | Triceps brachii, especially the long head during the skull crusher phase |
| Secondary Muscle | Glutes, hamstrings, core, shoulders, forearms, and hip stabilizers |
| Equipment | Dumbbell and exercise mat or flat floor surface |
| Difficulty | Intermediate because it combines upper-body isolation with lower-body isometric stability |
Sets & Reps (By Goal)
- Muscle control: 2–3 sets × 8–10 reps with a slow 2–3 second lowering phase.
- Triceps hypertrophy: 3–4 sets × 10–15 reps using a moderate dumbbell and strict elbow control.
- Glute activation finisher: 2–3 sets × 12–16 reps while holding the bridge high for the full set.
- Full-body stability: 3 sets × 8–12 reps with a 1–2 second pause at the top of each elbow extension.
- Beginner progression: 2 sets × 6–8 reps, lowering the hips between reps if needed.
Progression rule: First improve control and hip stability, then increase reps, then increase dumbbell weight. Do not progress the load if your elbows flare, hips drop, or lower back takes over.
Setup / Starting Position
- Lie on your back: Place your upper back, shoulders, and head on the floor. Bend your knees and keep both feet flat.
- Set your feet: Position your feet around hip-width apart, close enough that your shins become nearly vertical at the top of the bridge.
- Hold the dumbbell securely: Grip one dumbbell with both hands, usually around the handle or inner plate area, depending on dumbbell style.
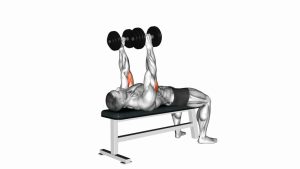
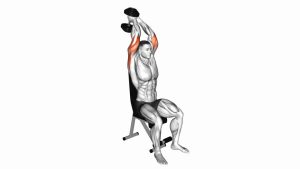
- Extend the arms: Start with the dumbbell above your chest or slightly over your shoulders, arms long but not aggressively locked.
- Brace your core: Keep the ribs down and pelvis controlled before lifting the hips.
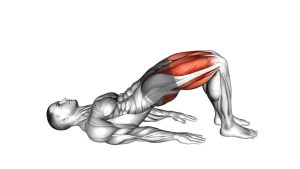
- Lift into the bridge: Drive through your heels and squeeze your glutes until your body forms a straight line from shoulders to knees.
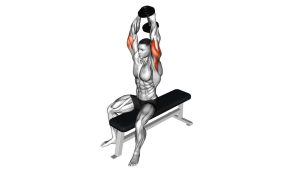
Execution (Step-by-Step)
- Hold the bridge position: Keep your hips high without over-arching your lower back. The glutes should do the work, not the lumbar spine.
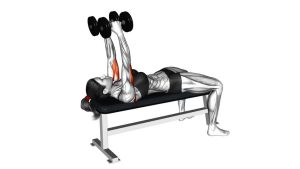
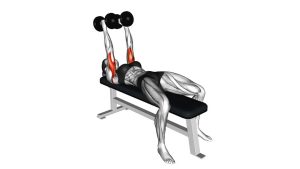
- Fix your upper arms: Keep the upper arms mostly vertical and stable. The movement should happen mainly at the elbows.
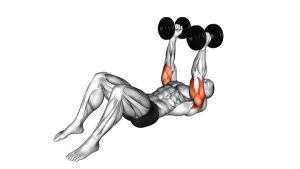
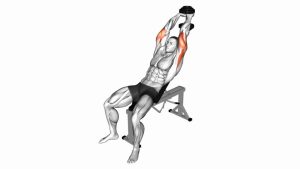
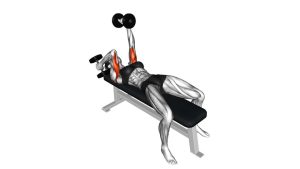
- Lower the dumbbell slowly: Bend your elbows and guide the dumbbell toward your forehead or slightly behind your head.
- Control the bottom position: Stop before the elbows lose position or the dumbbell feels too close to the face.
- Extend the elbows: Contract your triceps to bring the dumbbell back up to the starting position.
- Keep the hips lifted: Do not let the bridge collapse as the arms move. Maintain even pressure through both feet.
- Repeat with rhythm: Continue for the target reps, keeping every rep smooth and controlled.
- Finish safely: After the final rep, bring the dumbbell back above the chest, lower the hips, then set the dumbbell down with control.
Pro Tips & Common Mistakes
Pro Tips
- Use a moderate dumbbell: This is not a max-strength skull crusher. Control matters more than load.
- Squeeze the glutes before lowering: Set the bridge first, then begin the triceps movement.
- Keep elbows narrow: Slight natural movement is fine, but avoid letting the elbows flare wide.
- Move only at the elbows: The upper arms should stay stable so the triceps receive the main tension.
- Keep ribs down: If the ribs flare, the lower back usually arches and the glutes lose tension.
- Breathe steadily: Exhale as you extend the dumbbell and keep the bridge strong.
Common Mistakes
- Letting the hips drop: This reduces glute activation and turns the exercise into a basic floor skull crusher.
- Over-arching the lower back: A high bridge should come from hip extension, not lumbar extension.
- Lowering the dumbbell too fast: Fast reps increase risk near the head and reduce triceps tension.
- Turning it into a press: If the shoulders move too much, the movement shifts away from the triceps.
- Using too much weight: Heavy loading often causes elbow flare, wrist stress, and poor bridge control.
- Feet too far away: This can make the hamstrings cramp and reduce glute involvement.
FAQ
What muscles does the Dumbbell Glute Bridge Skull Crusher work?
It primarily works the triceps during the skull crusher portion and the glutes during the bridge hold. The hamstrings, core, shoulders, and forearms also assist with stability and control.
Is this exercise better for triceps or glutes?
It is usually more triceps-focused because the skull crusher is the moving part of the exercise. However, the glutes work continuously to hold the bridge, making it useful for combining arm training with hip stability.
Should I keep my hips up for the entire set?
Yes, if you can maintain good form. Keeping the hips lifted increases glute and core demand. If you are a beginner, you can lower the hips between reps until you build enough stability.
Where should the dumbbell lower during the skull crusher?
Lower the dumbbell toward your forehead or slightly behind the head while keeping the elbows controlled. Do not let the dumbbell drop quickly or travel too close to your face.
Why do my hamstrings cramp during the bridge?
Hamstring cramping often happens when the feet are too far away or the glutes are not fully engaged. Bring your feet slightly closer, push through the heels, and squeeze the glutes before starting each rep.
Can beginners do this exercise?
Beginners can do it with a light dumbbell, but it may be better to first master the regular glute bridge and the lying dumbbell skull crusher separately. Once both movements feel stable, combine them.
Can I use two dumbbells instead of one?
Yes. Two dumbbells can be used, but they require more coordination and wrist control. One dumbbell held with both hands is usually more stable and beginner-friendly.
Recommended Equipment
- Hex Dumbbells Set — ideal for controlled skull crushers and progressive strength training.
- Adjustable Dumbbell — useful for changing resistance without needing multiple dumbbells.
- Thick Exercise Mat — supports the shoulders, back, and head during floor-based bridge work.
- Glute Resistance Band — optional tool to increase hip stability and glute engagement during bridge variations.
- Weightlifting Gloves — improves grip comfort when holding a dumbbell near the head.
Choose equipment that helps you stay stable and controlled. For this exercise, grip security and floor comfort are more important than heavy loading.