Air Bike Exercise: Proper Form, Core Benefits, Sets, Tips & FAQ
Learn how to perform the Air Bike exercise with proper form. Build abs, obliques, core endurance, and rotational control with step-by-step cues, sets, mistakes, FAQs, and equipment.
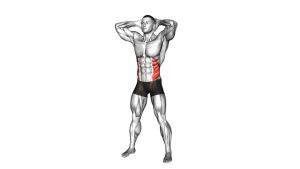
Air Bike
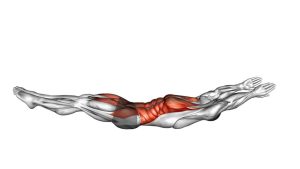
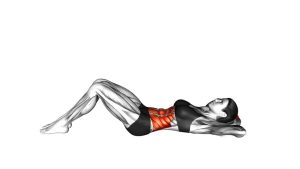
The Air Bike is highly effective because it combines three important core actions: spinal flexion, torso rotation, and anti-extension control. As one knee drives toward the chest, the opposite side of the torso rotates toward it, creating strong oblique engagement. Meanwhile, the extended leg stays off the floor, forcing the abs to stabilize the pelvis and prevent the lower back from arching.
This exercise is best performed with smooth control. Moving too fast often turns the Air Bike into a momentum-based leg swing instead of a true abdominal exercise. For the best results, keep your elbows wide, avoid pulling on the neck, rotate from the rib cage, and maintain steady breathing throughout the set.
Quick Overview
| Body Part | Core |
|---|---|
| Primary Muscle | Rectus abdominis and obliques |
| Secondary Muscle | Hip flexors, transverse abdominis, deep core stabilizers |
| Equipment | Bodyweight only; optional exercise mat |
| Difficulty | Beginner to Intermediate |
Sets & Reps (By Goal)
- Core activation: 2–3 sets × 10–16 total reps with slow, controlled rotation.
- Ab strength: 3–4 sets × 16–24 total reps, keeping the extended leg low but controlled.
- Core endurance: 3–5 sets × 30–45 seconds with steady breathing and no neck pulling.
- Fat-loss circuit training: 3–4 rounds × 20–40 seconds paired with planks, mountain climbers, or leg raises.
- Beginner modification: 2–3 sets × 8–12 total reps with the extended leg higher and a shorter rotation range.
Progression rule: First improve control, then add reps or time. Do not progress by rushing. A slower Air Bike with clean rotation is more effective than a fast set with poor core tension.
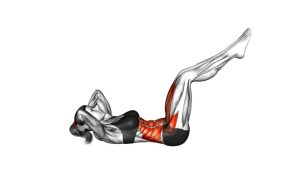
Setup / Starting Position
- Lie on your back: Start on a mat or comfortable floor surface with your body aligned straight.
- Place your hands lightly near your head: Keep your fingertips behind the ears or near the temples. Do not interlock the fingers and pull the neck forward.
- Lift your shoulders slightly: Raise the head, neck, and shoulder blades just enough to create abdominal tension.
- Raise your legs: Bring both knees above the hips with the knees bent. Your shins can start roughly parallel to the floor.
- Brace your core: Gently press the lower back toward the floor and tighten the abs before the first rep.
- Set your elbow position: Keep the elbows wide rather than folded inward. This helps encourage torso rotation instead of arm pulling.
Setup cue: Before moving, think “ribs down, lower back controlled, shoulders lifted, neck relaxed.” This position keeps the exercise focused on the abs instead of the lower back or neck.
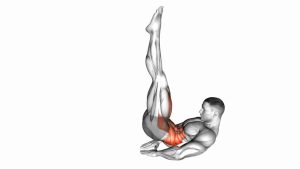
Execution (Step-by-Step)
- Start with core tension: Keep your lower back stable against the floor and maintain a slight crunch position.
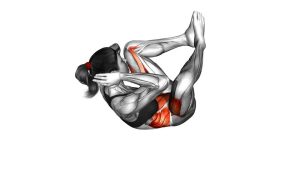
- Drive one knee inward: Bring one knee toward the chest while keeping the opposite leg extended away from the body.
- Rotate toward the bent knee: Turn your torso so the opposite elbow moves toward the incoming knee. The elbow does not need to touch the knee.
- Extend the other leg: Straighten the opposite leg at a low-to-moderate angle while keeping it hovering above the floor.
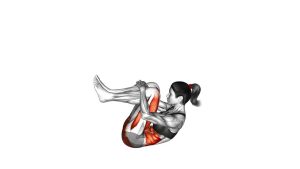
- Switch sides smoothly: Bend the extended leg in as the other leg extends. Rotate your torso toward the new bent knee.
- Keep the rhythm controlled: Continue alternating sides in a pedaling motion without bouncing or collapsing the shoulders.
- Breathe with the movement: Exhale as you rotate and draw the knee in. Inhale lightly during the transition.
Pro Tips & Common Mistakes
Pro Tips
- Rotate from the ribs: Think about bringing your shoulder toward the opposite knee, not just moving the elbow.
- Keep the extended leg active: The lower the leg, the harder the exercise becomes. Raise the leg higher if your lower back arches.
- Use a controlled tempo: Move smoothly from side to side instead of rushing through reps.
- Keep your elbows open: Wide elbows reduce the urge to pull the head forward.
- Maintain shoulder lift: Keep the shoulder blades slightly off the floor to maintain abdominal tension.
- Focus on quality reps: Each rep should include a clear knee drive, opposite-side rotation, and controlled leg extension.
Common Mistakes
- Pulling on the neck: This can create strain and takes work away from the core.
- Moving too fast: Fast reps often reduce oblique activation and increase momentum.
- Letting the lower back arch: If the lower back lifts, raise the extended leg or shorten the range.
- Only moving the elbows: The rotation should come from the torso, not from flaring the arms side to side.
- Dropping the extended leg: Letting the heel touch the floor reduces tension and breaks the rhythm.
- Holding the breath: Poor breathing can make the movement feel harder and increase neck or face tension.
FAQ
What muscles does the Air Bike work?
The Air Bike mainly works the rectus abdominis and obliques. It also uses the hip flexors and deep core stabilizers because your legs stay lifted while your torso rotates from side to side.
Is the Air Bike the same as a bicycle crunch?
Yes. The Air Bike is commonly called the Bicycle Crunch. Both names describe the same movement pattern: alternating knee drives with opposite-side torso rotation and a pedaling leg action.
Should my elbow touch my knee?
It is not required. The goal is not to force contact. The goal is to rotate the torso with control while keeping the abs engaged. Forcing the elbow to touch the knee can cause neck pulling or rounded, rushed reps.
Why does my neck hurt during Air Bikes?
Neck discomfort usually happens when you pull on the head, tuck the chin too hard, or lose abdominal tension. Keep your hands light, elbows wide, and neck neutral. If needed, perform fewer reps or rest your head briefly between sets.
How can beginners modify the Air Bike?
Beginners can keep the extended leg higher, move slower, reduce the rotation range, or perform the exercise with one foot briefly tapping the floor between reps. These changes reduce pressure on the lower back while still training the abs.
Is the Air Bike good for losing belly fat?
The Air Bike strengthens and tones the abdominal muscles, but it does not directly burn fat from only the belly area. For visible results, combine core training with full-body strength work, cardio, proper nutrition, and consistent calorie control.
Recommended Equipment
- Exercise Mat — adds comfort for your spine, hips, and shoulders during floor-based core exercises.
- Thick Yoga Mat — useful if you need extra cushioning for repeated ab workouts or hard floors.
- Ab Workout Mat — supports the lower back and helps maintain comfort during crunch-style movements.
- Core Sliders — helpful for adding variety to core training with mountain climbers, plank reaches, and sliding knee tucks.
- Resistance Bands Set — useful for pairing Air Bikes with full core and upper-body stability work.
Equipment note: The Air Bike does not require equipment, but a quality mat can make the movement more comfortable and help you stay consistent with floor-based abdominal training.