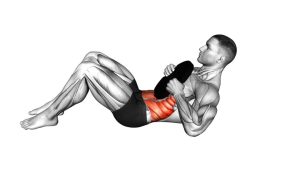
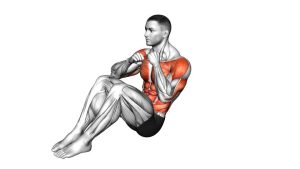
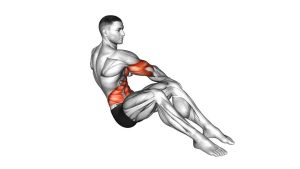
Lying Crossed-Legs Twist: Form, Benefits, Sets, Tips & FAQ
Learn the Lying Crossed-Legs Twist to train obliques, improve rotational core control, and build better trunk stability with safe form.
Lying Crossed-Legs Twist
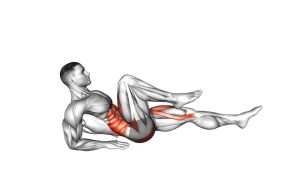
This exercise is especially useful for building rotational core strength, improving pelvic control, and teaching the abs to resist uncontrolled movement. The crossed-leg position helps keep the legs connected, while the arms stay wide on the floor to create a stable base. Move slowly from one side to the other and let the obliques guide the rotation.
Quick Overview
| Body Part | Core |
|---|---|
| Primary Muscle | Obliques |
| Secondary Muscle | Rectus abdominis, transverse abdominis, hip flexors, lower-back stabilizers |
| Equipment | Bodyweight only; exercise mat optional |
| Difficulty | Beginner to Intermediate |
Sets & Reps (By Goal)
- Core control: 2–3 sets × 8–12 reps per side with a slow tempo.
- Oblique endurance: 3–4 sets × 12–16 reps per side with steady breathing.
- Warm-up rotation: 1–2 sets × 6–10 reps per side using a comfortable range.
- Beginner practice: 2 sets × 6–8 reps per side with smaller motion and longer pauses.
Progression rule: First improve control, range, and smoothness. After that, you may slow the lowering phase, add a short pause near each side, or use light ankle weights only if your lower back stays relaxed and stable.
Setup / Starting Position
- Lie on your back: Use a flat floor surface and place an exercise mat underneath your body if needed.
- Open your arms: Extend both arms out to the sides in a T-shape to help anchor the upper body.
- Bend your knees: Bring the knees up so the hips and knees are comfortably bent.
- Cross your legs: Cross one ankle over the other and keep the legs connected throughout the movement.
- Brace gently: Tighten your core lightly as if preparing for a small rotation, not a hard crunch.
- Keep shoulders grounded: Let the upper back stay heavy on the floor before you begin twisting.
A smaller range is better when learning. The exercise should feel controlled in the waist and obliques, not aggressive in the lower back.
Execution (Step-by-Step)
- Start from center: Keep the knees bent, ankles crossed, and arms wide on the floor.
- Rotate to one side: Slowly lower both knees toward one side while keeping the legs together.
- Control the descent: Let the hips rotate, but avoid dropping the legs quickly or bouncing at the bottom.
- Keep the shoulders down: Maintain contact through the upper back and opposite shoulder as much as possible.
- Pause briefly: Stop before the lower back feels strained or the shoulder lifts excessively.
- Return to center: Use the obliques to pull the legs back to the middle with control.
- Repeat to the other side: Move through the same controlled pattern in the opposite direction.
Pro Tips & Common Mistakes
- Move slowly: This is a control exercise, not a speed drill.
- Keep the ankles crossed: The crossed-leg position helps the knees move as one unit.
- Anchor the upper body: Press the arms gently into the floor to prevent excessive torso rolling.
- Do not force the floor touch: The knees do not need to reach the ground for the exercise to be effective.
- Avoid lower-back arching: Keep the ribs controlled and avoid letting the spine snap into rotation.
- Breathe through each rep: Exhale as the legs return toward center to improve abdominal control.
- Use a smaller range if needed: Smaller, cleaner reps are better than large, uncontrolled twists.
- Do not pull with the neck: Keep the head relaxed and avoid jaw or shoulder tension.
FAQ
What muscles does the Lying Crossed-Legs Twist work?
The main muscles are the obliques. The rectus abdominis, transverse abdominis, hip flexors, and lower-back stabilizers also assist by keeping the pelvis and trunk controlled.
Is the Lying Crossed-Legs Twist good for beginners?
Yes. It can be beginner-friendly when performed with a small range of motion and slow control. Beginners should avoid forcing the knees too low and should focus on keeping the shoulders grounded.
Should my knees touch the floor on each side?
Not necessarily. The goal is controlled rotation, not maximum range. Stop where you can keep the movement smooth and the lower back comfortable.
Why are the legs crossed during this twist?
Crossing the legs helps keep the knees connected and creates a slightly different rotational challenge for the obliques compared with a standard bent-knee windshield wiper.
Can I make this exercise harder?
Yes. You can slow the lowering phase, pause near each side, increase the number of reps, or use light ankle weights. Only progress when your lower back stays stable and pain-free.
Who should be careful with this exercise?
Anyone with lower-back pain, hip irritation, recent spinal injury, or nerve-like symptoms should use a smaller range or consult a qualified professional before adding rotational core exercises.
Recommended Equipment (Optional)
- Thick Exercise Mat — adds comfort for the spine, hips, and shoulders during floor-based core work.
- Non-Slip Yoga Mat — helps reduce sliding while rotating from side to side.
- Adjustable Ankle Weights — optional progression for advanced control once bodyweight reps are clean.
- Resistance Bands Set — useful for pairing this exercise with anti-rotation and core stability drills.
- Foam Roller — helpful for warm-up mobility work around the upper back and hips.
Tip: Equipment is optional. Start with bodyweight only, then progress slowly if your rotation stays smooth, your shoulders stay grounded, and your lower back remains comfortable.