Wall Sit Toe Touch: Form, Muscles Worked, Sets, Tips & FAQ
Learn the Wall Sit Toe Touch for quads, core, hip flexors, and balance. Includes form steps, sets by goal, common mistakes, FAQs, and gear.
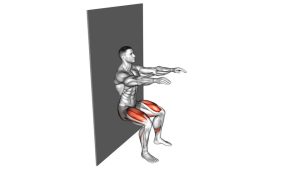
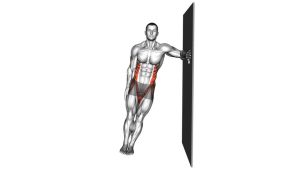
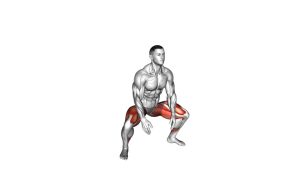
Wall Sit Toe Touch
This exercise is useful when you want to train quad endurance, hip flexor control, core stability, and cross-body coordination at the same time. The base position is an isometric wall sit, so the thighs stay under constant tension while the moving leg and opposite arm create an added balance challenge.
Quick Overview
| Body Part | Legs |
|---|---|
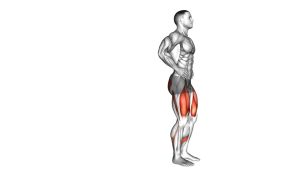
| Primary Muscle | Quadriceps |
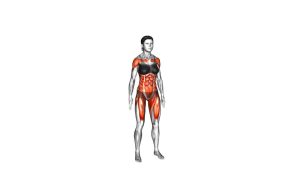
| Secondary Muscle | Core, hip flexors, glutes, calves, shoulders |
| Equipment | Wall only; optional exercise mat or supportive shoes |
| Difficulty | Beginner to intermediate |
Sets & Reps (By Goal)
- Beginner control: 2–3 sets × 6–8 touches per side, with a higher wall-sit angle.
- Muscular endurance: 3–4 sets × 10–15 touches per side, resting 45–75 seconds.
- Core and coordination: 3 sets × 8–12 slow alternating reps per side.
- Conditioning finisher: 2–4 rounds × 30–45 seconds of continuous alternating reps.
Progression rule: First increase control and time under tension. Then increase reps, hold a slightly deeper wall sit, or slow the reach. Do not progress if the knees collapse inward or the back slides away from the wall.
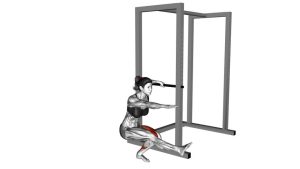
Setup / Starting Position
- Stand with your back to a wall: Place your upper back, mid-back, and hips lightly against the wall.
- Step your feet forward: Move the feet far enough away so your knees can bend without passing too far over the toes.
- Slide into a wall sit: Bend the knees and lower the hips until you reach a strong, comfortable squat depth.
- Set your feet: Keep both feet about hip-width apart, flat on the floor, with knees tracking in line with the toes.
- Brace your core: Keep the ribs down, pelvis controlled, and shoulders relaxed against the wall.
- Prepare the arms: Extend the arms out or slightly forward so you can reach toward the opposite foot during each rep.
For beginners, start with a shallow wall sit instead of forcing a 90-degree knee angle. The exercise should feel stable before it feels intense.
Execution (Step-by-Step)
- Hold the wall sit: Keep your back supported and maintain steady pressure through the feet.
- Lift one knee: Raise one foot from the floor by flexing the hip while keeping the supporting leg stable.
- Reach across the body: Move the opposite hand toward the lifted foot or shin without twisting aggressively.
- Touch or reach close: Lightly touch the toe if your mobility allows, or simply reach toward it with control.
- Return smoothly: Lower the foot back to the floor and bring the arm back to the starting position.
- Switch sides: Lift the other knee and reach with the opposite hand.
- Repeat rhythmically: Continue alternating sides while keeping the wall-sit position steady.
Pro Tips & Common Mistakes
- Keep the back connected to the wall: Avoid leaning forward too much during the toe reach.
- Control the supporting knee: Do not let it collapse inward when the opposite leg lifts.
- Use a small reach first: You do not need to force a toe touch. Quality matters more than range.
- Move from the hip: Lift the knee with hip flexor control instead of kicking the lower leg wildly.
- Breathe through the hold: Do not hold your breath during the wall sit.
- Avoid bouncing: Lower the foot softly and keep each rep smooth.
- Keep the feet flat: Press through the heel and midfoot of the supporting leg.
- Do not sit too low too soon: A deep wall sit can overload the knees if your strength is not ready.
FAQ
What muscles does the Wall Sit Toe Touch work?
The main working muscles are the quadriceps because they hold the wall-sit position. The core, hip flexors, glutes, and calves help stabilize the body while the opposite hand reaches toward the lifted foot.
Is the Wall Sit Toe Touch good for beginners?
Yes, it can be beginner-friendly when performed with a shallow wall sit and a small reach. Beginners should focus on balance, knee alignment, and smooth alternating reps before increasing depth or speed.
Should I actually touch my toe every rep?
Not necessarily. The goal is controlled cross-body movement. If you cannot touch the toe without rounding, twisting, or losing the wall sit, reach toward the shin or knee instead.
Why do my quads burn so quickly?
The wall sit keeps the quads under constant isometric tension. Adding the toe-touch movement increases the demand because one leg must support more of the work during each alternating rep.
How can I make the Wall Sit Toe Touch harder?
Use a deeper wall sit, slow down the lowering phase, increase total time, pause at the top of each reach, or wear a light ankle weight. Only progress when your knees and hips stay controlled.
How can I make this exercise easier?
Use a higher wall-sit position, reduce the knee lift, reach toward the knee instead of the toe, or perform fewer reps per set. You can also rest between sides instead of alternating continuously.
Recommended Equipment
- Exercise Mat — useful for comfort, warm-ups, and floor-based mobility before lower-body training
- Adjustable Ankle Weights — optional progression for hip flexor and core challenge once form is stable
- Resistance Bands Set — helpful for glute activation drills and lower-body warm-ups
- Non-Slip Training Shoes — improves foot stability during wall-sit variations
- Interval Training Timer — useful for timed wall-sit sets, circuits, and conditioning finishers
Tip: Equipment is optional for this exercise. Master the bodyweight version first, then add light progression only when your wall-sit position stays steady.