Barbell Lateral Lunge: Form, Benefits, Muscles Worked & Tips
Learn the Barbell Lateral Lunge for stronger glutes, quads, adductors, and hip control. Includes form steps, sets, tips, FAQs, and equipment.
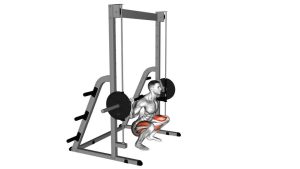
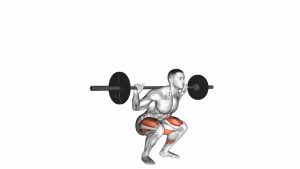
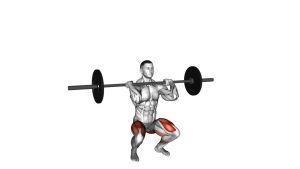
Barbell Lateral Lunge
This exercise requires balance, control, and strong bracing because the barbell is placed across the upper back. The movement should feel like a controlled side step plus hip sit-back, not a regular squat. The working leg bends while the opposite leg stays long, creating a strong stretch through the inner thigh and a deep loading position for the glutes and quads.
Quick Overview
| Body Part | Legs |
|---|---|
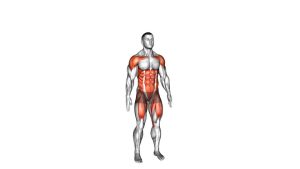
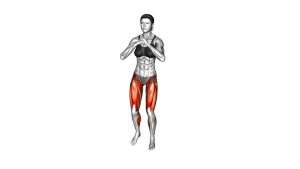
| Primary Muscle | Gluteus maximus, quadriceps, adductors |
| Secondary Muscle | Hamstrings, gluteus medius, calves, core stabilizers |
| Equipment | Barbell, weight plates, squat rack recommended |
| Difficulty | Intermediate |
Sets & Reps (By Goal)
- Strength: 3–5 sets × 4–6 reps per side with controlled rest between sides.
- Muscle growth: 3–4 sets × 8–12 reps per side using a smooth tempo.
- Hip mobility and control: 2–3 sets × 8–10 reps per side with light weight and deeper range.
- Athletic conditioning: 2–4 sets × 10–14 alternating reps using moderate weight.
Progression rule: Improve depth, balance, and knee tracking before increasing weight. Add load only when both sides feel stable and symmetrical.
Setup / Starting Position
- Set the barbell: Place the bar across your upper back like a high-bar squat. Keep it stable, not resting on the neck.
- Grip evenly: Hold the bar with both hands and pull your elbows slightly down to create upper-back tension.
- Stand tall: Start with feet about hip-width apart, chest lifted, ribs controlled, and core braced.
- Look forward: Keep your head neutral and eyes focused ahead to help balance.
- Prepare the step: Choose one side and create enough space to step wide without rushing the movement.
A squat rack is recommended so you can safely unrack and rerack the barbell without twisting or lifting it from the floor.
Execution (Step-by-Step)
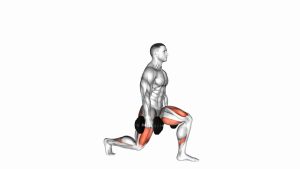
- Step to the side: Take a wide lateral step with one foot while keeping the barbell steady across your upper back.
- Plant the foot: Land with the working foot flat, keeping the heel, midfoot, and toes connected to the floor.
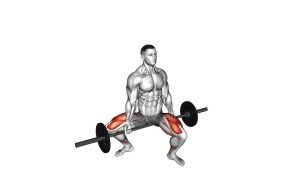
- Shift into the hip: Push your hips back and toward the stepping leg as the working knee bends.
- Keep the opposite leg long: The non-working leg should stay extended, creating a stretch through the inner thigh.
- Control the bottom: Lower until you reach a strong, stable depth without rounding the back or collapsing the knee inward.
- Drive through the working foot: Push the floor away using the heel and midfoot of the bent leg.
- Return to center: Bring your body back to the starting position with control before repeating on the same side or alternating sides.
Pro Tips & Common Mistakes
- Use a wide enough step: A short step turns the movement into an awkward squat and limits hip loading.
- Keep the working foot flat: Do not roll onto the inside edge of the foot or lift the heel.
- Do not let the knee cave inward: Keep the knee tracking in the same direction as the toes.
- Keep the opposite leg straight: The straight leg creates the adductor stretch and defines the lateral lunge pattern.
- Avoid rounding the spine: Brace your core and keep your torso strong as your hips move back.
- Control the descent: Do not bounce out of the bottom position. Use muscle tension, not momentum.
- Start lighter than expected: The lateral position challenges the hips and groin more than regular lunges.
- Train both sides equally: Lateral lunges can reveal left-right strength and mobility differences.
FAQ
What muscles does the Barbell Lateral Lunge work?
The Barbell Lateral Lunge mainly works the glutes, quadriceps, and adductors. It also trains the hamstrings, gluteus medius, calves, and core because the body must stabilize the barbell while moving side to side.
Is the Barbell Lateral Lunge good for glutes?
Yes. The glutes work strongly when you sit the hips back into the working leg and drive back to center. To feel more glute engagement, keep the working foot flat, push through the heel and midfoot, and avoid collapsing forward.
Should I alternate sides or do all reps on one side first?
Both methods work. Alternating sides is useful for coordination and conditioning. Performing all reps on one side first is better for focused strength, control, and correcting side-to-side imbalances.
How deep should I go?
Lower only as far as you can keep your working foot flat, spine neutral, and knee aligned. Depth should improve gradually as your hip mobility, adductor flexibility, and lateral strength improve.
Why do I feel this exercise in my inner thigh?
That is normal. The straight leg places the adductors under stretch, and the adductors also help pull the body back toward center. However, sharp groin pain is not normal and means you should reduce range or load.
Is this exercise beginner-friendly?
The barbell version is usually best for intermediate lifters. Beginners should first learn the bodyweight lateral lunge or dumbbell lateral lunge before adding a barbell across the back.
Recommended Equipment
- Olympic Barbell — the main loading tool for building strength with this lateral lunge variation
- Olympic Weight Plates — allows progressive overload as your lower-body strength improves
- Squat Rack — helps you safely unrack and rerack the barbell at shoulder height
- Barbell Pad — optional comfort support for lifters who feel pressure across the upper back
- Weightlifting Shoes — provides a stable base and better foot pressure during loaded lower-body work
Tip: Choose equipment that helps you stay stable and controlled. The Barbell Lateral Lunge should be trained with clean movement quality before heavy loading.