Barbell Squat 2-Second Hold : Form, Benefits & Tips
Master the Barbell Squat 2-Second Hold with proper depth, controlled form, and a steady pause. Learn muscles worked, sets, common mistakes, and tips.
Barbell Squat (2-Second Hold)
The paused barbell squat is an effective variation for building lower-body strength while improving movement consistency. Because the lifter stops at the bottom, the quadriceps, glutes, and core must maintain tension without relying on an immediate rebound.
Additionally, the deliberate pause gives you time to recognize your squat depth, foot pressure, knee alignment, and torso position. Therefore, this exercise can help reinforce consistent technique and strengthen positions that often feel difficult during regular squats.
Although the movement resembles a traditional high-bar back squat, the two-second hold makes each repetition more demanding. As a result, using a lighter weight than your usual squat may be necessary to maintain proper form.
Quick Overview
| Body Part | Legs |
|---|---|
| Primary Muscle | Quadriceps (rectus femoris, vastus lateralis, vastus medialis, and vastus intermedius) and gluteus maximus |
| Secondary Muscle | Adductor magnus, hamstrings, spinal erectors, abdominal muscles, obliques, calves, and hip stabilizers |
| Equipment | Barbell, weight plates, and squat rack with appropriate safety supports |
| Difficulty | Intermediate — requires established squat technique, controlled depth, and the ability to maintain stability under a loaded barbell |
Sets & Reps (By Goal)
- Strength development: Perform 3–5 sets × 3–5 reps with a two-second pause at the bottom. Rest 2–3 minutes between sets. Use a challenging but manageable load that allows consistent depth and stable technique.
- Muscle hypertrophy: Complete 3–4 sets × 6–10 reps while maintaining controlled movement throughout each repetition. Rest 90–150 seconds between sets. Additionally, prioritize steady muscle tension rather than increasing weight too quickly.
- Technique improvement: Perform 2–4 sets × 4–6 reps using a relatively light barbell load. Focus on proper knee tracking, foot pressure, and torso alignment. Furthermore, use the pause to reinforce consistent bottom-position mechanics.
- Bottom-position stability: Complete 3 sets × 5–8 reps with a strict two-second hold. Rest 60–120 seconds between sets. Throughout the pause, maintain abdominal pressure, balanced foot contact, and active leg tension.
- Muscular endurance: Perform 2–3 sets × 10–12 reps using a lighter load. Rest 60–90 seconds between sets. However, stop the set when fatigue prevents a stable pause or controlled ascent.
How to Choose the Correct Training Load
Start with a weight that allows you to complete every pause without leaning excessively or losing your balance. Because each repetition includes a stationary hold, the exercise may feel harder than a standard squat.
Therefore, choose movement quality over maximum resistance. Your final repetition should maintain the same depth, stability, and pause duration as your first.
Progression rule: First master consistent depth, controlled lowering, and a complete two-second pause. Next, increase repetitions within your target range. Finally, add weight gradually while preserving the same technique and muscular control.
Setup / Starting Position
- Prepare the squat rack: Position the barbell on rack hooks slightly below shoulder height. Additionally, adjust the safety bars to a suitable height below your intended squat depth.
- Position the barbell: Step underneath the bar and place it securely across your upper trapezius muscles. Avoid resting the bar directly on your cervical spine or neck.
- Establish your grip: Hold the bar with both hands slightly wider than shoulder width, according to your mobility. Keep your wrists comfortable and upper-back muscles engaged.
- Unrack the weight: Brace your abdomen, extend your hips and knees, and lift the bar off the supports. Then take small, controlled steps backward to establish your stance.
- Set your foot position: Stand approximately shoulder-width apart, with your toes pointing slightly outward. However, adjust your stance according to your hip structure and comfortable squat mechanics.
- Brace your core: Take a controlled breath and create abdominal pressure before descending. Meanwhile, maintain a relatively neutral spine and keep your chest and upper back stable.
- Establish your balance: Distribute pressure across your heel, big-toe base, and little-toe base. Keep your gaze generally forward and slightly downward without forcing your head into extension.
Starting Position Checkpoint
Before beginning the squat, confirm that both feet feel stable. The bar should remain secure across your upper back, while your hips and knees start in an extended position.
Additionally, your abdomen should feel braced without excessive rib flaring. Once you establish this position, begin the descent without rushing or shifting your weight onto your toes.
Execution (Step-by-Step)
- Initiate the descent: Begin bending your hips and knees together. Allow your hips to move downward while your knees travel naturally in the direction of your toes. Keep the barbell balanced over your midfoot.
- Lower with control: Descend gradually over approximately 2–3 seconds. Meanwhile, maintain abdominal tension and prevent your knees from collapsing inward. Your torso may incline forward naturally as your hips and knees flex.
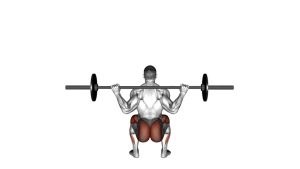
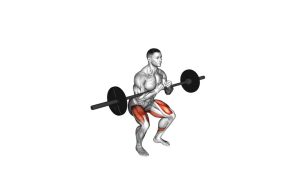
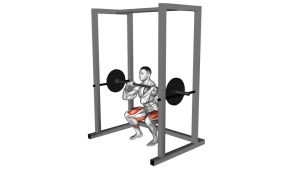
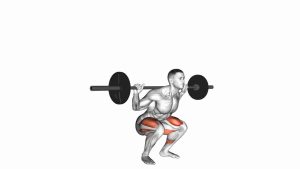
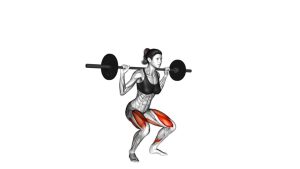
- Reach your squat depth: Continue lowering until your thighs approach parallel to the floor, as demonstrated in the video. However, prioritize the deepest position you can control without losing spinal stability or balanced foot contact.
- Establish the bottom position: Stop your downward movement completely. Keep the bar stable, your feet planted, and your knees aligned with your toes. Avoid sitting backward excessively or relaxing your abdominal brace.
- Hold for two seconds: Maintain the bottom position while counting two controlled seconds. During the pause, continue producing muscular tension through your quadriceps, glutes, and core. Do not bounce or rest on the safety bars.
- Begin the upward drive: After completing the pause, push firmly through your entire foot. Extend your hips and knees together while maintaining your torso angle as consistently as possible.
- Complete the ascent: Continue standing until your hips and knees reach full extension. Additionally, keep your spine stable and prevent excessive backward leaning or exaggerated hip thrusting at the top.
- Reset for the next repetition: Return to a stable upright position, reestablish your breathing and abdominal brace, and prepare for the next controlled squat. Repeat the same depth and two-second pause on every repetition.
Understanding the Two-Second Bottom Hold
The pause begins only after your downward movement has stopped. Therefore, the lowering phase does not count toward the required two-second hold.
During this stationary phase, the quadriceps and hip extensors maintain force to support your body and the barbell. Meanwhile, your core and spinal erectors help prevent unnecessary torso movement.
Once the two seconds finish, initiate the ascent smoothly. Avoid bouncing upward or allowing the hips to rise much faster than the shoulders.
Pro Tips & Common Mistakes
- Maintain complete foot contact: Keep pressure distributed across your feet throughout the movement. Avoid lifting your heels or shifting excessively onto your toes during the descent.
- Do not bounce at the bottom: The purpose of this variation is to remove the immediate rebound between lowering and lifting. Therefore, establish a genuine stationary pause before beginning the ascent.
- Keep your knees aligned: Allow the knees to move naturally over the toes. However, avoid uncontrolled inward collapse during the pause or upward drive.
- Preserve spinal stability: Maintain a braced, relatively neutral spine. Excessive rounding or uncontrolled arching can indicate that your load or squat depth exceeds your current control.
- Control your breathing: Establish abdominal pressure before descending. Additionally, avoid completely relaxing your brace during the hold. Release and reset your breath when you reach a stable position.
- Avoid excessive forward leaning: Some torso inclination is normal during back squats. Nevertheless, prevent sudden chest collapse or uncontrolled changes in your torso position.
- Use an appropriate weight: Paused repetitions can be significantly more demanding than regular squats. Consequently, reducing the load often improves positioning and exercise quality.
- Keep the pause consistent: Count two full seconds at the bottom of every repetition. Do not shorten the pause as fatigue increases or the set becomes more challenging.
- Do not force excessive depth: Squat to a depth that allows stable foot contact and controlled spinal positioning. Furthermore, avoid forcing your hips lower if your technique begins to deteriorate.
- Rise with coordinated movement: Extend the hips and knees together. Avoid shooting your hips upward first, which may increase the forward torso inclination and shift more work toward the back.
Why the Paused Squat Feels More Difficult
A conventional squat often benefits from the natural stretch-shortening cycle during the transition into standing. In contrast, a deliberate pause reduces the contribution of an immediate rebound.
Consequently, the lifter must initiate the upward movement from a relatively stationary position. This requires controlled muscular force while maintaining stable joint alignment.
Additionally, the longer time spent under tension increases the difficulty of each repetition. For this reason, consistent positioning matters more than the amount of weight lifted.
FAQ
Muscles Worked and Exercise Technique
What muscles does the Barbell Squat (2-Second Hold) work?
The Barbell Squat (2-Second Hold) primarily works the quadriceps and gluteus maximus. Additionally, the adductor magnus contributes to hip extension, while the hamstrings, spinal erectors, abdominal muscles, and calves assist with movement and stability.
Because the exercise includes a stationary bottom hold, the muscles must maintain tension before producing the upward drive. Therefore, it provides a challenging variation for developing lower-body strength and controlled squat positioning.
What is the difference between a regular barbell squat and a two-second paused squat?
A regular barbell squat generally transitions directly from the lowering phase into the upward movement. In contrast, a two-second paused squat includes a deliberate stop at the bottom.
This pause reduces the immediate rebound that can assist the ascent. As a result, the lifter must generate sufficient force from a stationary position while maintaining muscular tension and balance.
How deep should I squat during the two-second hold?
Aim for a controlled squat depth that your mobility, strength, and body proportions allow. In the demonstrated variation, the thighs approach parallel to the floor.
However, not everyone needs the same exact depth. Instead, prioritize stable foot contact, comfortable knee tracking, and a controlled spine. Reduce depth if your position becomes unstable or painful.
Pause Duration and Training Benefits
Does the two-second hold build more strength?
Paused squats can improve strength in the bottom portion of the squat by requiring force production without an immediate rebound. Additionally, they can reinforce positioning, balance, and consistent squat depth.
Nevertheless, they are not automatically superior to conventional squats for every training goal. Instead, both variations can complement a balanced lower-body strength program.
Should I use the same weight as my regular barbell squat?
Usually, starting with a lighter weight is sensible. Because the two-second pause increases the difficulty of each repetition, your standard squat weight may be too demanding.
Therefore, begin conservatively and evaluate your ability to maintain posture, balance, and the full pause duration. Increase resistance only when your repetitions remain consistent and controlled.
Should I hold my breath during the two-second pause?
A controlled abdominal brace helps stabilize the torso during a loaded squat. Some experienced lifters use a brief breath hold to maintain pressure through the most demanding portion.
However, prolonged breath holding can be unsuitable for certain individuals, particularly those with cardiovascular or blood-pressure concerns. Therefore, use a breathing strategy appropriate for your health and training experience.
Programming, Beginners, and Safety
Is the Barbell Squat (2-Second Hold) suitable for beginners?
The loaded paused squat is generally better suited to lifters who already understand standard squat mechanics. However, beginners can practice the same movement pattern using bodyweight squats or a lighter training bar.
First, develop stable balance and comfortable squat depth. Next, introduce a short stationary hold. Finally, progress toward loaded repetitions once movement quality becomes consistent.
How often should I include paused barbell squats in my workout?
Many lifters can include paused squats once or twice per week, depending on their training program and recovery requirements. For example, they may replace regular squats during a technique-focused session or serve as a secondary strength exercise.
Additionally, allow sufficient recovery between demanding lower-body workouts. Adjust the total volume if your legs remain excessively fatigued or your technique declines.
What should I do if my knees or lower back hurt during paused squats?
Stop the exercise if you experience sharp, worsening, or unusual joint pain. Although muscular effort is expected, persistent knee or back pain should not be ignored.
First, reassess the weight, squat depth, bracing, and movement control. However, if symptoms continue or interfere with normal activities, consult a qualified healthcare professional before returning to loaded squats.
Recommended Equipment
- Power Rack with Safety Bars — provides a stable setup for loaded barbell squats. Adjustable safety supports help reduce the risk of becoming trapped beneath the barbell when correctly positioned.
- Olympic Barbell — the primary resistance tool for paused back squats. Choose a barbell with suitable dimensions, grip texture, and load capacity for your training needs.
- Olympic Bumper Weight Plates — allow gradual resistance progression as strength and squat control improve. Select compatible plates and increase the total load conservatively.
- Olympic Barbell Collars — help secure weight plates on the barbell and reduce unwanted plate movement. Use collars compatible with the diameter of your barbell sleeves.
- Weightlifting Shoes — provide a firm, stable lifting surface. Additionally, a raised heel may help some lifters maintain balance and achieve a comfortable squat depth.
Tip: Prioritize a sturdy squat rack, compatible barbell, secure weight plates, and properly adjusted safety supports before increasing resistance. Furthermore, choose equipment that matches your experience, training environment, and current strength level.