Elbow Touch and Lift: Form, Shoulder Benefits, Sets, Tips & FAQ
Learn the Elbow Touch and Lift, a beginner-friendly shoulder mobility and activation exercise that improves control, posture, and coordination. Includes form tips, sets by goal, mistakes, FAQs, and recommended equipment.
Elbow Touch and Lift
This exercise works best when performed with a smooth tempo and light muscular effort. You should feel the shoulders doing the work, especially the front of the delts, while the neck stays relaxed and the ribs stay down. It is a great choice for beginners, home workouts, movement prep, or shoulder sessions where you want cleaner mechanics before heavier pressing or raising exercises.
Quick Overview
| Body Part | Shoulders |
|---|---|
| Primary Muscle | Anterior deltoids (front shoulders) |
| Secondary Muscle | Medial deltoids, upper chest, rotator cuff stabilizers, upper traps (light) |
| Equipment | None |
| Difficulty | Beginner |
Sets & Reps (By Goal)
- Warm-up / activation: 2–3 sets × 10–15 reps with slow, smooth control
- Shoulder mobility practice: 2–4 sets × 8–12 reps with a brief pause at the top
- Light endurance / toning: 2–3 sets × 15–20 reps with short rest periods
- Desk break reset: 1–2 sets × 8–10 easy reps to open the shoulders and reinforce posture
Progression rule: Increase control, pause quality, and range before adding speed or external load. If the shoulders start shrugging or the neck gets tense, reduce the range and slow the tempo.
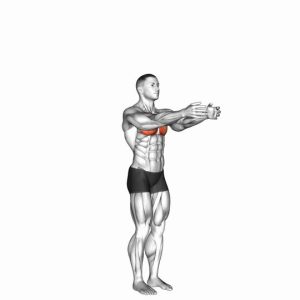
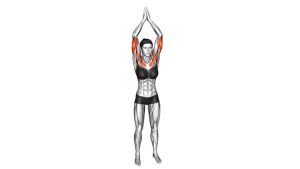
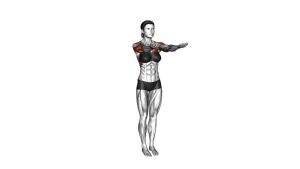
Setup / Starting Position
- Stand tall: Keep your feet about hip-width apart and your posture upright.
- Brace lightly: Keep your ribs stacked over your hips and your core gently engaged.
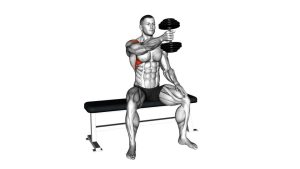
- Raise the arms: Bring your arms up in front of the body with elbows bent around 90 degrees.
- Set shoulder position: Keep the shoulders down and relaxed rather than shrugged upward.
- Start in control: Hands and forearms should stay organized and symmetrical before the first rep.
Tip: Think of creating a long neck and open chest before you start. Good setup makes the motion feel smoother and cleaner.
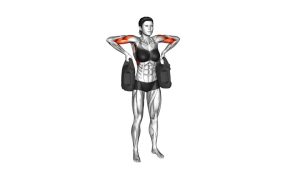
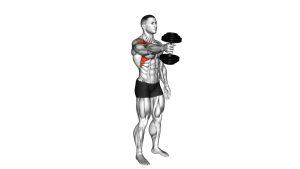
Execution (Step-by-Step)
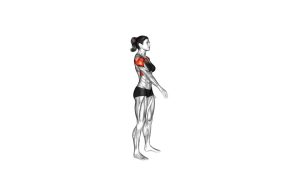
- Bring the elbows inward: Move both elbows toward each other in front of the chest in a controlled motion.
- Light squeeze: Let the elbows come close together or lightly touch without rounding the upper back excessively.
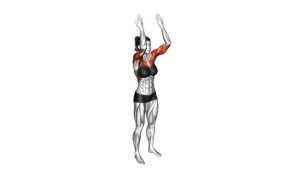
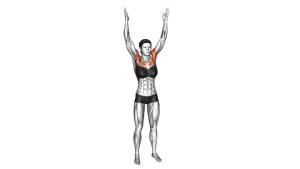
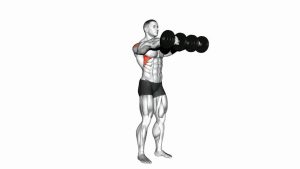
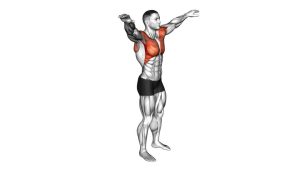
- Open and lift: Separate the elbows and guide them outward and slightly upward while keeping them bent.
- Control the top: Pause briefly when the shoulders feel open and active, without arching the lower back.
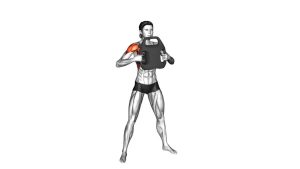
- Return smoothly: Bring the arms back through the same path and repeat with an even rhythm.
Pro Tips & Common Mistakes
- Keep the neck relaxed: Do not let the traps take over by shrugging the shoulders.
- Stay tall: Avoid leaning back or flaring the ribs as the elbows lift.
- Use a controlled tempo: Fast reps often reduce shoulder activation and turn the drill into momentum.
- Don’t force elbow contact: Bring the elbows inward naturally without collapsing posture.
- Open through the shoulders: Think “elbows out and up” rather than swinging the forearms loosely.
- Keep both sides even: Match the height and path of each elbow for better coordination.
- Use it before upper-body training: This pairs well with presses, lateral raises, and band pull-aparts.
FAQ
What muscles does the Elbow Touch and Lift work?
It mainly targets the anterior deltoids while also involving the medial delts, upper chest, and small shoulder stabilizers. It is more of a mobility-and-activation drill than a heavy muscle-building exercise.
Is this a good shoulder warm-up?
Yes. It is a very useful warm-up drill because it raises awareness of shoulder position, improves control, and prepares the shoulders for pressing or raising movements.
Should I use weights for this exercise?
Most people should start with bodyweight only. Once the motion is smooth and pain-free, very light resistance such as tiny dumbbells or bands can be added carefully.
How high should I lift my elbows?
Only as high as you can lift while keeping the shoulders relaxed and pain-free. Quality matters more than range. Stop before the movement turns into shrugging or compensation.
Who should be careful with this exercise?
Anyone with active shoulder impingement, recent injury, or painful overhead movement should keep the range small and avoid forcing the lift. If symptoms are significant, get professional guidance.
Recommended Equipment (Optional)
- Resistance Bands Set — useful for progressing shoulder activation, pull-aparts, and light mobility work
- Light Dumbbells — good for adding very small amounts of resistance once the movement pattern is clean
- Over-the-Door Shoulder Pulley — helpful for extra shoulder mobility and controlled rehab-style range-of-motion work
- Exercise Mat — useful for warm-up, floor mobility drills, and a more comfortable home workout area
- Posture Corrector Brace — optional awareness tool for posture, but not a replacement for strengthening and mobility work
Tip: Optional tools should support better movement quality, not force range or create discomfort. Start simple and prioritize clean shoulder motion first.