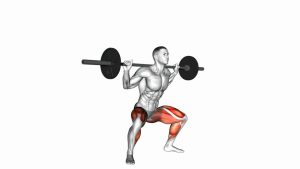
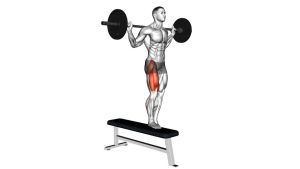
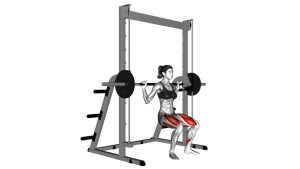
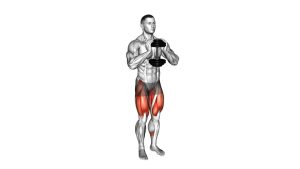
Barbell Curtsy Lunge: Proper Form, Muscles Worked & Benefits
Master the barbell curtsy lunge with step-by-step form, muscles worked, sets, safety tips, and common mistakes for stronger glutes and stable legs.
Barbell Curtsy Lunge
The Barbell Curtsy Lunge combines a diagonal stepping pattern with controlled hip and knee flexion. Because the supporting leg performs most of the work, the exercise develops strength on each side independently. Additionally, the crossed-leg position increases the coordination demands placed on the hips and core.
However, effective technique requires more than simply stepping one foot behind the other. The supporting knee should follow a comfortable alignment, while the pelvis and upper body remain stable. Therefore, beginners should first master bodyweight curtsy lunges before progressing to a loaded barbell.
Quick Overview
| Body Part | Legs |
|---|---|
| Primary Muscle | Gluteus maximus and quadriceps (vastus lateralis, vastus medialis, vastus intermedius, and rectus femoris) |
| Secondary Muscle | Gluteus medius, gluteus minimus, hip adductors, hamstrings, calves, spinal erectors, and core stabilizers |
| Equipment | Barbell, weight plates, secure collars, and a suitable squat rack for setup |
| Difficulty | Intermediate — requires controlled unilateral strength, hip stability, coordination, and barbell balance |
Sets & Reps (By Goal)
- Strength: 3–4 sets × 5–8 reps per leg. Rest 90–120 seconds between sets. Use a manageable load and prioritize balance.
- Hypertrophy / Muscle Growth: 3–4 sets × 8–12 reps per leg. Rest 60–90 seconds. Use controlled lowering and consistent depth.
- Muscular Endurance: 2–3 sets × 12–16 reps per leg. Rest 45–75 seconds. Choose lighter resistance to maintain technique.
- Balance / Hip Stability: 2–3 sets × 6–10 reps per leg. Practice slowly with bodyweight before adding a barbell.
- Mobility / Movement Control: 1–2 sets × 6–8 controlled reps per leg. Perform this variation without external loading.
- Rehab-Style Regression: Use a supported, shallow, unloaded crossover only when appropriate and cleared by a qualified rehabilitation professional.
Choosing the Right Training Load
Start with a weight that allows every repetition to feel stable and deliberate. Furthermore, keep enough strength in reserve to correct your position without struggling. If the barbell causes excessive leaning, reduce the resistance immediately.
Progression rule: First master the diagonal step and controlled descent. Next, improve movement consistency and repetition quality. Finally, add small weight increases while preserving comfortable knee alignment and stable balance.
Setup / Starting Position
- Prepare the barbell: Position the bar securely on a squat rack at an appropriate height. Load both sides evenly and secure the plates with suitable collars.
- Place the bar across your upper back: Step underneath the bar and position it comfortably across the upper trapezius. Avoid resting it directly on the cervical spine.
- Establish your grip: Hold the bar slightly wider than shoulder width. Keep your wrists comfortable and pull your upper-back muscles gently into a stable position.
- Unrack with control: Stand tall to lift the bar from its supports. Then take a small step backward into a clear training area.
- Set your stance: Position your feet approximately hip-width apart. Keep your knees soft, chest lifted, and body weight distributed evenly.
- Brace your core: Engage your abdominal muscles without holding excessive tension in your neck. Maintain a neutral spine and look forward.
Foot Placement and Balance Preparation
Before beginning, identify the supporting leg and the leg that will step diagonally backward. The crossover should be moderate rather than exaggerated. Consequently, your hips can move through a comfortable range without forcing the knee into an awkward position.
In addition, ensure that your footwear provides stable contact with the floor. Avoid slippery surfaces or unstable shoes. Once balanced, begin the movement without rushing the first repetition.
Tip: Practice several unloaded diagonal steps before using the barbell. This helps establish the correct stepping pattern and reduces unnecessary balance corrections.
Execution (Step-by-Step)
- Establish a stable starting position: Stand upright with the barbell resting securely across your upper back. Keep your chest lifted, shoulders steady, and abdominal muscles engaged.
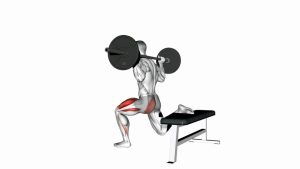
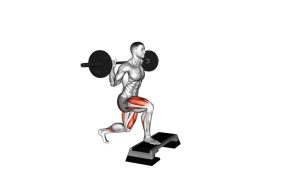
- Step diagonally backward: Move one leg behind and slightly across the opposite supporting leg. Unlike a standard reverse lunge, the stepping foot travels across the body’s midline in a controlled diagonal pattern.
- Transfer weight to the supporting leg: Allow the front foot to carry most of your body weight. Meanwhile, use the rear foot for balance without pushing excessively through its toes.
- Lower your hips: Bend both knees gradually as your body descends. Keep the supporting knee moving comfortably in line with its foot. Additionally, maintain a stable pelvis and avoid twisting your torso.
- Reach a controlled bottom position: Lower only as far as your mobility and strength allow. The rear knee approaches the floor without needing to touch it. However, never force additional depth if the supporting knee rotates inward.
- Drive through the supporting foot: Push through the midfoot and heel while extending the supporting hip and knee. As a result, your body rises smoothly from the crossed-leg position.
- Return to the starting stance: Bring the rear leg forward into its original position. Stand upright without leaning backward or losing control of the barbell.
- Repeat on the opposite side: Perform the same diagonal crossover using the other leg. Continue alternating sides while keeping your repetitions smooth and balanced.
Breathing and Movement Tempo
Inhale and brace before lowering into the lunge. Then exhale gradually as you rise through the supporting leg. For controlled repetitions, use approximately two to three seconds during the descent. Afterward, return to standing without bouncing or pushing suddenly from the rear foot.
Pro Tips & Common Mistakes
- Keep the crossover moderate: An exaggerated diagonal step can create unnecessary rotational stress. Instead, use a comfortable crossing distance that allows controlled knee movement.
- Maintain stable knee alignment: Avoid letting the supporting knee collapse inward. Additionally, reduce the range of motion if you cannot maintain comfortable tracking.
- Do not rush the descent: Dropping quickly into the bottom position makes balance more difficult. Therefore, lower slowly and maintain muscular control throughout the repetition.
- Keep the barbell balanced: Avoid tilting the shoulders or shifting the bar excessively from side to side. Instead, maintain upper-back tension and a steady trunk position.
- Drive through the supporting leg: The front leg should generate most of the upward force. Meanwhile, the crossed rear leg provides additional balance.
- Avoid excessive forward leaning: A slight natural torso inclination is acceptable. However, excessive bending can shift your center of mass and reduce control.
- Control the rear knee: Avoid dropping the rear knee forcefully toward the floor. Instead, descend only to a depth that feels comfortable and stable.
- Do not overload too early: Heavy weights can magnify balance and technique problems. Consequently, progress gradually after demonstrating consistent unloaded repetitions.
- Maintain steady breathing: Avoid unnecessary breath-holding throughout long sets. Instead, coordinate your breathing with the lowering and lifting phases.
- Train both sides consistently: Alternate legs or complete equal repetitions on each side. This helps develop balanced strength and improves movement coordination.
Improving Glute Activation and Stability
To improve glute involvement, focus on pushing through the supporting foot while extending the hip. Additionally, keep your pelvis steady rather than rotating toward the stepping leg. The gluteus medius helps control the hip, especially during the diagonal transition.
For better balance, practice slow bodyweight repetitions before increasing resistance. Moreover, consistent foot placement makes each repetition easier to reproduce. If your knees or hips feel uncomfortable, use a shallower range or substitute a standard reverse lunge.
FAQ
Muscles Worked and Exercise Benefits
What muscles does the Barbell Curtsy Lunge work?
The Barbell Curtsy Lunge primarily targets the gluteus maximus and quadriceps. Additionally, the gluteus medius, hip adductors, hamstrings, and core help stabilize the movement.
Because each repetition emphasizes one supporting leg, the exercise also challenges unilateral strength. As a result, controlled training can improve lower-body coordination and hip stability.
Is the Barbell Curtsy Lunge good for building glutes?
Yes, this exercise can support glute development when performed with appropriate resistance. The gluteus maximus contributes to hip extension as you return to standing. Meanwhile, the gluteus medius helps stabilize the pelvis.
However, the exercise is not automatically superior to standard lunges or split squats. Therefore, choose the variation that allows comfortable joints, progressive resistance, and consistent technique.
Technique and Movement Differences
What is the difference between a Curtsy Lunge and a Reverse Lunge?
A traditional reverse lunge involves stepping backward with relatively little sideways movement. In contrast, a curtsy lunge involves moving the rear foot diagonally across the body’s midline.
Consequently, the curtsy variation introduces additional coordination and rotational control demands. Both exercises can strengthen the glutes and quadriceps, although their joint positions differ.
How far should I cross my leg during a Barbell Curtsy Lunge?
Use a moderate diagonal step that allows your supporting knee to remain comfortable. Avoid crossing so far that your pelvis twists or your knee moves into an awkward position.
Furthermore, the correct distance depends on your hip mobility and individual anatomy. Start with a shallow crossover and adjust gradually while maintaining balance.
Should my torso stay completely upright?
Your torso should remain relatively upright with the spine in a stable position. However, a small forward inclination may occur naturally as the hips descend.
The important goal is to avoid excessive forward bending, sideways leaning, or unwanted trunk rotation. Additionally, maintain secure barbell placement throughout the movement.
Training Frequency, Progression, and Safety
How many Barbell Curtsy Lunges should I perform?
For muscle growth, begin with 3 sets of 8–12 repetitions per leg. Alternatively, use fewer repetitions when emphasizing strength with manageable resistance.
Because the movement requires balance and coordination, prioritize clean technique over high repetitions. Additionally, allow adequate recovery between challenging lower-body training sessions.
Is the Barbell Curtsy Lunge suitable for beginners?
The barbell variation is generally better suited to people with previous lunge experience. Beginners should first practice standard reverse lunges and unloaded curtsy lunges.
Once balance and knee control improve, light external resistance may be introduced. However, the exercise should remain comfortable throughout the entire movement.
Can Barbell Curtsy Lunges cause knee pain?
The crossed-leg position may aggravate symptoms in people sensitive to rotational knee loading. Furthermore, excessive crossover distance or poor balance can increase discomfort.
Therefore, avoid forcing the knee into a painful position. Reduce the depth, remove the barbell, or select a standard reverse lunge. If pain persists, consult a qualified healthcare professional.
Can I perform Barbell Curtsy Lunges on both legs?
Yes, the exercise can be performed by alternating the supporting leg. First, step diagonally behind one side and return to standing. Next, repeat the movement using the opposite supporting leg.
Alternatively, complete all repetitions on one side before switching. In either approach, use equal training volume and maintain consistent movement quality.
Recommended Equipment
- Olympic Barbell — provides the primary resistance for barbell curtsy lunges and other compound lower-body exercises
- Olympic Weight Plates — allow gradual resistance increases as lower-body strength and movement control improve
- Power Rack with Safety Bars — supports safer barbell setup, unracking, and controlled lower-body strength training
- Olympic Barbell Collars — help secure weight plates and reduce unwanted plate movement during alternating crossover steps
- Flat-Sole Weightlifting Shoes — provide stable floor contact for controlled diagonal stepping and balanced lower-body training
Tip: Prioritize stable footwear, properly secured weight plates, and a suitable squat rack. Furthermore, select resistance according to your current strength and coordination. Equipment supports training, but it does not replace correct technique.