Safety Bar Front Squat: Proper Form, Muscles Worked, Sets & Tips
Learn the Safety Bar Front Squat with proper form, muscles worked, sets by goal, common mistakes, helpful tips, FAQs, and recommended lifting equipment.
Safety Bar Front Squat
The Safety Bar Front Squat combines knee-dominant lower-body strength with demanding trunk stabilization. Because the bar provides a padded shoulder support and a manageable hand position, the exercise offers an alternative to traditional front squatting for lifters with limited wrist mobility.
Additionally, the relatively upright torso encourages substantial knee flexion, making the movement useful for quadriceps development. However, the glutes, adductors, and spinal stabilizers remain important throughout the full range of motion.
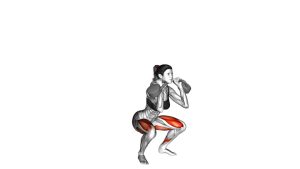
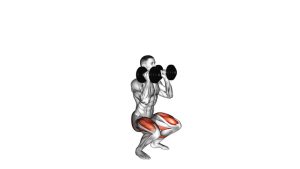
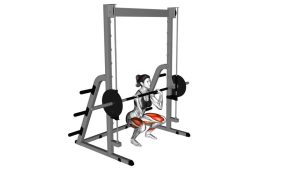
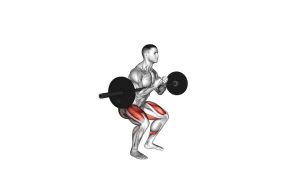
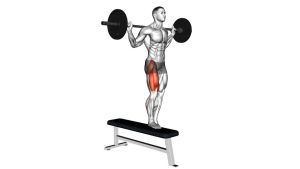
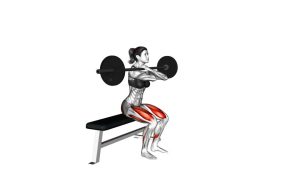
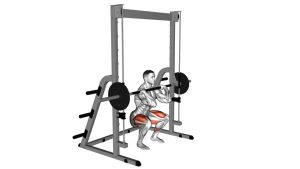
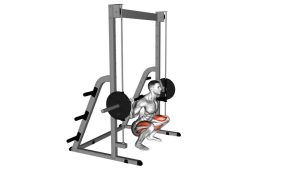
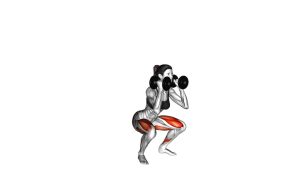
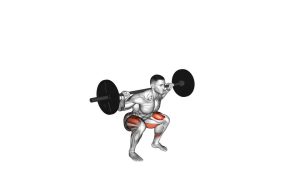
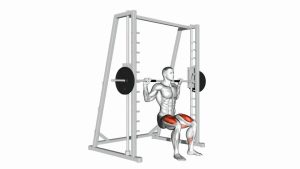
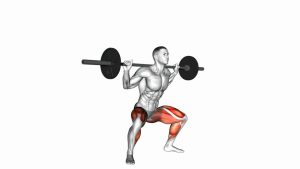
As demonstrated in the exercise animation, both legs work simultaneously while the knees and hips bend together. Therefore, effective repetitions depend on coordinated movement, consistent foot pressure, and controlled depth. Instead of chasing maximum weight immediately, establish stable technique and gradually increase resistance.
Quick Overview
| Body Part | Legs |
|---|---|
| Primary Muscle | Quadriceps (vastus lateralis, vastus medialis, vastus intermedius, and rectus femoris) |
| Secondary Muscle | Gluteus maximus, adductor magnus, and additional hip stabilizers; hamstrings assist stabilization |
| Equipment | Safety squat bar or suitable padded specialty barbell, Olympic weight plates, and power rack with safety supports |
| Difficulty | Intermediate (requires controlled squat mechanics, bracing, and familiarity with loaded barbell movements) |
Movement classification: Compound, bilateral, squat-pattern, lower-body push exercise. The quadriceps extend the knees during the ascent, while the gluteus maximus contributes to hip extension. Meanwhile, the abdominal muscles and spinal erectors resist unwanted torso movement.
Although the specialty bar changes the upper-body setup, it does not eliminate the need for proper squat mechanics. Therefore, balance, bracing, ankle mobility, and appropriate loading remain essential.
Sets & Reps (By Goal)
- Strength: 4–5 sets × 3–6 reps with challenging but controlled resistance. Rest approximately 2–3 minutes between sets while maintaining consistent technique.
- Hypertrophy (muscle growth): 3–4 sets × 6–12 reps with a controlled lowering phase. Rest 90–150 seconds and select a load that allows stable repetitions.
- Muscular endurance: 2–3 sets × 12–15 reps using lighter resistance. Rest 60–90 seconds while avoiding rushed repetitions or excessive fatigue.
- Mobility and movement control: 2–3 sets × 5–8 reps with an empty or lightly loaded bar. Focus on comfortable squat depth, consistent knee tracking, and smooth movement.
- Return-to-training control: 2 sets × 5–8 light repetitions only when cleared for loaded squatting. Prioritize pain-free movement and follow any individualized rehabilitation guidance.
Choosing the Right Training Load
Start with a resistance that allows complete control throughout the intended range of motion. For beginners transitioning from bodyweight squats, even an unloaded specialty bar may feel demanding. Therefore, check the bar’s actual weight before adding plates.
For muscle growth, finish most working sets with approximately one to three controlled repetitions remaining. Conversely, strength-focused sessions generally benefit from heavier loads and longer recovery periods. In either case, technique should remain consistent as fatigue increases.
Progression rule: First improve squat depth, torso stability, and repetition quality. Next, gradually add repetitions within your target range. Finally, increase resistance in small increments while preserving balanced foot pressure and controlled movement.
Setup / Starting Position
Bar Placement and Rack Preparation
- Prepare a suitable power rack: Position the specialty bar at a height that allows comfortable unracking without rising onto your toes or bending excessively.
- Adjust the safety supports: Set the rack’s safety bars just below your lowest controlled squat position. Consequently, they can help catch the weight if a repetition fails.
- Position the padded bar: Settle the shoulder padding securely according to the bar’s design. For the front-supported variation shown, the padded assembly sits around the upper shoulder area. Avoid placing direct pressure against the throat.
- Secure the handles: Grip the accessible handles with both hands. Keep the wrists comfortable, elbows bent, and shoulders engaged without excessive tension.
- Unrack carefully: Brace your abdomen, extend the hips and knees, and lift the bar from its supports. Then take one or two controlled steps backward.
Foot Position and Core Bracing
- Establish your stance: Position both feet approximately shoulder-width apart. However, adjust stance width slightly to accommodate your hip structure and mobility.
- Angle the toes naturally: Turn the toes slightly outward if that allows comfortable knee tracking. Keep the knees pointing in approximately the same direction.
- Distribute foot pressure: Maintain contact through the heel, base of the big toe, and base of the little toe. Therefore, avoid balancing exclusively on the heels or forefeet.
- Brace the torso: Inhale, tighten the abdominal wall, and maintain a neutral spinal position. Keep the chest comfortably lifted without exaggerating the lower-back arch.
- Prepare to descend: Look slightly forward, keep the bar stable, and initiate the movement with both legs. Your entire body should feel balanced before the first repetition.
Setup tip: Bar designs vary. Consequently, confirm the correct orientation and shoulder placement for your specific specialty bar before loading it. Practice with an empty bar until unracking, walking out, and reracking feel predictable.
Execution (Step-by-Step)
Phase 1: Controlled Descent
- Establish the starting position: Stand upright with both hips and knees extended. Keep the padded bar secure, shoulders stable, and abdominal muscles braced.
- Initiate hip and knee flexion: Bend both knees and hips together. Meanwhile, allow the knees to travel forward naturally as the pelvis moves downward.
- Lower between the legs: Descend smoothly without excessively pushing the hips backward. Because this is a relatively upright squat variation, the knees may travel farther forward than during some back squats.
- Maintain torso stability: Keep the ribs stacked over the pelvis and avoid excessive spinal rounding. Additionally, prevent the upper body from collapsing forward under the bar.
Phase 2: Bottom Position
- Reach a controlled squat depth: Continue lowering until the thighs approach parallel or move below it, provided balance, joint comfort, and spinal position remain stable.
- Keep the feet planted: Maintain balanced pressure across both feet. Furthermore, avoid lifting the heels or allowing the arches to collapse.
- Maintain knee alignment: Keep the knees tracking in the direction of the toes. Avoid sudden inward collapse, especially as you prepare to reverse the movement.
- Reverse without bouncing: Transition smoothly from lowering to lifting. Instead of relaxing at the bottom, maintain abdominal tension and control the loaded position.
Phase 3: Upward Drive and Completion
- Push through the floor: Drive upward through both feet while extending the knees and hips together. Keep the heels grounded and avoid shifting onto the toes.
- Raise the hips and chest together: Maintain a stable torso as the bar travels upward. Otherwise, the movement can turn into an excessive forward-leaning recovery.
- Continue extending the legs: Allow the quadriceps and glutes to produce the upward force. Meanwhile, the core stabilizers resist unwanted spinal movement.
- Return to full standing: Finish with the hips and knees extended. However, avoid leaning backward or forcefully snapping the knees into extension.
- Reset your breathing: Exhale during the easier portion of the ascent or after passing the most demanding point. Then establish another controlled breath and brace before repeating.
Recommended tempo: Begin with approximately 2–3 seconds lowering, a smooth transition, and 1–2 seconds rising. Although heavier strength repetitions may move more slowly, avoid deliberately accelerating the descent or bouncing out of the bottom.
After completing the set, approach the rack carefully and confirm that both sides of the bar are supported before releasing the handles.
Pro Tips & Common Mistakes
Pro Tips for Better Squat Technique
- Maintain balanced foot pressure: Drive through the entire foot rather than relying exclusively on the heels. Consequently, you can maintain better balance as the knees move forward.
- Keep the torso comfortably upright: Brace the abdomen and avoid unnecessary forward bending. However, a small amount of torso inclination is natural and depends on individual proportions.
- Choose a suitable stance: Experiment with moderate stance adjustments to find comfortable hip and knee alignment. Therefore, do not force an identical foot position on every lifter.
- Use a controlled lowering phase: Descend deliberately to maintain consistent tension and positioning. Additionally, a slower tempo helps reveal balance or stability problems.
- Keep the handles secure: Use them to stabilize the specialty bar without aggressively pulling or twisting it. Excessive handle tension may disrupt comfortable shoulder positioning.
- Progress gradually: Increase resistance only after performing clean repetitions at your current training weight. As a result, strength development can progress without sacrificing movement quality.
Common Mistakes to Avoid
- Knees collapsing inward: Allowing the knees to move inward excessively can compromise stability. Instead, maintain alignment with the direction of the toes throughout the repetition.
- Heels lifting from the ground: This may indicate an unsuitable stance, limited ankle mobility, or poor balance. Therefore, reduce depth temporarily and improve foot pressure before progressing.
- Excessive forward leaning: Letting the chest collapse can increase the demand on the spinal extensors. Keep the abdomen braced and allow the hips and chest to rise together.
- Dropping too quickly: An uncontrolled descent makes it harder to maintain balanced positioning. Instead, slow the lowering phase and approach the bottom deliberately.
- Forcing excessive squat depth: Going deeper than your available mobility allows may cause compensatory movement. Consequently, use the deepest comfortable position you can maintain with control.
- Loading too heavily: Excessive weight often produces shortened repetitions, poor balance, and inconsistent technique. Begin lighter and progress only when every repetition remains stable.
- Incorrect bar positioning: Placing the padding too close to the throat or using the bar backward can create discomfort. Always verify the intended configuration of your equipment.
Improving Performance Over Time
For consistent progress, combine the Safety Bar Front Squat with complementary lower-body exercises. For example, Romanian deadlifts strengthen the hip-hinge pattern, while calf raises and ankle mobility work can support lower-body training.
Additionally, record your working weight, repetitions, and squat depth. Comparing these details helps distinguish genuine strength improvements from changes in technique. Most importantly, prioritize repeatable movement quality rather than increasing resistance at every workout.
FAQ
Muscles Worked and Exercise Technique
What muscles does the Safety Bar Front Squat work?
The Safety Bar Front Squat primarily trains the quadriceps, which extend the knees during the upward phase. Additionally, the gluteus maximus and adductor magnus contribute to hip extension.
Meanwhile, the abdominal muscles and spinal erectors maintain trunk stability under the loaded bar. Although the hamstrings contribute to lower-body stabilization, they are not the primary movers in this exercise.
How is a Safety Bar Front Squat different from a regular Front Squat?
A conventional front squat generally uses a straight barbell supported across the front shoulders, with the elbows elevated. Conversely, this variation uses a padded specialty bar that changes how the load is supported.
Depending on the bar design, the handles may also reduce the need for traditional front-rack wrist positioning. However, both exercises require strong abdominal bracing, coordinated knee and hip movement, and stable foot pressure.
Should my knees travel past my toes during the squat?
Yes, some forward knee travel is normal during a squat, particularly when maintaining a relatively upright torso. However, the amount varies with individual limb proportions, ankle mobility, and stance.
Rather than forcing the knees behind the toes, focus on keeping your feet grounded and knees aligned. Consequently, you can move through a comfortable squat pattern without unnecessary restrictions.
Training Frequency and Progression
Is the Safety Bar Front Squat suitable for beginners?
It can be appropriate for beginners who already demonstrate consistent bodyweight squat mechanics. However, the specialty bar may be heavy even without additional plates.
Therefore, inexperienced lifters should first develop bracing, squat control, and safe rack handling. Starting with bodyweight squats or goblet squats may provide a more manageable progression. Once these movements feel comfortable, introduce the specialty bar with appropriate supervision.
How many times per week should I perform Safety Bar Front Squats?
Most lifters can begin with one or two weekly sessions, depending on their total training volume. For example, one session may emphasize heavier strength work while another uses moderate resistance.
Additionally, allow sufficient recovery between demanding lower-body workouts. If your performance declines or significant soreness persists, adjust training volume, load, or frequency.
Can Safety Bar Front Squats help build bigger quadriceps?
Yes. The movement allows substantial knee extension work, making it useful for quadriceps hypertrophy. Furthermore, a controlled range of motion can provide consistent muscular loading.
However, muscle growth also depends on adequate training effort, progressive overload, nutrition, and recovery. Therefore, combine technically sound repetitions with an appropriate long-term training program.
Safety, Comfort, and Equipment
Why do I feel the exercise in my lower back?
The spinal erectors naturally contribute to torso stabilization during loaded squatting. Therefore, some muscular effort in the back is expected. However, sharp pain, excessive strain, or an inability to maintain position should not be ignored.
If the movement feels uncomfortable, reduce the weight and reassess your bracing and bar placement. Additionally, make sure the hips and chest rise together instead of allowing excessive forward folding.
Do I need special equipment for the Safety Bar Front Squat?
Yes. This variation requires a suitable safety squat bar or padded specialty barbell. Additionally, a compatible power rack with correctly positioned safety supports is strongly recommended.
Olympic plates and secure collars allow resistance to be adjusted safely. Although dedicated weightlifting shoes are optional, stable footwear can help maintain consistent foot positioning. Always confirm that the equipment is compatible before beginning the exercise.
What should I do if I cannot squat below parallel?
Begin with the deepest range you can control while keeping the feet planted and spine stable. Because hip structure and ankle mobility vary, comfortable squat depth differs between individuals.
Additionally, practice controlled bodyweight squats and suitable mobility exercises. As movement quality improves, gradually explore a deeper range without forcing painful positions. Remember that consistent technique is more valuable than achieving a particular depth at any cost.
Recommended Equipment
- Safety Squat Bar with Padded Shoulder Support — the primary specialty-bar option for this exercise. Its padded support and handles provide an alternative to the conventional front-rack grip. Confirm that the selected model supports your intended bar orientation.
- Power Rack with Adjustable Safety Bars — provides stable unracking and reracking positions while allowing safety supports to be adjusted beneath the intended squat depth.
- Olympic Bumper Weight Plates — allow progressive resistance increases for strength and muscle development. Select plates compatible with your specialty bar and its rated loading capacity.
- Olympic Barbell Locking Collars — help keep loaded plates secured during unracking, squatting, and reracking. Choose collars designed for the sleeve diameter of your particular bar.
- Weightlifting Shoes with Stable Raised Heels — provide a firm lifting platform and can make upright squatting more comfortable for some lifters with limited ankle dorsiflexion.
Equipment tip: Prioritize a suitable specialty bar and secure power rack before purchasing optional accessories. Additionally, verify plate compatibility, rack dimensions, bar weight, and manufacturer loading limits. For best results, use equipment that supports stable positioning and controlled progression.