Seated Twist Straight-Arm: Core Rotation Form, Sets, Tips & FAQ
Learn the Seated Twist Straight-Arm exercise to train obliques, core rotation, and torso control with step-by-step form, sets, tips, and FAQs.
Seated Twist (Straight-Arm)
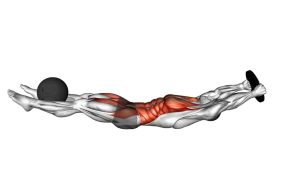
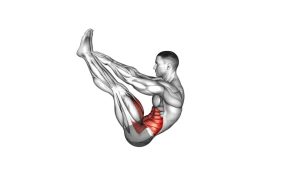
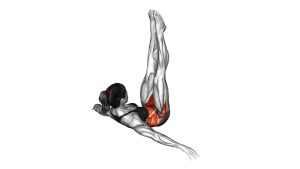
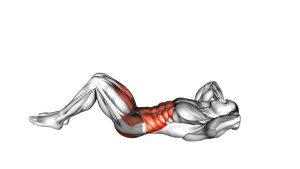
This exercise works best when the rotation comes from the midsection rather than from the arms alone. The body begins seated on the floor with the arms straight, the torso slightly leaned back, and the core engaged. Then, the shoulders and arms rotate together from side to side while the hips remain stable. As a result, the movement builds better control through the abs and obliques without requiring equipment.
Quick Overview
| Body Part | Core |
|---|---|
| Primary Muscle | Obliques |
| Secondary Muscle | Rectus abdominis, transverse abdominis, hip flexors, spinal stabilizers |
| Equipment | None; optional exercise mat for floor comfort |
| Difficulty | Beginner to intermediate |
Sets & Reps (By Goal)
- Beginner core control: 2–3 sets × 8–12 reps per side with a slow tempo.
- Oblique endurance: 3–4 sets × 12–20 reps per side with steady breathing.
- Core warm-up: 1–2 sets × 8–10 reps per side before rotational or full-body training.
- Bodyweight abs workout: 3 sets × 30–45 seconds while maintaining clean form.
Progression rule: First improve control and range of motion. After that, increase time under tension, add more reps, or hold a light object only if the straight-arm position stays stable.
Setup / Starting Position
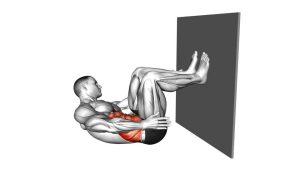
- Sit on the floor: Position your body upright with your legs in front and your hips grounded.
- Lean back slightly: Create mild core tension without rounding your lower back aggressively.
- Extend your arms: Reach both arms straight forward at about chest level, keeping the elbows long.
- Brace your core: Tighten your midsection gently as if preparing to resist movement.
- Set your posture: Keep the chest lifted, shoulders relaxed, and head aligned with the torso.
The video shows a controlled seated position with straight arms and no visible equipment. Therefore, this version should be treated as a bodyweight rotational core drill.
Execution (Step-by-Step)
- Start centered: Sit tall, extend your arms forward, and stabilize your hips on the floor.
- Rotate to one side: Turn your torso and shoulders together while keeping your arms straight.
- Control the end range: Pause briefly when you reach a comfortable twist without forcing your spine.
- Return to center: Bring your arms and torso back to the middle with a smooth, controlled motion.
- Rotate to the opposite side: Repeat the same movement pattern while keeping the legs and hips stable.
- Continue alternating: Move side to side at a steady pace without bouncing or rushing.
Pro Tips & Common Mistakes
- Keep your arms straight: Straight arms increase the lever and make the obliques work harder.
- Rotate from the torso: Do not simply wave your arms side to side without turning your ribs and shoulders.
- Avoid rushing: Fast reps often reduce core tension and turn the exercise into momentum.
- Keep your hips grounded: If your hips shift too much, reduce the range and regain control.
- Stay tall through the chest: Collapsing forward can reduce rotation quality and increase lower-back stress.
- Breathe steadily: Exhale as you rotate, then inhale as you return through the center.
- Use a smaller twist when needed: A clean short range is better than a large uncontrolled twist.
FAQ
What muscles does the Seated Twist (Straight-Arm) work?
The exercise mainly targets the obliques. In addition, it trains the rectus abdominis, transverse abdominis, hip flexors, and smaller spinal stabilizers that help control the seated twisting motion.
Is the Seated Twist (Straight-Arm) good for beginners?
Yes, it can be beginner-friendly when performed slowly with a small range of motion. However, beginners should avoid leaning too far back or twisting aggressively until they can control the movement.
Should my arms stay straight during the whole movement?
Yes. In this variation, the arms remain extended forward. As a result, the core must work harder to control the rotation compared with a bent-arm version.
Why do I feel this in my hip flexors?
Some hip flexor engagement is normal because the body is seated and slightly leaned back. Still, your abs and obliques should remain the main focus. If the hip flexors dominate, sit more upright and reduce the range.
Can I add weight to this exercise?
You can add a light medicine ball, small plate, or dumbbell after mastering the bodyweight version. However, only add load if your hips stay stable, your arms stay controlled, and your lower back feels comfortable.
Recommended Equipment (Optional)
- Exercise Mat — adds floor comfort and helps keep the hips stable during seated core work.
- Medicine Ball — useful for progressing the twist after bodyweight control improves.
- Light Dumbbell Set — allows gradual resistance for advanced straight-arm twist variations.
- Yoga Block — can support posture drills and help modify seated positions.
- Core Sliders — useful for pairing this exercise with other controlled core stability movements.
Tip: Start with no equipment first. Then, once your twist stays controlled, use light resistance only if it does not change your posture or create lower-back discomfort.