Standing Abdominal Vacuum: Form, Core Control, Sets, Tips & FAQ
Learn the Standing Abdominal Vacuum to train deep core control, improve abdominal bracing, and build better posture with clear form cues.
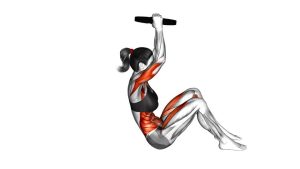
Standing Abdominal Vacuum
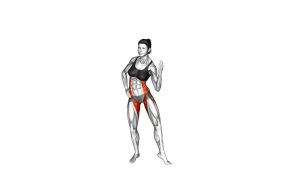
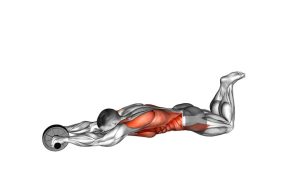
This movement is small on the outside, yet it demands focused internal control. In the video, the body stays upright while the abdomen gradually pulls inward, holds briefly, and then returns to a relaxed position. Because the movement is controlled and low-impact, it works well as a warm-up drill, posture practice, or beginner-friendly deep core exercise.
Quick Overview
| Body Part | Abs |
|---|---|
| Primary Muscle | Transverse abdominis |
| Secondary Muscle | Deep abdominal stabilizers, diaphragm control, pelvic floor coordination |
| Equipment | None |
| Difficulty | Beginner to intermediate depending on hold time and breathing control |
Sets & Reps (By Goal)
- Beginner core awareness: 2–3 sets × 5–8 holds, holding each vacuum for 3–5 seconds.
- Posture and daily core control: 2–4 sets × 6–10 holds, using slow breathing preparation before each rep.
- Deep core endurance: 3–5 sets × 5–8 holds, holding each rep for 8–15 seconds when form stays clean.
- Warm-up activation: 1–2 sets × 5–6 easy holds before core training or posture-focused workouts.
Progression rule: First improve control and smoothness. Then, increase hold time gradually. However, never progress by forcing a hard breath hold or collapsing your posture.
Setup / Starting Position
- Stand upright: Place your feet about hip-to-shoulder width apart and keep your body tall.
- Relax your arms: Let your arms hang naturally by your sides, as shown in the video.
- Set your posture: Keep your chest lifted, shoulders relaxed, and head neutral.
- Prepare your breath: Take a controlled breath, then exhale before drawing the abdomen inward.
- Keep the spine still: Avoid bending forward, arching excessively, or twisting during the setup.
Execution (Step-by-Step)
- Begin from a relaxed abdomen: Stand tall and allow the stomach to start in a neutral position.
- Exhale smoothly: Let air out under control so the abdomen can begin to flatten.
- Draw the abdomen inward: Pull the stomach gently toward the spine without crunching or bending forward.
- Create the vacuum: Continue drawing inward until the waist visibly narrows and the area under the ribs looks hollow.
- Hold the position: Maintain the inward abdominal pull while keeping the shoulders relaxed and the posture upright.
- Release slowly: Allow the abdomen to return outward with control instead of suddenly relaxing.
- Reset before repeating: Return to a normal standing position, breathe normally, and repeat only when ready.
Pro Tips & Common Mistakes
- Keep the torso tall: The video shows an upright body position, so avoid folding forward to make the vacuum look deeper.
- Use a slow exhale first: A controlled exhale helps the abdomen draw inward more smoothly.
- Do not force the hold: If you feel dizzy or strained, release the vacuum and breathe normally.
- Avoid shoulder tension: Your shoulders should stay relaxed instead of rising toward your ears.
- Do not rush the release: A slow return trains control better than a sudden abdominal drop.
- Start with short holds: Clean 3–5 second holds are better than long holds with poor control.
- Keep the movement internal: The abdomen moves inward, while the spine and hips stay mostly still.
FAQ
What muscles does the Standing Abdominal Vacuum work?
The main target is the transverse abdominis, which is one of the deep abdominal stabilizers. Additionally, the exercise encourages better coordination between breathing, posture, and abdominal control.
Should I bend forward during the abdominal vacuum?
No. In this standing version, the torso stays upright. Therefore, the movement should come from drawing the abdomen inward rather than folding the spine forward.
How long should I hold each vacuum?
Beginners can start with 3–5 seconds per hold. Then, as control improves, you can build toward 8–15 seconds while keeping the movement smooth and comfortable.
Is the Standing Abdominal Vacuum good for beginners?
Yes, it can be beginner-friendly because it uses no equipment and very little external movement. However, beginners should avoid long breath holds and focus on relaxed, controlled practice.
Why does my stomach not pull in very far?
Limited range is normal at first. Instead of forcing the vacuum, practice a smoother exhale, reduce tension, and focus on gradually improving abdominal control over time.
Can I do abdominal vacuums every day?
Many people use low-effort abdominal vacuums as daily core-awareness practice. Nevertheless, if you feel discomfort, dizziness, or excessive pressure, reduce the frequency and intensity.
Recommended Equipment (Optional)
- Yoga Mat — useful for pairing vacuum practice with floor-based core drills.
- Posture Corrector Brace — helps build awareness of upright posture during daily routines.
- Breathing Trainer — supports breathing-control practice when used appropriately.
- Fitness Mirror — helps monitor posture, shoulder position, and abdominal control.
- Resistance Bands Set — useful for adding posture-focused rows and upper-back work alongside core training.
Tip: Equipment is optional for this exercise. However, tools like a mirror or mat can make practice more consistent and easier to control.