Seated Alternate In-Out Leg Raise on Floor: Form, Sets, Tips & FAQ
Learn the Seated Alternate In-Out Leg Raise on Floor to train abs, hip flexors, and core control with clear setup, reps, tips, FAQs, and gear.
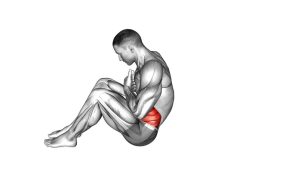
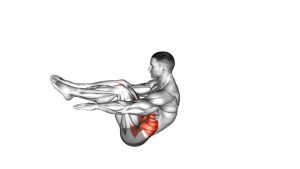
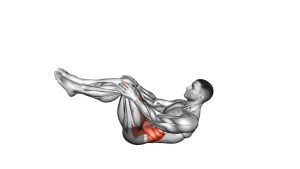
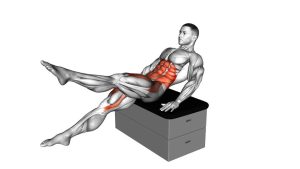
Seated Alternate In-Out Leg Raise on Floor
This exercise works best when the torso stays steady and the legs move with control. Instead of rushing the motion, focus on keeping the chest lifted, the core braced, and the feet hovering above the floor. Therefore, each repetition should feel smooth, balanced, and deliberate.
Quick Overview
| Body Part | Abs |
|---|---|
| Primary Muscle | Rectus abdominis |
| Secondary Muscle | Hip flexors, obliques, quadriceps, deep core stabilizers |
| Equipment | None; performed on the floor |
| Difficulty | Beginner to intermediate, depending on leg height and control |
Sets & Reps (By Goal)
- Core activation: 2–3 sets × 8–10 reps per side with slow control.
- Ab endurance: 3–4 sets × 12–16 total alternating reps.
- Conditioning finisher: 2–3 rounds × 20–30 seconds, keeping the movement clean.
- Beginner control: 2 sets × 6–8 reps per side with a smaller range of motion.
Progression rule: First improve control and posture. Then extend the legs farther or keep the feet slightly lower, as long as the lower back remains stable.
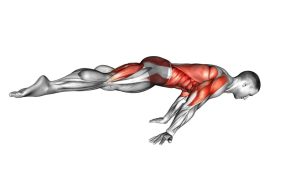
Setup / Starting Position
- Sit on the floor: Place your hips on the ground with your legs forward.
- Lean back slightly: Keep your torso reclined while staying tall through the chest.
- Place your hands behind you: Keep both palms on the floor for support and balance.
- Lift the feet: Raise both feet slightly off the floor without collapsing your posture.
- Brace your core: Keep your ribs controlled and your lower back from arching excessively.
In the video, the arms remain behind the body throughout the movement. Therefore, this version uses hand support rather than a hands-free balance position.
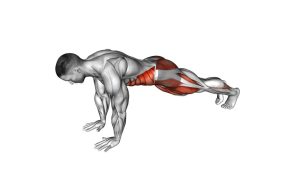
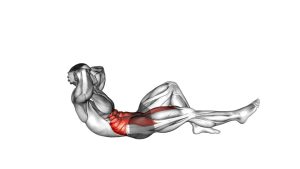
Execution (Step-by-Step)
- Start with both legs forward: Keep the legs extended or nearly extended while the feet hover above the floor.
- Pull one knee in: Bring one knee toward your torso while the opposite leg stays extended.
- Control the torso: Keep your chest lifted and avoid rocking backward as the knee comes in.
- Extend the tucked leg: Send that leg forward again while keeping the foot off the floor.
- Alternate sides: Repeat the same in-and-out action with the opposite leg.
- Keep the rhythm smooth: Continue alternating without letting the feet rest between reps.
Pro Tips & Common Mistakes
- Keep the feet hovering: Do not let the heels drop to the floor between reps unless you need a beginner modification.
- Avoid leaning too far back: A slight recline is enough. Too much lean can shift tension away from the abs.
- Do not rush the alternating pattern: Smooth reps make the core work harder and reduce momentum.
- Brace before each tuck: Exhale lightly as the knee comes in to help maintain trunk control.
- Keep the shoulders relaxed: The hands support balance, but they should not create shoulder shrugging.
- Shorten the range if needed: If your lower back arches, bring the feet higher or reduce the extension distance.
FAQ
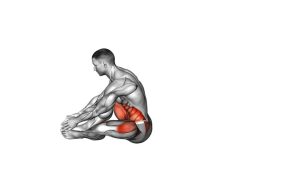
What muscles does the Seated Alternate In-Out Leg Raise on Floor work?
It mainly works the rectus abdominis, while the hip flexors assist with the leg movement. Additionally, the obliques and deep core muscles help keep the torso stable.
Is this exercise good for lower abs?
Yes, it can strongly challenge the lower-ab region because the legs stay elevated while the knees move in and out. However, the entire abdominal wall helps stabilize the body during the movement.
Should my feet touch the floor?
In the demonstrated version, the feet stay lifted. However, beginners can briefly tap the heels down between reps if they need more control or less lower-back strain.
Why do I feel this in my hip flexors?
Some hip flexor involvement is expected because the legs are lifting and extending. Nevertheless, if the hip flexors take over completely, slow the movement, brace harder, and reduce the range.
How can I make this exercise harder?
You can extend the legs farther, lower the feet closer to the floor, or increase the rep count. Still, only progress if your torso remains stable and your lower back stays comfortable.
Recommended Equipment (Optional)
- Thick Exercise Mat — adds comfort under the hips and hands during floor-based core work
- Non-Slip Yoga Mat — helps prevent sliding while the legs move in and out
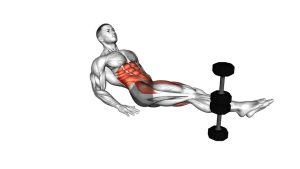
- Adjustable Ankle Weights — optional advanced resistance once bodyweight reps are controlled
- Core Sliders — useful for related knee-tuck and leg-extension core variations
- Ab Workout Mat — provides extra cushioning for seated ab exercises on hard floors
Tip: Equipment is optional for this exercise. Start with bodyweight first, then add resistance only when your form stays steady.