Seated Alternate Knee Tuck on Chair: Form, Benefits, Sets & Tips
Learn the Seated Alternate Knee Tuck on Chair to strengthen abs, hip flexors, and core control with safe form, sets, tips, FAQs, and equipment.
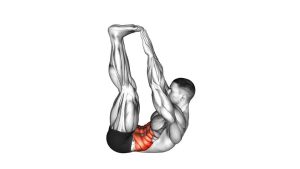
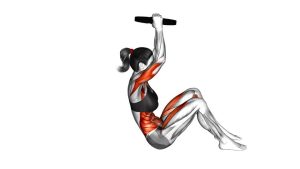
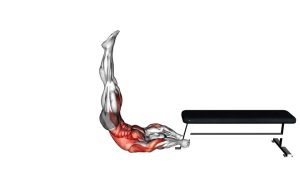
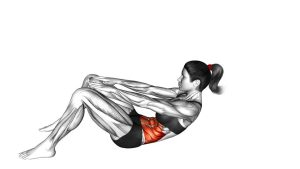
Seated Alternate Knee Tuck on Chair
This exercise looks simple, yet it becomes effective when each knee tuck is smooth, controlled, and balanced. As one knee travels inward, the torso should stay tall with only a slight backward lean. Meanwhile, the hands support your position without taking over the work from your abs. For best results, move at a steady rhythm and avoid kicking the legs forward with momentum.
Quick Overview
| Body Part | Abs |
|---|---|
| Primary Muscle | Rectus abdominis |
| Secondary Muscle | Hip flexors, obliques, transverse abdominis, quadriceps |
| Equipment | Chair, bench, or sturdy elevated seat |
| Difficulty | Beginner to intermediate, depending on tempo and leg height |
Sets & Reps (By Goal)
- Beginner core control: 2–3 sets × 8–10 reps per side, resting 45–60 seconds between sets.
- Core endurance: 3–4 sets × 12–20 total alternating reps, using a smooth and steady rhythm.
- Low-impact ab finisher: 2–3 rounds × 30–45 seconds, resting 30–45 seconds after each round.
- Warm-up activation: 1–2 sets × 8–12 total reps before a core, lower-body, or full-body workout.
Progression rule: First, increase control and range of motion. Then, add more reps or time. Finally, slow the lowering phase to make the abs work harder without needing extra equipment.
Setup / Starting Position
- Choose a stable chair: Sit near the front edge of a strong chair or bench that does not wobble.
- Place your hands beside your hips: Grip the chair lightly for balance, but avoid pushing hard through the arms.
- Lean back slightly: Keep the chest lifted while creating a small reclined angle through the torso.
- Brace your core: Draw the ribs down gently and keep the lower back from collapsing into a deep arch.
- Extend both legs forward: Start with the feet in front of you, knees soft, and heels either lightly touching or hovering close to the floor.
A slightly reclined torso increases abdominal demand. However, the movement should still feel controlled rather than strained.
Execution (Step-by-Step)
- Set your posture: Sit tall, brace your abs, and keep your shoulders relaxed away from your ears.
- Lift one knee inward: Bend one knee and guide it toward your chest while the opposite leg stays extended forward.
- Pause briefly: At the top, squeeze your abs lightly without rounding your shoulders forward.
- Switch sides smoothly: Extend the tucked leg forward as the opposite knee begins to travel inward.
- Maintain a steady rhythm: Continue alternating sides while keeping your hips stable and your torso quiet.
- Finish with control: After the final rep, lower both feet carefully before relaxing your posture.
Pro Tips & Common Mistakes
- Keep the movement controlled: Momentum reduces core tension, so move each leg with intention.
- Use your hands for balance only: Although your hands support you, your abs should drive the knee tuck.
- Avoid collapsing backward: Maintain a lifted chest and steady ribs to protect the lower back.
- Do not rush the switch: Instead, let one leg extend as the other knee comes in with clean timing.
- Keep the neck neutral: Look forward and avoid craning your head toward the knee.
- Control the extended leg: The straight leg should not slap down or swing wildly between reps.
- Start with a smaller range: If the hip flexors dominate, shorten the tuck and focus more on abdominal bracing.
FAQ
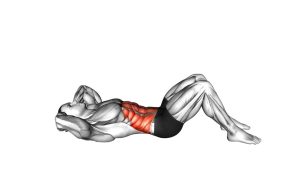
What muscles does the Seated Alternate Knee Tuck on Chair work?
This exercise mainly works the rectus abdominis, which helps flex and stabilize the trunk. In addition, the hip flexors lift each knee, while the obliques and deep core muscles help keep the pelvis steady during the alternating motion.
Is this exercise good for beginners?
Yes. Because the chair supports your body, this variation is more accessible than many floor-based ab exercises. However, beginners should start slowly and keep the range comfortable before increasing reps or speed.
Should my feet touch the floor between reps?
They can touch lightly if you need more control. As you improve, you can hover the feet close to the floor to increase abdominal tension. Still, the priority should be clean movement rather than maximum difficulty.
Why do I feel this mostly in my hip flexors?
Some hip flexor involvement is normal because the knees are lifting toward the torso. Nevertheless, if the hip flexors dominate, lean back slightly less, reduce the range, and brace the abs before each tuck.
Can I use this exercise for weight loss?
It can be part of a fat-loss routine, especially when paired with full-body strength training, walking, and nutrition control. On its own, however, it is best viewed as a core-strengthening and endurance exercise.
Recommended Equipment
- Sturdy Workout Bench — provides a stable surface for seated knee tucks and other core exercises.
- Non-Slip Exercise Mat — helps prevent the chair or bench from sliding during seated core work.
- Adjustable Plyo Box — works as a strong elevated seat for core drills, step-ups, and conditioning exercises.
- Adjustable Ankle Weights — useful for advanced progression once bodyweight reps feel easy and controlled.
- Core Sliders — helpful for progressing into floor-based knee tucks, mountain climbers, and ab variations.
Tip: Start with a stable chair or bench before adding resistance. Better control will make this exercise safer and more effective.