Lever Seated Leg Press: Proper Form, Muscles Worked, Sets, Tips & FAQ
Learn the Lever Seated Leg Press for stronger quads, glutes, and legs. Includes proper setup, execution, sets, common mistakes, FAQs, and gear.
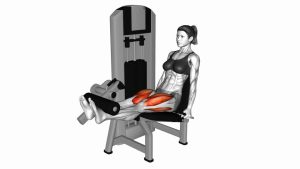
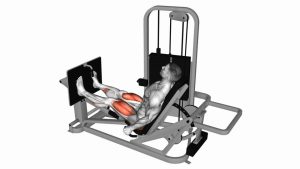
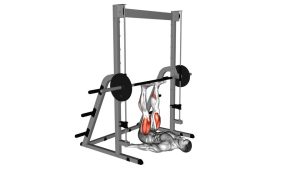
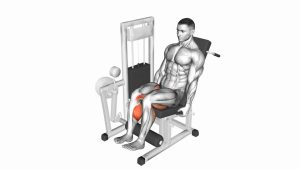
Lever Seated Leg Press
This exercise is a strong choice for building leg size and strength because the machine gives you a stable pressing path. It allows you to load the legs heavily while reducing the balance demands of free-weight squats. For best results, keep your heels planted, control the lowering phase, and press through the full foot while keeping the knees aligned with the toes.
Quick Overview
| Body Part | Legs |
|---|---|
| Primary Muscle | Quadriceps |
| Secondary Muscle | Glutes, hamstrings, calves, hip stabilizers |
| Equipment | Lever seated leg press machine / plate-loaded leg press machine |
| Difficulty | Beginner to intermediate |
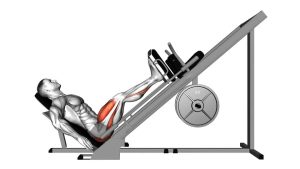
Muscles Worked
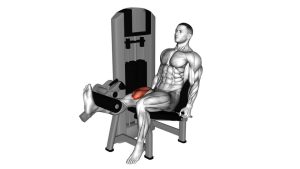
The quadriceps are the main target because they extend the knees as you press the platform away. The glutes assist strongly from the bottom position, especially when the feet are placed slightly higher on the platform. The hamstrings help stabilize the hips, while the calves help maintain stable foot pressure during the press.
- Quadriceps: Main knee-extension muscle group during the pressing phase.
- Glutes: Assist hip extension, especially through deeper ranges.
- Hamstrings: Help control the hips and support lower-body stability.
- Calves: Stabilize ankle position and help maintain full-foot pressure.
Sets & Reps (By Goal)
- Muscle growth: 3–5 sets × 8–15 reps with controlled depth and steady tempo.
- Strength focus: 4–6 sets × 5–8 reps with heavier resistance and longer rest periods.
- Beginner technique: 2–3 sets × 10–12 reps using light-to-moderate weight.
- Leg endurance: 2–4 sets × 15–25 reps with smooth reps and shorter rest periods.
- Quad-focused finisher: 2–3 sets × 12–20 reps near the end of a leg workout.
Progression rule: Add reps first, then increase weight only when your depth, knee tracking, and foot pressure stay consistent across every rep.
Setup / Starting Position
- Sit fully into the machine: Keep your hips, lower back, upper back, and shoulders supported by the pad.
- Place your feet on the platform: Use a shoulder-width stance as your standard starting position.
- Set your foot angle: Turn the toes slightly outward if it helps your knees track naturally.
- Keep the heels down: Your heels should stay planted during both the lowering and pressing phases.
- Grip the handles: Use the handles to keep your torso stable and prevent shifting on the seat.
- Start with soft knees: Extend the legs without aggressively locking the knees before beginning the rep.
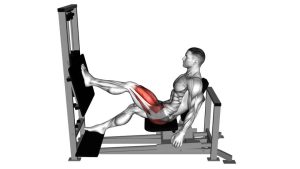
For a quad bias, place the feet slightly lower on the platform. For more glute involvement, place the feet slightly higher. In both cases, keep the knees aligned with the toes.
Execution (Step-by-Step)
- Brace and settle: Keep your torso tight, back supported, and head neutral against the machine.
- Unlock smoothly: Begin the rep with control instead of dropping quickly into the bottom position.
- Lower the platform: Bend your knees and allow the platform to come toward your body.
- Control knee direction: Keep the knees tracking in line with the toes without collapsing inward.
- Reach your safe depth: Stop when your knees are deeply bent but your hips and lower back remain stable.
- Press through the full foot: Drive through the mid-foot and heels to move the platform away.
- Finish without snapping: Extend your legs smoothly and stop just before a hard knee lockout.
- Repeat with control: Keep each rep consistent, avoiding bouncing, twisting, or rushing.
Pro Tips & Common Mistakes
- Do not bounce at the bottom: Pause briefly or reverse smoothly instead of using momentum.
- Keep your hips down: If your hips lift, shorten the range or reduce the weight.
- Do not let the knees cave in: Drive the knees in the same direction as the toes.
- Avoid pressing only through the toes: Keep full-foot pressure with the heels planted.
- Do not overload too soon: Heavy weight is only useful when the movement stays clean.
- Control the lowering phase: A slower eccentric helps improve muscle tension and joint control.
- Use foot placement with purpose: Lower feet increase quad demand; higher feet increase glute contribution.
- Keep the knees slightly soft at the top: This helps maintain tension and reduces joint stress.
FAQ
What muscles does the Lever Seated Leg Press work?
The Lever Seated Leg Press mainly works the quadriceps. The glutes, hamstrings, calves, and hip stabilizers also assist during the movement.
Is the Lever Seated Leg Press good for beginners?
Yes. It is beginner-friendly because the machine supports the torso and guides the pressing path. Beginners should start with a light load and focus on control before increasing weight.
How deep should I go on the leg press?
Lower as far as you can while keeping your hips and lower back firmly supported. Stop before your pelvis rolls upward or your lower back rounds.
Should I lock my knees at the top?
No. You should extend the legs strongly but avoid snapping into a hard lockout. Keep a small bend in the knees to protect the joints and maintain muscle tension.
How can I target my quads more?
Use a slightly lower foot position, keep your feet about shoulder-width apart, and allow the knees to travel forward naturally while keeping the heels down.
How can I target my glutes more?
Place your feet slightly higher on the platform and use a controlled deeper range, as long as your hips do not lift from the pad.
Recommended Equipment
- Knee Sleeves for Weightlifting — help keep the knees warm and comfortable during leg training.
- Weightlifting Shoes — provide a stable base for strong lower-body pressing.
- Lifting Belt — useful for extra trunk support during heavier leg sessions.
- Resistance Bands — useful for glute activation, warm-ups, and knee-tracking drills.
- Gym Towel — keeps the machine pad clean, dry, and comfortable during training.
Tip: Equipment can improve comfort and stability, but the most important factors are controlled reps, safe depth, proper knee tracking, and consistent foot pressure.