Sitting Lotus Dynamic Side Stretch: Form, Benefits, Tips & FAQ
Learn the Sitting Lotus Dynamic Side Stretch for oblique mobility, side-body flexibility, core control, setup, form cues, mistakes, FAQs, and gear.
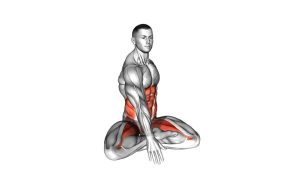
Sitting Lotus Dynamic Side Stretch
This exercise works best when the motion stays smooth, slow, and balanced. Instead of forcing the body into a deep side bend, focus on creating a long arc from the hip through the ribs and into the reaching hand. As a result, the stretch feels active, controlled, and easy to repeat.
Quick Overview
| Body Part | Core |
|---|---|
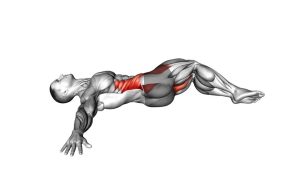
| Primary Muscle | Obliques |
| Secondary Muscle | Latissimus dorsi, quadratus lumborum, spinal stabilizers, shoulder stabilizers |
| Equipment | None; optional yoga mat or cushion |
| Difficulty | Beginner |
Sets & Reps (By Goal)
- Warm-up mobility: 1–2 sets × 8–12 reps per side with a smooth rhythm.
- Flexibility practice: 2–3 sets × 6–10 reps per side with a 1–2 second pause at the stretched position.
- Core control: 2–3 sets × 8–12 reps per side while keeping the ribs controlled and hips grounded.
- Recovery or desk-break routine: 1–2 easy sets × 5–8 reps per side using relaxed breathing.
Progression rule: First improve control and range. Then, increase repetitions only if your hips stay down and your torso does not twist forward.
Setup / Starting Position
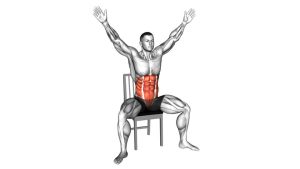
- Sit on the floor: Begin in a lotus, half-lotus, or comfortable cross-legged position.
- Ground your hips: Keep both sitting bones heavy so the pelvis does not lift during the stretch.
- Lengthen your spine: Sit tall through the crown of the head before moving to either side.
- Place one hand down: Rest one hand lightly on the floor beside you for support.
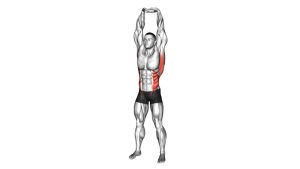
- Reach the other arm overhead: Keep the reaching arm long without shrugging the shoulder toward the ear.
Tip: If the hips feel tight, sit on a folded towel, yoga block, or cushion to make the spine easier to stack.
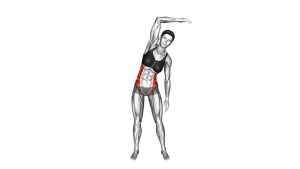
Execution (Step-by-Step)
- Start tall: Sit upright with your chest open, shoulders relaxed, and hips grounded.
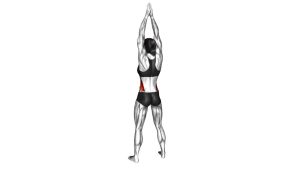
- Reach overhead: Extend one arm up and slightly across the body to prepare for the side bend.
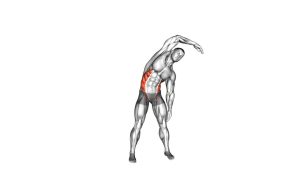
- Bend to the side: Slowly lean toward the supporting hand while keeping the movement mainly lateral.
- Create length: Reach through the fingertips and feel the stretch along the side of the ribs, waist, and upper back.
- Return to center: Use your core to bring the torso back upright without bouncing.
- Switch sides: Place the opposite hand down, reach the other arm overhead, and repeat to the other side.
- Continue rhythmically: Alternate side to side with calm breathing and steady control.
Pro Tips & Common Mistakes
- Keep the hips grounded: If one hip lifts, reduce the range and focus on length instead of depth.
- Move side to side, not forward: The torso should bend laterally rather than collapse toward the floor.
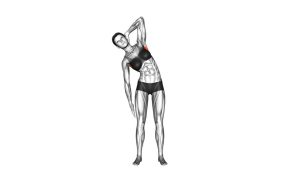
- Reach long through the top arm: This improves the stretch through the lats, ribs, and obliques.
- Avoid shoulder shrugging: Keep the neck relaxed and the shoulder away from the ear.
- Use the bottom hand lightly: It supports balance, but it should not pull the torso aggressively.
- Breathe into the open side: Inhale as you lengthen, then exhale as you return to center.
- Do not bounce: A smooth dynamic rhythm is safer and more useful than forcing range.
FAQ
What muscles does the Sitting Lotus Dynamic Side Stretch work?
It mainly targets the obliques through lateral trunk movement. Additionally, it stretches the lats, supports spinal mobility, and lightly engages the core stabilizers.
Is this exercise good for beginners?
Yes. It is beginner-friendly because it uses bodyweight only and has a simple seated setup. However, beginners should keep the range comfortable and avoid forcing the hips or lower back.
Should I do this stretch fast or slow?
Perform it slowly and rhythmically. Although it is dynamic, the goal is controlled mobility, not speed or momentum.
Can I do this exercise if I cannot sit in lotus position?
Yes. You can use a comfortable cross-legged position instead. Also, sitting on a folded towel or cushion can make the posture easier.
Where should I feel the stretch?
You should feel length through the side of the waist, ribs, and upper back on the reaching-arm side. You may also feel mild shoulder and lat stretch.
Recommended Equipment (Optional)
- Yoga Mat — provides floor comfort and grip during seated mobility work.
- Yoga Block — useful for elevating the hips if the lotus or cross-legged position feels tight.
- Meditation Cushion — supports a taller seated posture and reduces hip strain.
- Stretching Strap — helpful for general mobility routines and flexibility sessions.
- Foam Roller — useful before or after training to release the upper back and lats.
Tip: Equipment is optional. However, a mat and cushion can make the seated position more comfortable and help you focus on clean side-bending mechanics.