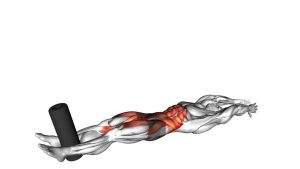
Flexion Leg Sit-Up Straight-Arm: Core Form, Sets, Tips & FAQ
Learn the Flexion Leg Sit-Up straight-arm exercise for abs, hip flexors, and core control with setup, steps, mistakes, FAQs, and gear.
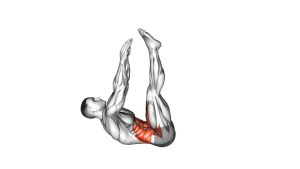
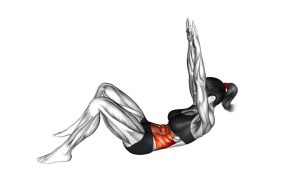
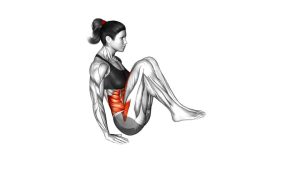
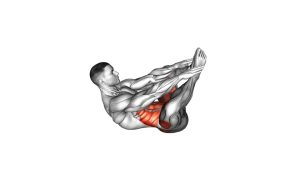
Flexion Leg Sit-Up (Straight-Arm)
This exercise begins with the body fully extended on the floor. Then, the arms travel forward as the torso rises and the legs lift at the same time. Because both the upper and lower body move together, the movement challenges abdominal compression, hip flexor strength, and total-body coordination. Moreover, the straight-arm position helps create a longer lever, which makes the exercise more demanding than a short-arm sit-up.
Quick Overview
| Body Part | Core |
|---|---|
| Primary Muscle | Rectus abdominis |
| Secondary Muscle | Hip flexors, lower abs, obliques, and shoulder stabilizers |
| Equipment | None; optional exercise mat |
| Difficulty | Intermediate because the arms and straight legs create a long-lever core challenge |
Sets & Reps (By Goal)
- Core control: 2–3 sets × 6–10 reps with a slow 2–3 second lowering phase.
- Ab strength: 3–4 sets × 8–12 reps with clean form and controlled breathing.
- Muscular endurance: 2–4 sets × 12–15 reps, only if your lower back stays comfortable.
- Beginner modification: 2–3 sets × 5–8 reps with a shorter lift or slightly bent knees.
Progression rule: First increase control, then increase reps. After that, you can slow the lowering phase or add a brief pause at the top. However, do not progress if your legs drop, your back arches, or your reps become rushed.
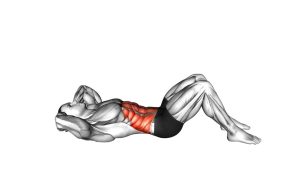
Setup / Starting Position
- Lie on your back: Start flat on the floor with your legs extended straight in front of you.
- Reach your arms overhead: Keep the arms straight and long so your body forms one extended line.
- Set your ribs: Lightly brace your core and avoid letting the lower back arch aggressively.
- Keep your legs together: Maintain straight legs with the toes pointing naturally upward or slightly forward.
- Prepare to lift together: The arms, torso, and legs should move as one coordinated pattern.
Tip: If your lower back lifts too much before the rep starts, shorten the range or bend the knees slightly. This keeps the movement focused on the abs instead of forcing the lumbar spine.
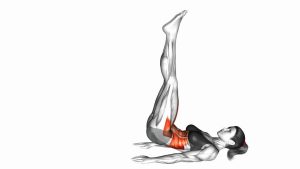
Execution (Step-by-Step)
- Begin from the long position: Keep your arms overhead, legs straight, and torso relaxed but braced.
- Lift the arms forward: Sweep your straight arms from overhead toward your legs as your torso begins to rise.
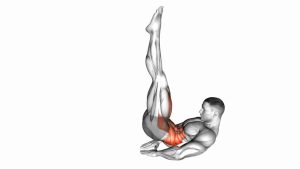
- Raise the legs at the same time: Lift both straight legs as the upper body comes off the floor.
- Create a controlled V shape: Balance briefly on the glutes while reaching your arms forward toward your feet.
- Pause with control: Hold the top position for a short moment without swinging or bouncing.
- Lower slowly: Return your torso, arms, and legs toward the floor together.
- Reset fully: Finish in the long starting position before beginning the next rep.
Pro Tips & Common Mistakes
- Move both halves together: The torso and legs should rise at the same time instead of moving separately.
- Keep the arms straight: Straight arms match the video pattern and increase the core demand.
- Control the descent: Lowering slowly builds strength and prevents the legs from slamming down.
- Avoid neck pulling: Keep the head moving naturally with the torso rather than straining the neck forward.
- Do not use momentum: Swinging may help you reach the top, but it reduces abdominal tension.
- Watch the lower back: If the low back arches or hurts, shorten the rep or use a modified version.
- Exhale as you lift: Breathing out during the upward phase can help the ribs stay down and the abs engage.
FAQ
What muscles does the Flexion Leg Sit-Up (Straight-Arm) work?
It mainly targets the rectus abdominis. Additionally, the hip flexors help lift the legs, while the obliques and shoulder stabilizers assist with control and balance.
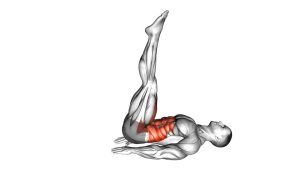
Is this the same as a V-up?
It is very similar to a straight-arm V-up. However, this version can be described as a flexion leg sit-up because the arms, torso, and straight legs flex upward together from the floor.
Should my legs stay straight?
In the demonstrated version, the legs stay mostly straight. Nevertheless, a slight knee bend is acceptable if it helps you maintain control and avoid lower-back discomfort.
Why do I feel this in my hip flexors?
Some hip flexor work is normal because the legs are lifting. However, your abs should still feel highly engaged. If the hip flexors dominate, slow the movement, reduce the height, or bend the knees slightly.
How can I make this exercise easier?
You can bend your knees, reduce the lift height, keep the arms closer to the body, or perform only the upper-body portion first. Then, as your control improves, gradually return to the full straight-arm version.
How can I make it harder?
Slow the lowering phase, pause longer at the top, or perform more controlled reps. For advanced training, you may hold a light medicine ball, but only after you can perform bodyweight reps safely.
Recommended Equipment (Optional)
- Exercise Mat — adds comfort and grip for floor-based core exercises.
- Thick Yoga Mat — useful if your spine or tailbone needs extra cushioning during sit-up variations.
- Mini Pilates Ball — can support modified core drills and help beginners learn controlled abdominal tension.
- Adjustable Ankle Weights — optional advanced progression for leg-lift strength, used only after bodyweight control is solid.
- Medicine Ball — optional tool for advanced core progressions when straight-arm reps are already clean.
Tip: Start with only a mat. Because this exercise already uses a long lever, extra load should come later, not before your form is stable.