Side Plank Pull: Core Rotation, Oblique Strength, Form Tips & FAQ
Learn the Side Plank Pull for stronger obliques, shoulder stability, and controlled core rotation. Includes setup, reps, mistakes, FAQs, and gear.
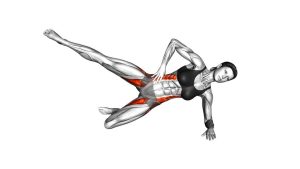
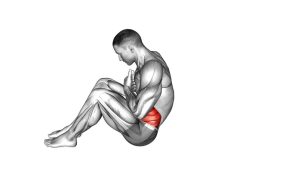
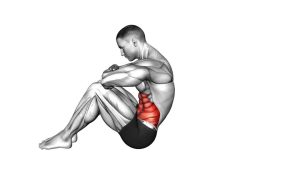
Side Plank Pull
This exercise works best when every phase is slow and deliberate. First, you create a stable high plank. Then, you rotate into the side plank without letting the hips sag. Finally, you perform the pull with a compact elbow path while keeping the body long and controlled. As a result, the Side Plank Pull trains more than simple abdominal strength; it also builds balance, shoulder control, and rotational stability.
Quick Overview
| Body Part | Obliques |
|---|---|
| Primary Muscle | Obliques |
| Secondary Muscle | Rectus abdominis, transverse abdominis, shoulders, chest, upper back, glutes |
| Equipment | Bodyweight only; optional exercise mat |
| Difficulty | Intermediate, because it requires plank strength, shoulder stability, and rotational control |
Sets & Reps (By Goal)
- Technique practice: 2–3 sets × 4–6 reps per side, using a slow tempo and full control.
- Core strength: 3–4 sets × 6–10 reps per side, resting 45–75 seconds between sets.
- Oblique endurance: 2–3 sets × 10–14 total reps, alternating sides with smooth transitions.
- Workout finisher: 2 rounds × 30–40 seconds, only if form stays clean.
Progression rule: Add reps only after you can rotate, pull, and return without hip drop, shoulder collapse, or lower-back twisting. Quality should always come before speed.
Setup / Starting Position
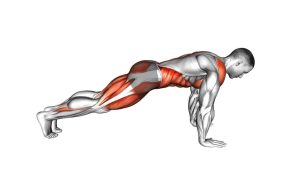
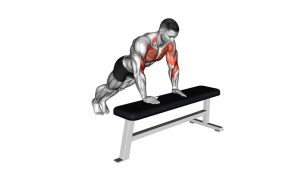
- Start in a high plank: Place both hands on the floor under your shoulders and extend both legs behind you.
- Create a long body line: Keep your head, ribs, hips, knees, and heels aligned.
- Brace your core: Gently tighten your abs as if preparing for a small push or body rotation.
- Set your feet: Keep the feet slightly apart at first if you need more balance.
- Press the floor away: Keep the support shoulder active so the chest does not sink between the arms.
Setup matters because the exercise begins before the rotation. Therefore, build a strong plank first, then move into the pull.
Execution (Step-by-Step)
- Begin in high plank: Keep both hands planted, legs straight, and core tight.
- Shift weight into one hand: Slowly move more bodyweight onto the support arm without locking or collapsing the shoulder.
- Rotate into side plank: Turn your torso to one side while keeping your hips lifted and your body long.
- Perform the pull: Bend the top elbow and pull it back toward the ribs in a compact motion.
- Control the peak position: Pause briefly while keeping the ribs stacked and the hips from dropping.
- Return with control: Extend the arm back down and rotate the torso toward the floor.
- Reset in plank: Place both hands under the shoulders again before repeating or switching sides.
Pro Tips & Common Mistakes
Pro Tips
- Move slowly: A slower tempo increases core demand and reduces sloppy rotation.
- Keep the support shoulder stacked: Your shoulder should stay strong over the wrist during the side plank phase.
- Lift the hips: Actively push the hips away from the floor to keep tension in the obliques.
- Use the top arm with control: Pull the elbow back without twisting aggressively through the lower back.
- Breathe steadily: Exhale during the pull, then inhale as you return to plank.
Common Mistakes
- Dropping the hips: This reduces oblique activation and may overload the lower back.
- Rushing the rotation: Fast reps often turn the exercise into momentum instead of core control.
- Letting the support shoulder sink: This can create unnecessary shoulder stress.
- Over-rotating the spine: Rotate enough to form the side plank, but do not force excessive twisting.
- Holding the breath: Breath-holding increases tension and makes balance harder.
FAQ
What muscles does the Side Plank Pull work?
The Side Plank Pull mainly targets the obliques. However, it also trains the rectus abdominis, transverse abdominis, shoulders, chest, upper back, and glutes because the body must rotate and stabilize at the same time.
Is the Side Plank Pull beginner-friendly?
It is better for intermediate exercisers because it combines a high plank, side plank, and pulling motion. Beginners can first practice a basic high plank, then a standard side plank, and finally add the pull once balance improves.
Should I do this exercise fast or slow?
Slow is better. A controlled tempo helps you keep the hips lifted, protect the shoulder, and make the obliques work harder. If you move too fast, momentum can take over.
Why do my hips drop during the movement?
Hip drop usually happens when the obliques, glutes, or support shoulder lose tension. To fix it, reduce the range, widen your feet slightly, and pause briefly before the pull.
Can I do the Side Plank Pull every day?
You can practice it often if volume is low and your joints feel good. However, for strength-focused training, 2–4 times per week is usually enough because the shoulders and core need recovery.
Recommended Equipment
- Exercise Mat — adds comfort for wrists, hands, and feet during plank-based core work.
- Wrist Support Wraps — helpful if your wrists fatigue during high plank positions.
- Push-Up Handles — can reduce wrist extension and make plank support more comfortable.
- Core Sliders — useful for progressing plank and anti-rotation core exercises.
- Resistance Bands Set — useful for pairing this exercise with rows, pull-aparts, and upper-back stability work.
Tip: The Side Plank Pull does not require equipment. Nevertheless, a mat or wrist-friendly support can make the movement more comfortable and easier to practice consistently.