Elevated Knee Tuck to V-Tuck: Form, Sets, Tips & FAQ
Learn the Elevated Knee Tuck to V-Tuck for stronger abs, hip flexors, and core control. Includes setup, steps, sets, mistakes, FAQs, and gear.
Elevated Knee Tuck to V-Tuck
This movement works best when it is performed with a smooth rhythm and strict control. The hands support the body, but they should not do all the work. Keep your chest lifted, your shoulders relaxed, and your legs moving with your abs rather than momentum. The hardest part is the extension phase, where the legs move away from the body without dropping to the floor.
Quick Overview
| Body Part | Core |
|---|---|
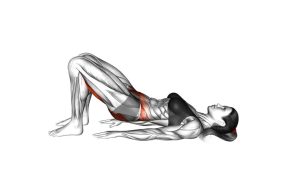
| Primary Muscle | Rectus abdominis, especially lower abdominal fibers |
| Secondary Muscle | Hip flexors, transverse abdominis, obliques, deep core stabilizers |
| Equipment | No equipment required; optional exercise mat or low bench |
| Difficulty | Beginner to Intermediate |
Sets & Reps (By Goal)
- Core activation: 2–3 sets × 8–10 reps with slow control
- Ab strength: 3–4 sets × 10–15 reps with 45–75 sec rest
- Lower-ab endurance: 2–4 sets × 15–20 reps with steady breathing
- Beginner control: 2 sets × 6–8 reps with a smaller leg-extension range
- Advanced challenge: 3–5 sets × 10–15 reps with straighter legs and no foot contact
Progression rule: First improve control and foot height. Then increase reps, extend the legs farther, or slow down the lowering phase.
Setup / Starting Position
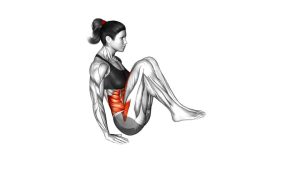
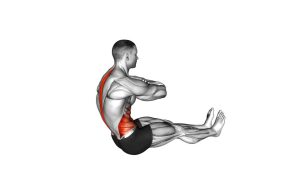
- Sit tall: Sit on the floor, mat, or stable elevated surface with your torso slightly leaned back.
- Place your hands behind you: Keep the hands beside or slightly behind the hips for balance and support.
- Lift your feet: Raise both feet slightly off the floor so your abs are active before the first rep.
- Set your posture: Keep the chest open, shoulders down, and ribs controlled.
- Brace lightly: Tighten your core as if preparing for a small punch, without holding your breath.
Tip: If your lower back feels strained, keep your knees more bent and reduce how far you extend the legs.
Execution (Step-by-Step)
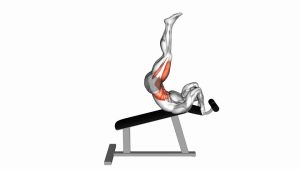
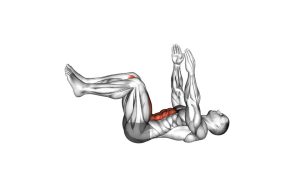
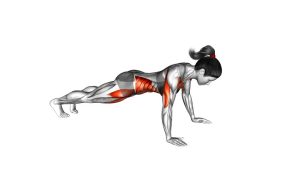
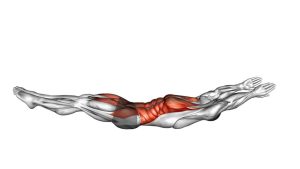
- Start in a supported V position: Lean back slightly with your hands planted and your feet lifted.
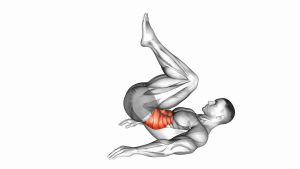
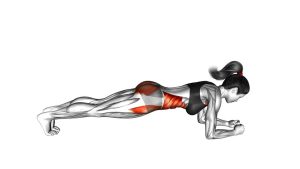
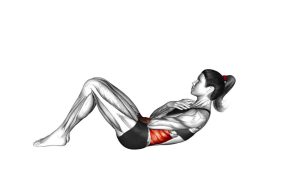
- Tuck the knees in: Bend your knees and pull them toward your chest while gently bringing the torso forward.
- Squeeze the abs: Pause briefly at the top and feel the abdominal compression.
- Extend into the V-tuck: Push the legs forward and slightly upward while leaning the torso back again.
- Keep tension: Do not let the heels crash to the floor. Keep the movement controlled.
- Repeat smoothly: Move from tuck to extension with a steady tempo and consistent breathing.
Pro Tips & Common Mistakes
- Keep your feet elevated: Touching down between reps removes tension from the abs.
- Do not overuse your arms: Your hands should stabilize, not push your entire body through the rep.
- Avoid rounding too much: A small amount of spinal flexion is normal, but do not collapse your chest.
- Control the extension: The leg-straightening phase is where most people lose form.
- Breathe with the movement: Exhale as you tuck in, inhale as you extend out.
- Keep the neck neutral: Do not crane the head forward to chase the knees.
- Use a smaller range when needed: Bent-knee extensions are better than sloppy straight-leg reps.
FAQ
What muscles does the Elevated Knee Tuck to V-Tuck work?
It mainly works the rectus abdominis, especially the lower-ab region, while also training the hip flexors, obliques, and deep core stabilizers.
Is the Elevated Knee Tuck to V-Tuck good for lower abs?
Yes. It is a strong lower-ab focused movement because the legs stay lifted while the pelvis and trunk control the tuck and extension pattern.
Should my feet touch the floor between reps?
Ideally, no. Keeping the feet elevated maintains constant abdominal tension. Beginners can lightly tap the floor if needed, but the goal is to remove that support over time.
Why do I feel this exercise in my hip flexors?
Some hip-flexor work is normal because the legs are lifted and extended. If the hip flexors dominate, bend your knees more, slow down, and focus on pulling the ribs and pelvis together during the tuck.
How can I make this exercise easier?
Keep your knees bent, reduce the leg-extension distance, place the hands more firmly behind you, or perform fewer reps with slower control.
How can I make this exercise harder?
Extend the legs straighter, keep the feet higher, slow the eccentric phase, pause in the V position, or hold a light medicine ball between the feet if your form stays clean.
Recommended Equipment
- Exercise Mat — provides comfort and grip for seated core exercises
- Ab Workout Mat — useful for protecting the lower back and hips during floor-based ab work
- Core Sliders — helpful for progressing into sliding knee tucks and other core variations
- Medicine Ball — optional tool for advanced core compression and weighted ab drills
- Adjustable Workout Bench — can be used for elevated seated tuck variations and controlled core training
Choose equipment that helps you keep better control, not equipment that forces a harder variation before your form is ready.